Choosing an email marketing tool can be a tough job. You want a tool that’s easy to use, doesn’t cost a ton of money and ‘just works’. That’s why I wanted to share my ConvertKit review with you here — is this the email marketing tool that you’ll love and use?
After all, starting email marketing itself can be a tough job – and as a solo entrepreneur, you want an email marketing tool that will make your life easier – not harder.
In this article, I’m going to take you through one of the best email marketing services I know.
It’s called ConvertKit – and in my opinion, it’s the best tool you can use to do email marketing – especially if you run your online business by yourself (or with a small team).
Let’s get started.
ConvertKit Overview: The Best Email Marketing Tool For Solo Marketers & Small Teams
You probably have a website. And you want the people visiting it to become your customers (and more importantly, raving fans).
Convertkit is the software that makes it easy for you to do this.
You see, with email marketing, you’re looking to create a proper revenue-generating system that works with minimal supervision on your part. You want it to work when you’re awake, asleep, in the toilet, or on a holiday.
For that, your email marketing system needs to do three things:
- Collect emails of visitors interested in hearing what you have to say.
- Send a series of email messages based on specific ‘triggers’ or ‘actions’ to the relevant audiences.
- Segments each subscriber based on the way they interact with your email campaigns.
And most importantly, you want all this to happen automatically. ConvertKit, in all its awesomeness, makes it insanely easy for you to set up a system like that.
In the next section, let’s walk through each of the five features of ConvertKit we’ve listed above…
ConvertKit Features Breakdown And Review
In no time, you’ll see how easy it is to create your first email marketing campaign with ConvertKit.
With it, you can:
- Create forms for both your website and individual landing pages where your visitors can submit their email addresses
- Set up a sequence of email messages that go to your subscribers exactly when you want them to.
- Intelligently categorize each of your subscribers based on the actions they take so you can easily send the right messages to the right audience.
- See all your automated email campaigns and the activity of your subscribers in each campaign in a visual way.
- Get detailed reports on how your email marketing campaigns are performing.
Plus, getting hang of ConvertKit and all its features is easy.
That’s because it’s well-designed, which means first-time users like yourself will be able to understand how to use it without much effort.
Forms:
Before you can start your email marketing campaign, you’ll need to collect emails of your visitors. For that, you’ll want to create ‘opt-in’ forms, where people can submit their emails.
Create a Form or Landing Page
ConvertKit offers you two options to create email opt-in forms:
a) You can create a form and put in on your website or embed it on your landing page.
OR
b) You can create a landing page and host it in ConvertKit or on your own domain with WordPress.
Here’s what the actual menu looks like:
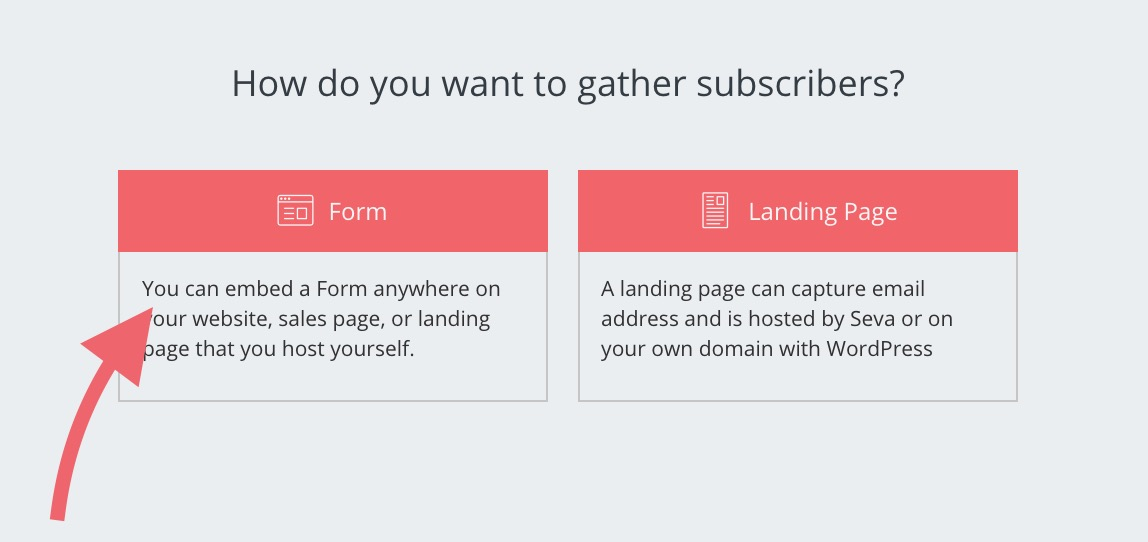
If you don’t have a website, the second option of creating a landing page can be especially useful.
Style The Form
I’ll be frank with you from the start. ConvertKit doesn’t offer a lot of customization when it comes to forms.
There are three main types of forms you can create: A full form complete with an image, a minimal form without an image and a stripped down, clean form with just the bare essentials.
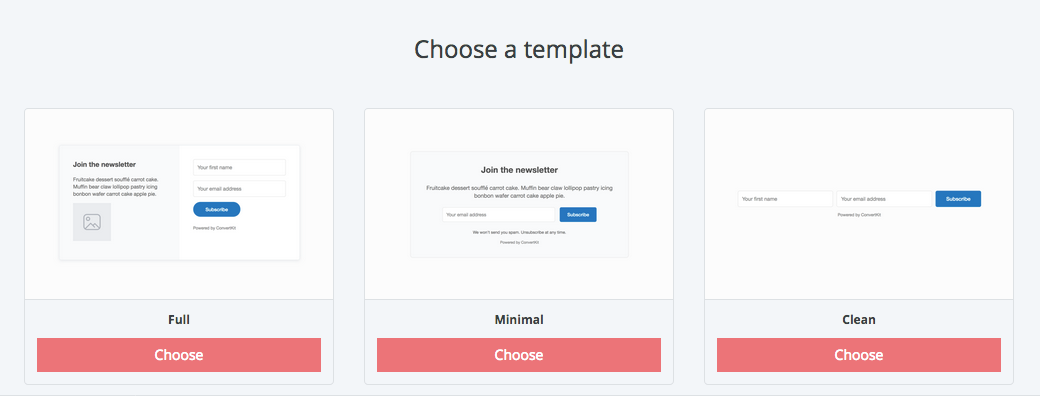
After you select the template, you can customize the form by changing the color of its elements i.e. text, button and background. In addition, you can customize the text anywhere on the form and add whatever description and pictures you want.
One cool thing about ConvertKit is it lets you see a ‘live preview’ of your form, with which you can quickly check out what your form will look like and how it’ll work once it’s live.
Plus, you can also change the form’s design by entering custom CSS code, either by yourself or by hiring a professional web designer.
Style The Landing Page
Landing pages are another story.
ConvertKit offers much more different-looking templates for landing pages than it does for forms.
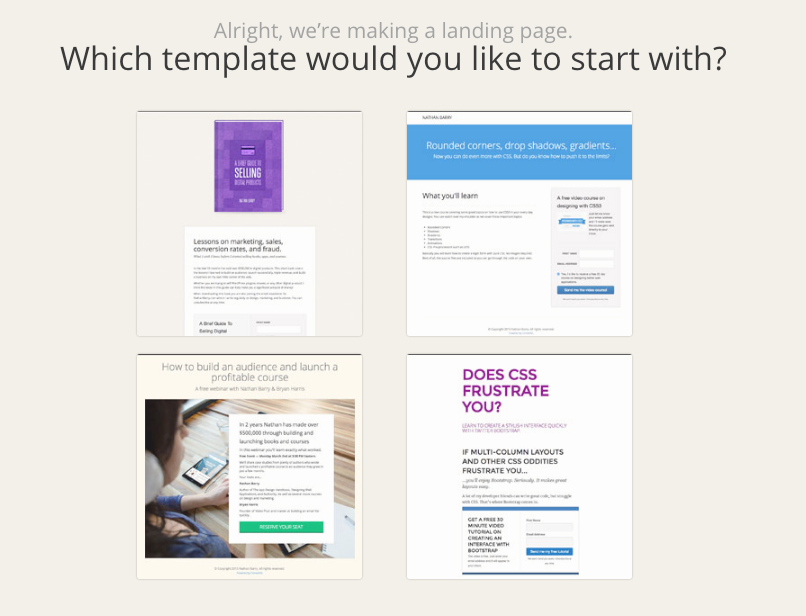
The rest of the process is similar.
You can customize your landing page with different colors, typography, images and text – and if you want, add custom CSS code as well.
Configure How And When A Form Appears
It’s not just enough for change the appearance of your forms. You also need to make sure it appears at the right moment as well.
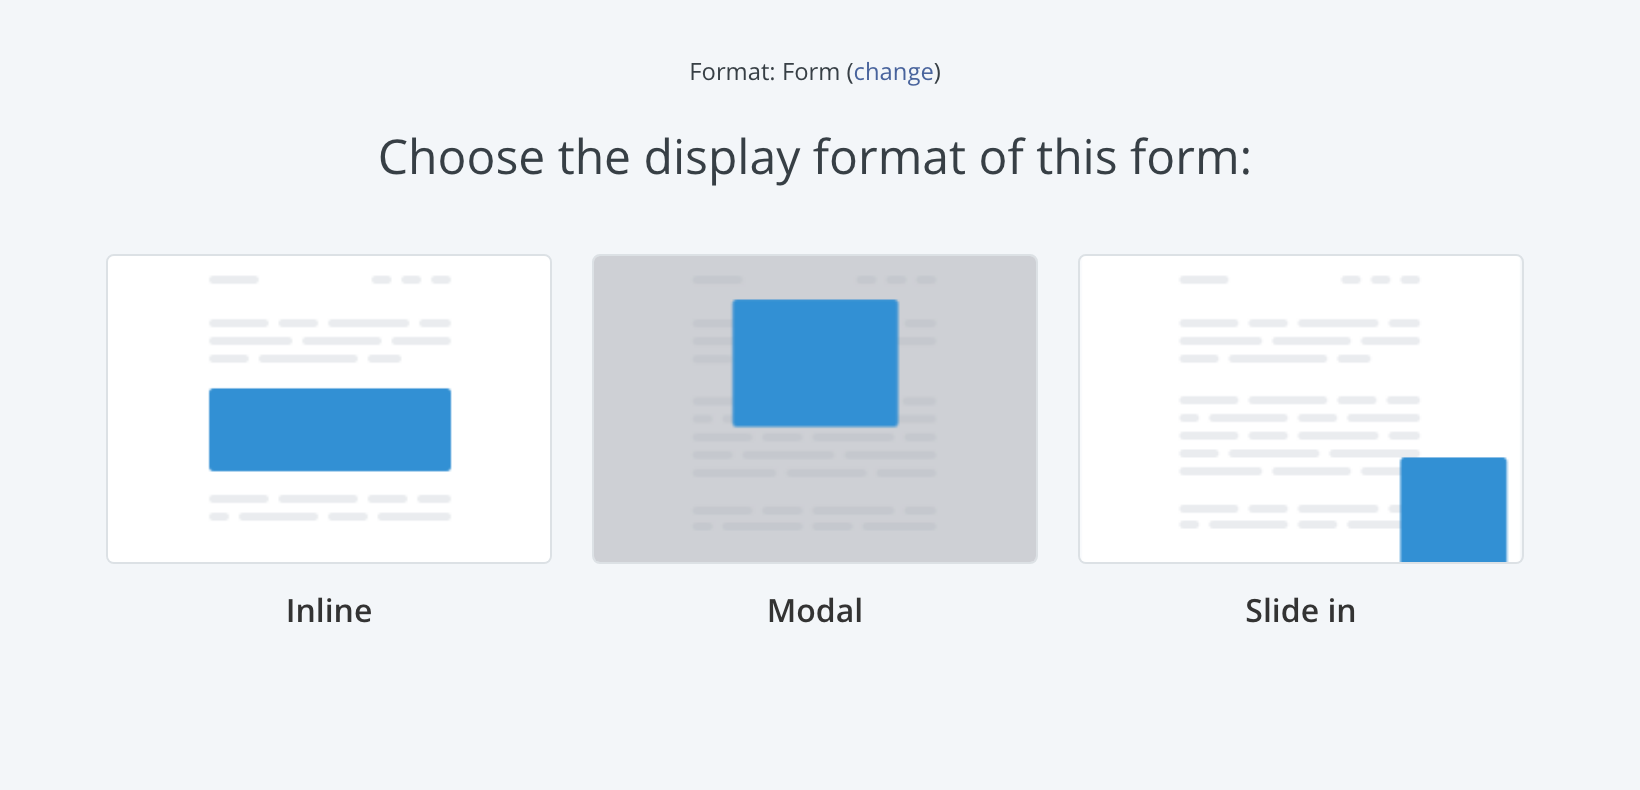
For that, ConvertKit lets you create three types of forms:
- Modal Forms: These forms take over the whole page and can be closed by the user. You can trigger this form based on time, scroll-percentage or exit-intent. Or you can trigger it after a visitors clicks on a button or link on your website.
- In-line Forms: These forms appear in-between your content, in the sidebar or footer. You can’t customize when and how they appear. Once you add them to a location on your website, they’ll always appear there.
- Slide-in Forms: These forms pop-up from the bottom-left or bottom-right corner of your website. You can set them to trigger after a fixed time or scroll-percentage.
Other Cool Settings in Forms:
In ConvertKit, once you create a form or landing page, style it and set its triggers, you can can then set up what you want to happen after a person subscribes to your form.
Some cool things you can do are:
- Take them to a thank-you page or any other webpage you want.
- Send them a downloadable item (like a video, .zip file or PDF)
- Tag and segment them in a list of your choice for further action.
… and more.
Subscribers:
In ConvertKit, all your subscribers are stored under one list. This list will show you their emails, when they subscribed and what’s their ‘status’.
Status shows you what’s the current state of your subscribers i.e. confirmed, unconfirmed, complained, canceled, cold and bounced. Your confirmed subscribers are the ones you need to pay attention to as they are getting your emails and interacting with them.
ConvertKit gives you two ways to organize the subscribers in your list:
- Tags: When you get subscribers, you’ll want to identify them based on their interests and activity to make sure you send the right messages to the right people. Tags let you do that. You can add tags to a subscriber when they click a link or dont, or when they make a purchase (or don’t). Each subscriber can have multiple tags.
- Segments: Suppose you’ve tagged your subscribers by products they’ve purchased, the links they’ve clicked and forms they’ve submitted their emails to. Since each subscribers will have done multiple of these things, you will have a lot of tags. To organize these tags, you can place them into segments.
For example, suppose you sell three products i.e. a wallet, a keychain and a purse. When any of your subscribers buy these things, you can tag each of them with ‘customer_wallet’, ‘customer_keychain’ and ‘customer_purse’ depending on what they’ve purchased.
Then suppose you want to know how many customers you have in your list of subscribers. You can then store all three ‘customer_’ tags in a segment called ‘existing customers’.
And in this way, you can organize your subscriber list.
Plus, you can set up automations after which ConvertKit will automatically add a subscriber to a tag or segment after they take the action you want.
Sequences:
In your email marketing campaigns, you may want to send a series of emails to your subscribers over a period of time. In ConvertKit, that happens under a menu called ‘Sequences’.
Here, you’ll get a glimpse of all your email sequences. You’ll be able to see how many emails each sequence has and for how long it will run.
In addition, for each sequence, you’ll see important statistics like:
- No. of Subscribers
- Open Rate
- Click Rate
- Unsubscribers
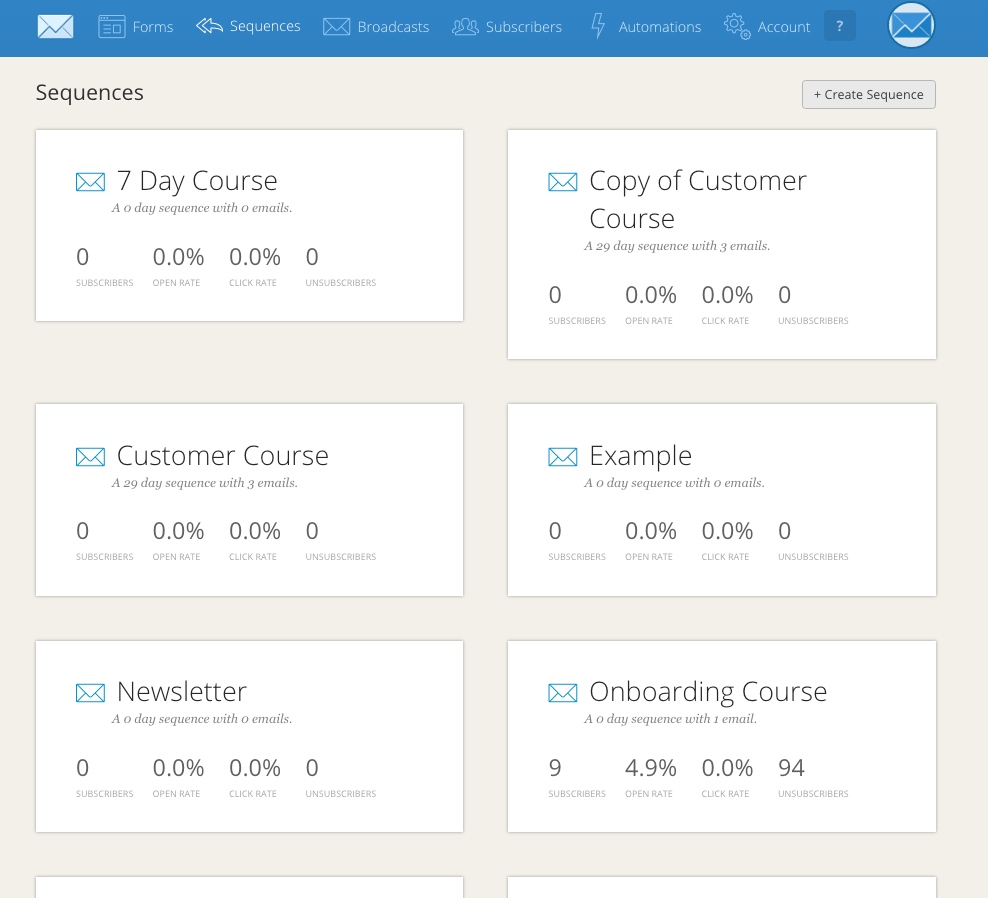
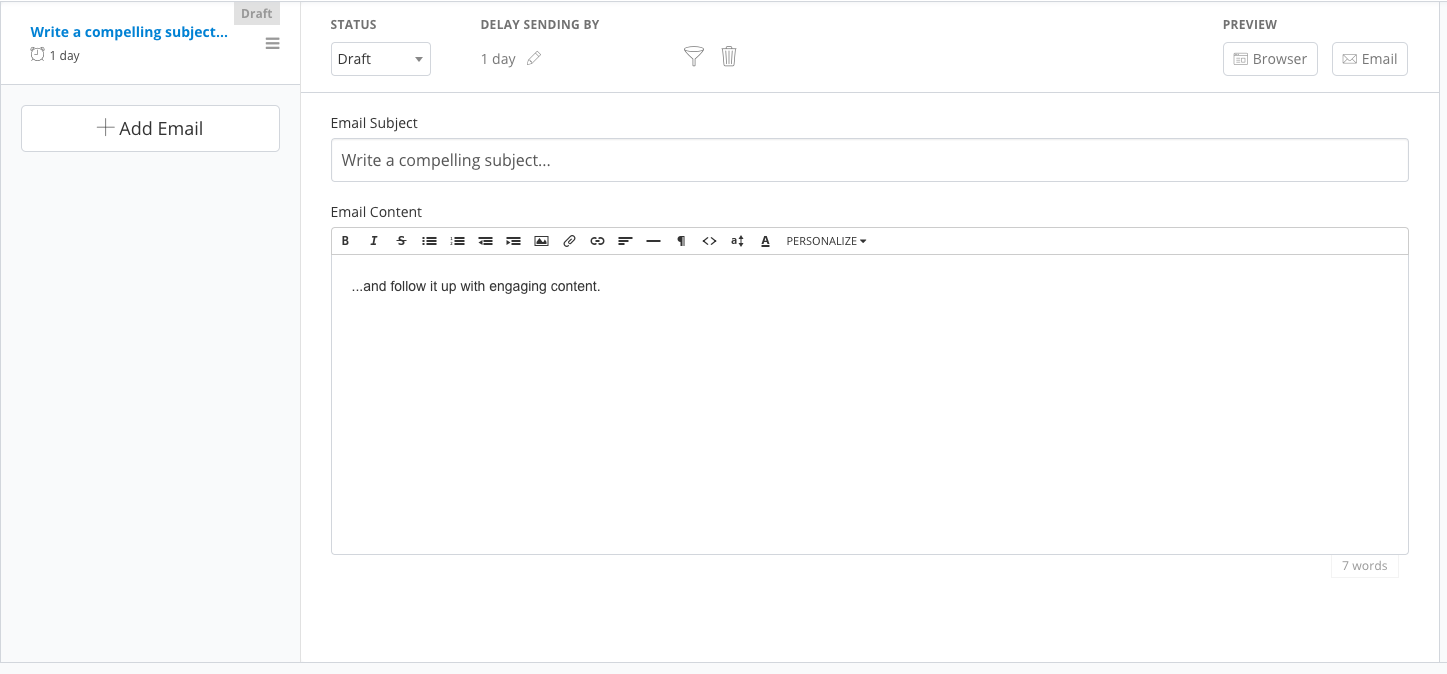
This area is where you’ll be able to create new emails to send to your subscribers.
You can add as many new emails to a sequence as you like. Once you’ve written the email, you can set it to ‘draft’ or ‘publish’. Only emails that are set to ‘publish’ will be sent to your subscribers. It’s up to you to choose which date and time you want each email in your sequence to be sent.
After you’ve set up your email sequence in ConvertKit, you’ll then have to choose which of your subscribers you want to send them to.
You can do this by selecting the tags and segments you’ve created earlier.
For example, suppose you want to send an email sequence only to people who’ve bought a course of yours. Since you’ve created a tag of those people, you can simply select that tag (or segment) and your email sequence will only be sent to subscribers within that tag.
Broadcasts:
There are times you want to send only one-time messages to your subscribers instead of a whole sequences. For that, broadcasts are a perfect option.
In broadcasts, you can quickly create a single email and send it to all of your subscribers, or to ones with a specific tag or in a specific segment.
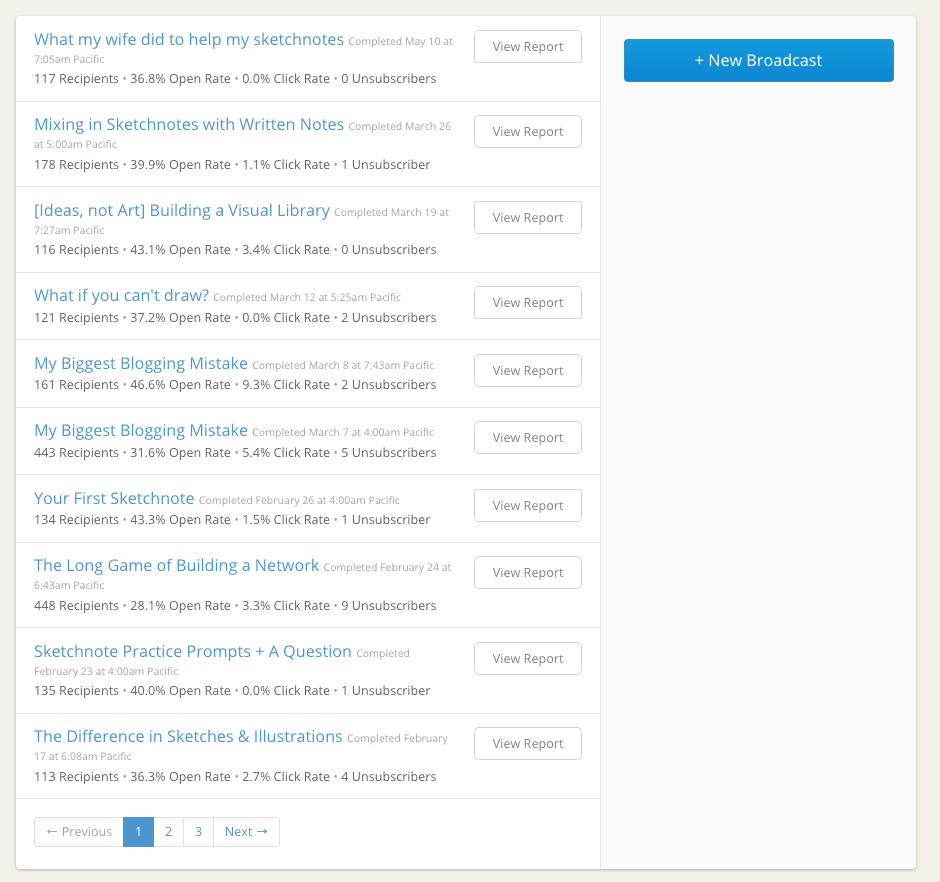
Bonus Tip: You can resend a broadcast to those subscribers who hadn’t opened your email to boost your open rates.
If you want to send blog post newsletters, special announcements or obligatory security messages to your subscribers, broadcasts is the perfect place to go.
Automations:
In the above sections, we told you how can tag your customers, put them into different segments, send them different email sequences and broadcasts.
Well, doing this manually for each and every subscriber you get is a tiresome thing.
And that’s where automations can help you.
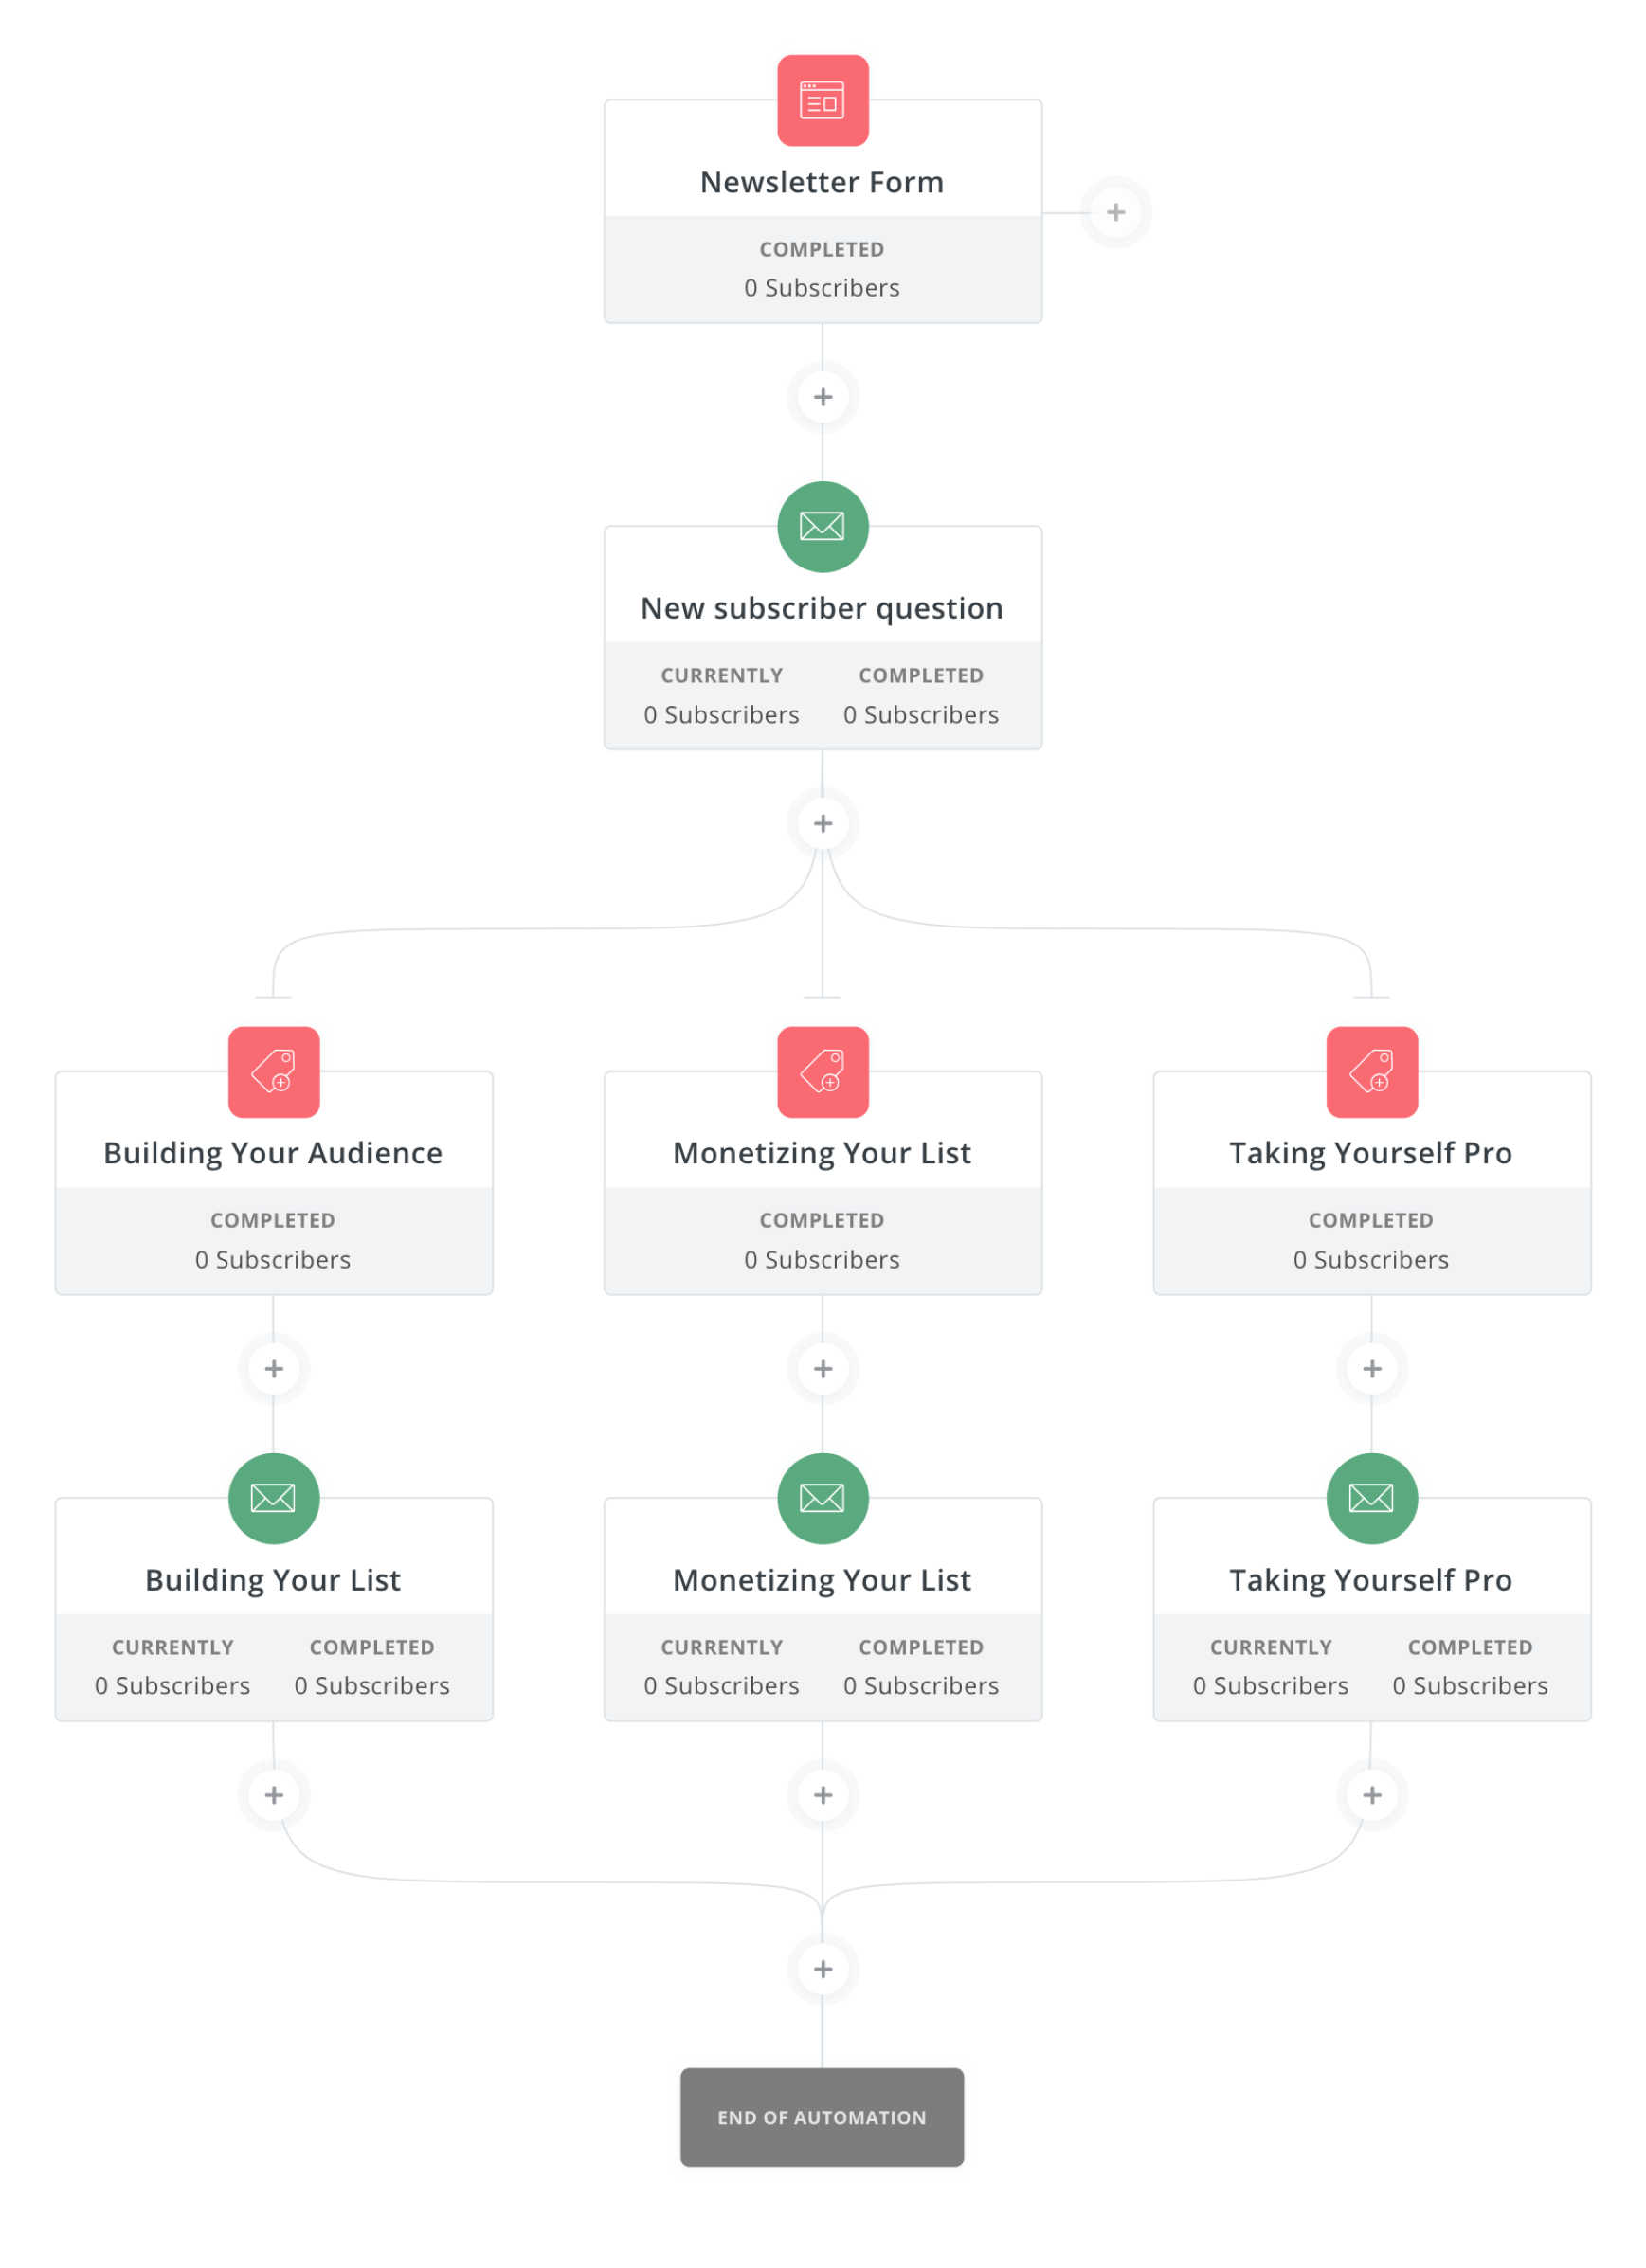
The automations section provide you with a visual map which let you see exactly the steps a subscriber has taken throughout your email marketing campaign – and a place where you can set up different automations.
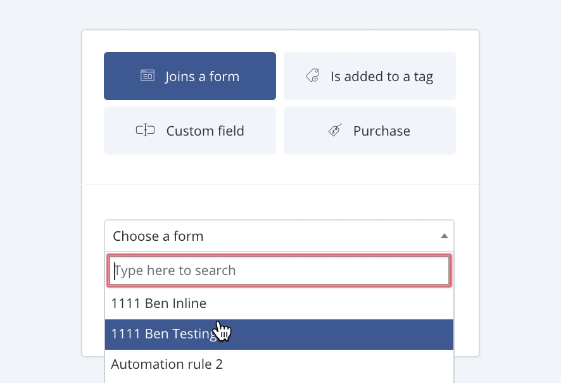
Right now, there are three types of automations you can create in ConvertKit:
- Actions: When a subscriber takes a specific action like making a purchase, clicking on a link or subscribing to a form, you can create an action-based automation. For example, adding a tag to customer who’s brought your course is an example of an action-based automation.
- Events: When something happens i.e. a customer buys something, a tag is removed etc., a event-based action will move that subscriber forward in the automation towards a new path. For example, suppose a customer buys a course they got through your email sequence. An event-based automation will pull them out of that sequence to a thank-you email sequence.
- Conditions: If you want to send an email based on whether an action or event has happened or not, you can apply conditions. For example, suppose some of the subscribers in your email sequence haven’t bought your course and you want to send the non-buyers to another email sequence. You can do that with a condition-based automation.
This makes the automations section the heart of ConvertKit. Here you can literally automate every single aspect of your email marketing campaign so you automatically get subscribers and turn them into your paying customers without lifting a finger.
Reports
Last, but not least, are the reports.
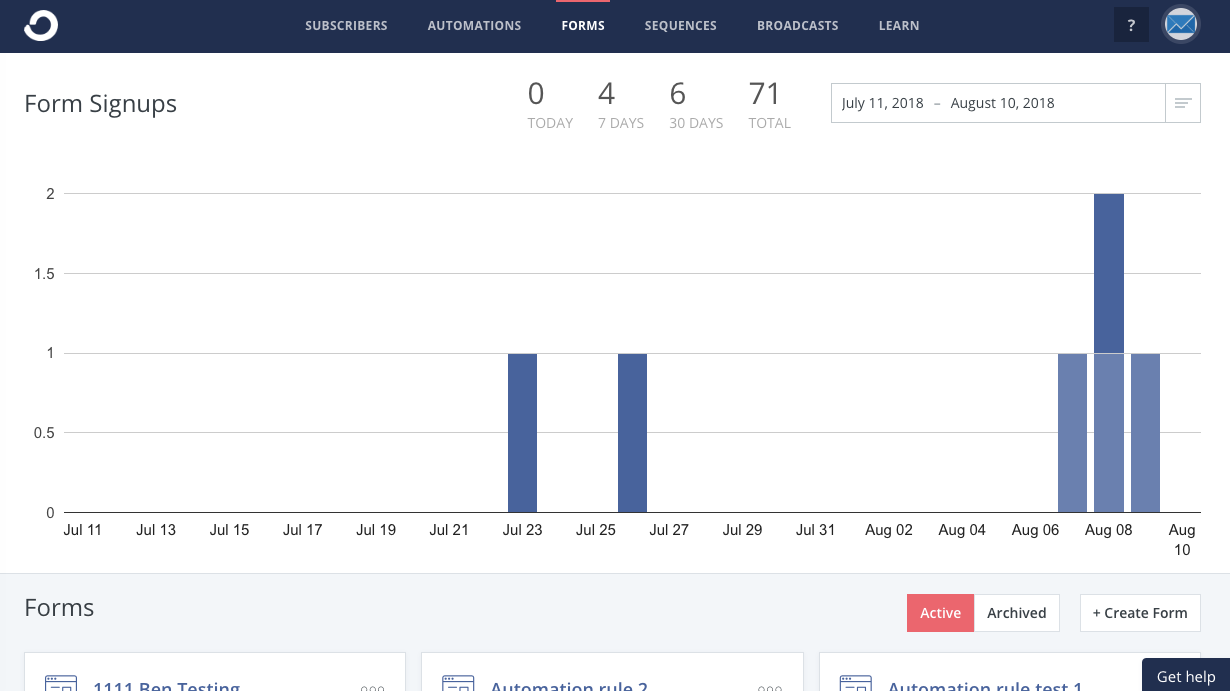
Reports let you see exactly how your email marketing efforts have performed. You can see reports of your:
- Forms and Landing Pages:
- Sequences

- Broadcasts

In addition, there is a main reporting page where you can see the exact numbers of subscribers you’ve gained throughout a specific period of time. Plus, you can filter and view which specific tags and segments got how many subscribers. And finally, you can view your number of unsubscribes as well.
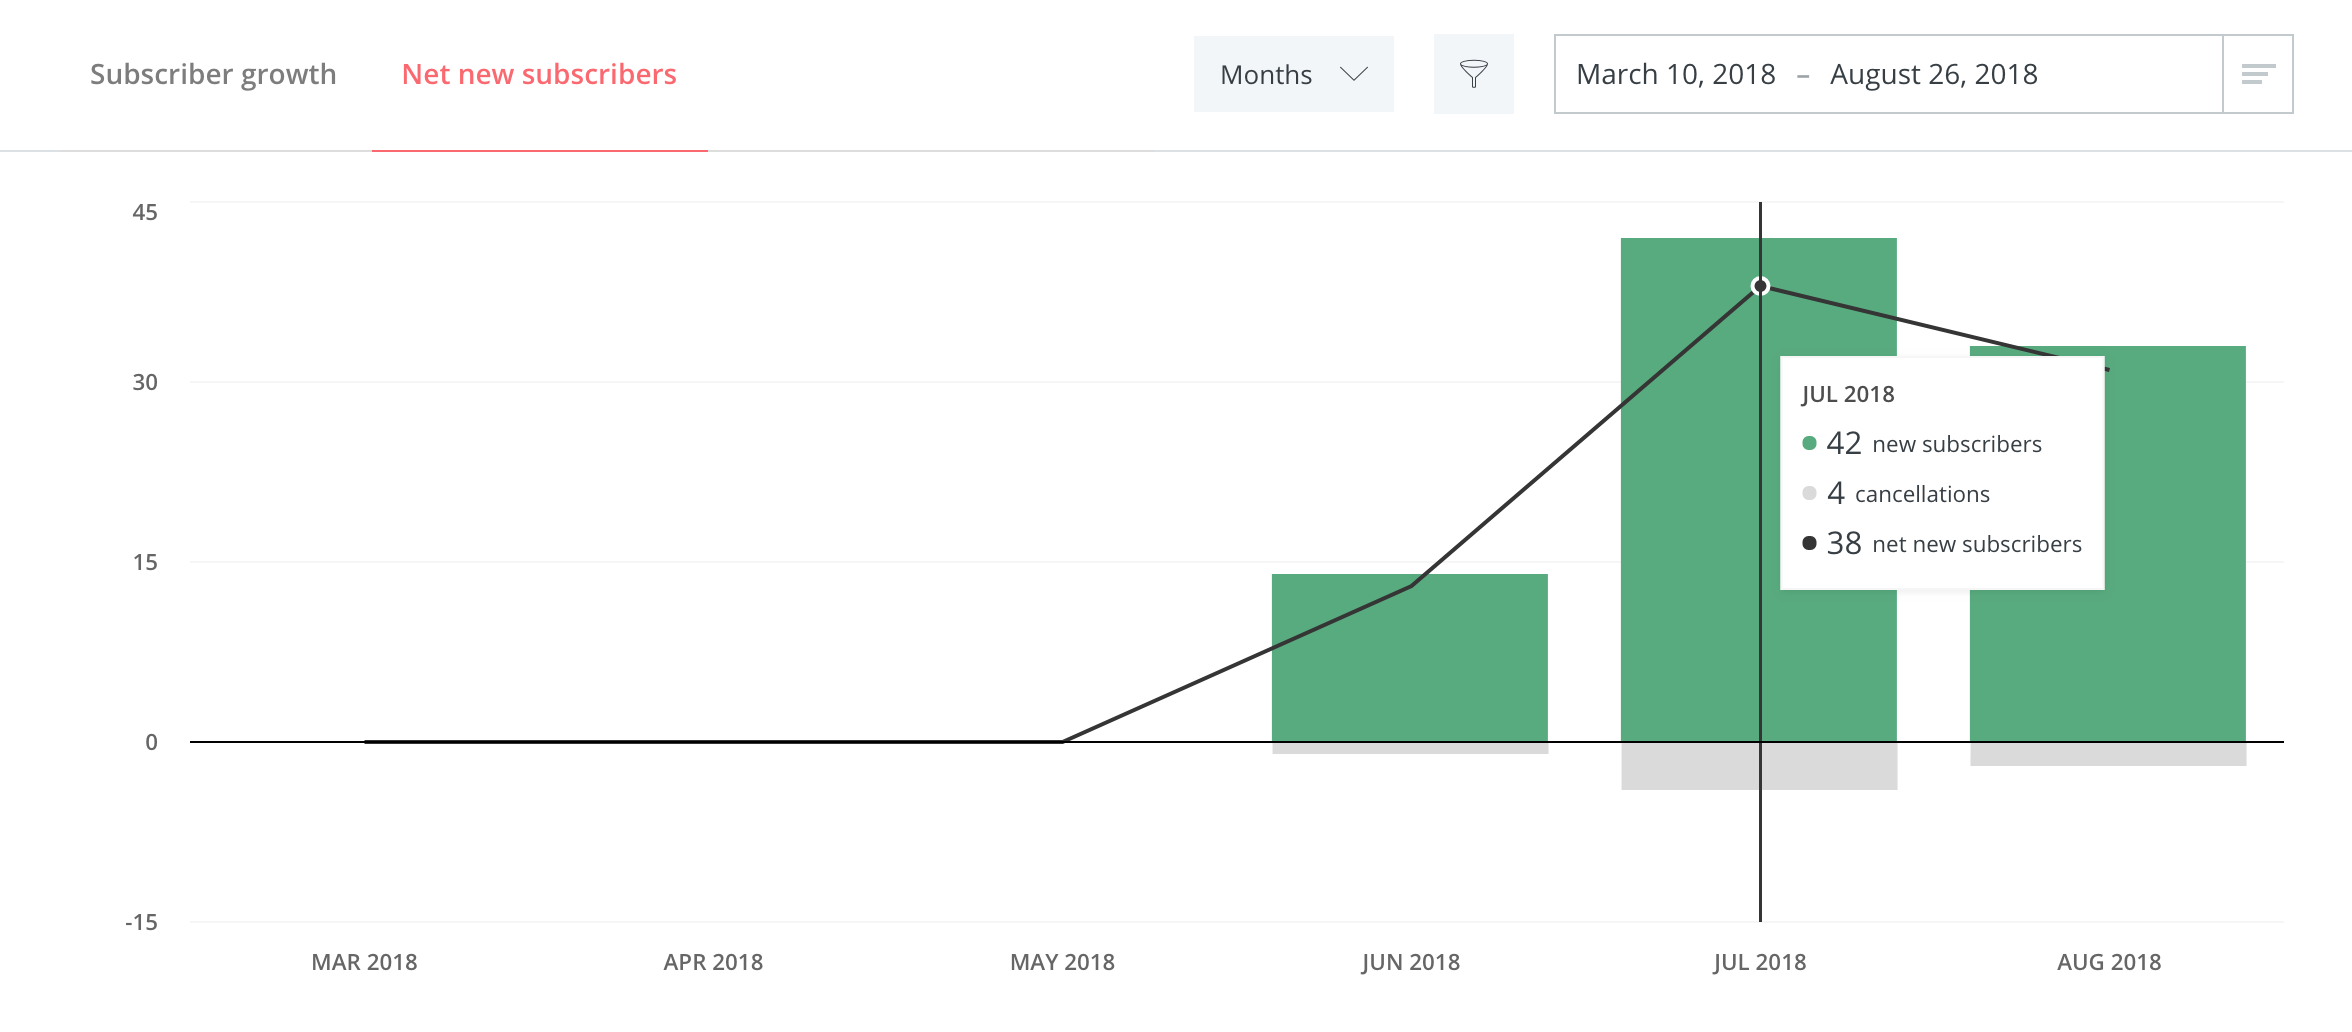
These reports, if not anything else, provide a quick visual look at how your email marketing is going. And with the power of A/B testing, this information will help you make the most sales possible with your email marketing campaigns.
ConvertKit: The Final Conclusion
If you are starting from zero, or have less than a thousand subscribers, ConvertKit costs $29 a month.
But price itself is not the lone metric with which you measure ‘value’. For that, you’ll have to put the services you get in this price in the equation as well.
Keeping this in mind, ConvertKit gives you each and every feature they have at this price i.e. $29. Plus, there’s no limit to how many emails you send or how many forms you create, which, if you look at competing email marketing software, is a pretty big deal.

That’s not to say ConvertKit isn’t without its flaws.
I personally feel they could make a lot of improvements in the way they offer templates. Right now there’s just not enough different designs to go through.
To solve this, you can integrate ConvertKit to another, better form-building service like Optinmonster or LeadPages. You can head over to https://convertkit.com/integrations/ to check out what other marketing software ConvertKit lets you integrate with.
But other than that, yes, I totally think if you’re new to email marketing, and want an easy-to-use, yet powerful email marketing tool for your online business, ConvertKit is the way to go.
You might also enjoy:


