Looking to find the best e-commerce platform for your impact business? We compare and contrast two key solutions: Shopify vs. Wordpress. Which one wins? Do you need one or the other? Should you have both? Make a more informed choice and start here.
Continue readingKajabi vs Clickfunnels: Best Sales Funnel Software? Decide Here [2021 Update]
Let’s start this review by understanding this: Clickfunnels and Kajabi are meant for different audience but that doesn’t mean you cannot make a choice here today.
The Main Differences Between Kajabi vs Clickfunnels
The main differences between Kajabi vs Clickfunnels include:
- Kajabi helps you create a content delivery system for online courses and content, whereas Clickfunnels creates sales funnel automation geared towards getting you more sales.
- Kajabi is for digital educators, whereas Clickfunnels is for anyone with a digital product or service.
- Kajabi is a specific tool for course creation, whereas Clickfunnels can work for anybody.
With Clickfunnels, its features are geared to towards helping you with one task only: creating awesome sales funnels that get you the more and more sales.
But Kajabi is meant for a different purpose altogether:
Its purpose is to help you create a proper content delivery system with which you can earn revenue through your courses and content.
In this review, we’ll do a feature comparison of both Kajabi and Clickfunnels to see how they stack up. This will help you understand which sales funnel tool is better suited for your business. We’ll compare each tool’s core offerings, their CRM, and email marketing tools.
As we dive deep into this comparison, you’ll see that both these tools offer similar features, yet are meant for very different audiences.
But which tool is perfect for you? Read on to find out!
Clickfunnels: The Beginner’s Software For Building Sales Funnels That Actually Sell
To sell anything online, you need a sales funnel.
But building a sales funnel is no easy task. It consists of many pages like a landing page, an opt-in page, a thank you page, an upsell page and on and on and on.
To make all this yourself would require a massive budget and lots of time.
Unless you use Clickfunnels.
Clickfunnels Features
Here is a summary of the features Clickfunnels has:
Build any kind of funnel with just one click: Clickfunnels has a variety prebuilt, scientifically-proven-to-convert-funnels for hosting webinars, selling products and collecting emails

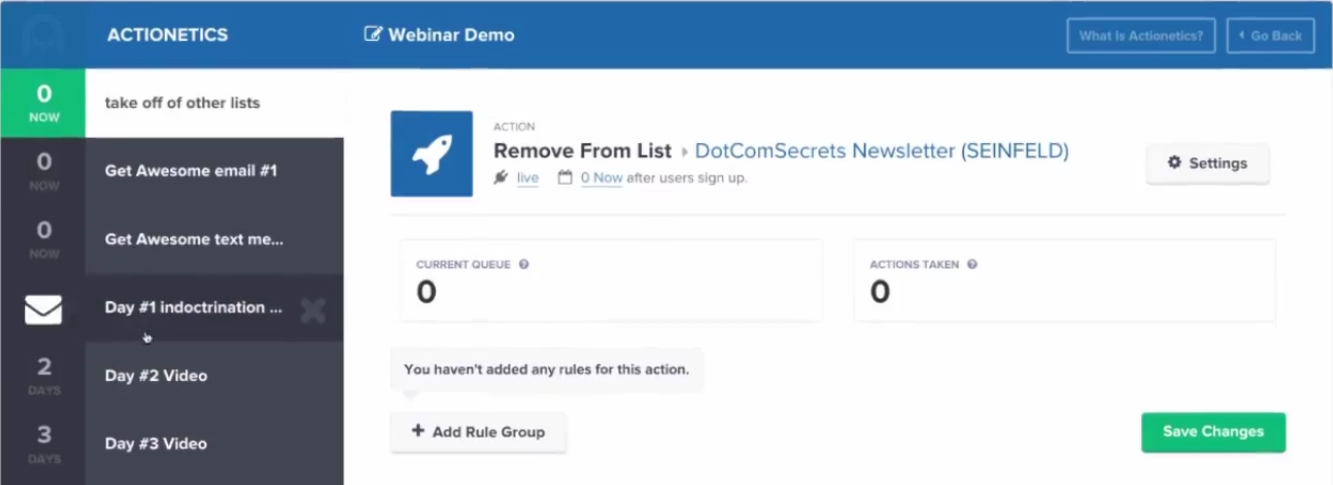
Automate your funnel with robust automation tools: Collect your leads, segment them in different groups and send them automated marketing emails and text messages.
Set up a Clickfunnels affiliate program: You can get other people to sell your products for you by paying them a small commission for each product sold.
Kajabi: The Educator’s Software That Helps You Sell Courses And Memberships Fast
If you are an expert on any topic – and can wow people with amazing and high-quality content, Kajabi is for you.
In Kajabi, you can easily create sales and marketing funnels where you can sell your courses to a hungry audience that wants to learn from you.
And that’s not all.
If you don’t want to sell courses – and want to create content such videos and blog posts at your own pace without bundling it up, you can also create membership sites and ask your audience to pay a recurring fee every month to access your content.
It’s important to note that while Kajabi is excellent for selling educational content, it’s limited to just that. If you plan to sell a wider variety of products, Clickfunnels is better suited for you.
Kajabi Features
Here’s a list of features Kajabi has:
Feature Rich Online Course & Membership Site Builder: Kajabi has a robust course building system with which you can set up the video course or articles and earn revenue from it, either by selling it for a fixed price or a monthly subscription.
One Click Funnel Creation With Pipelines: Pipelines is Kajabi’s version of Clickfunnels. There are pre-built versions of sales funnels and digital marketing campaigns you can use to sell your digital product. However, Kajabi’s sales funnels aren’t as powerful as Clickfunnels are. But they include prewritten emails while Clickfunnels funnels don’t.
Built-in CRM: Kajabi’s CRM lets see information about your customers, but not in as detail as Clickfunnels CRM does. You can see who subscribed to your courses or membership sites. In addition, you can segment leads and customers, send them marketing emails and automate your sales process.
Clickfunnels vs Kajabi: Feature Comparison
As you can see, both Kajabi and Clickfunnels have extremely similar features.
They offer website builders, pre-built sales funnels, CRM systems and email marketing automation tools – making them both an all-in-one sales funnel tool.
But this doesn’t mean you can just ‘eenie meenie miney mo’ your way to choosing one.
Both sale funnel building software still has their own strengths and weakness.
So now, we’ll go head-to-head and compare the following main features of both Kajabi and Clickfunnels and see how they stack up:
Let’s start with exploring both tools core offerings, including the website builder, which is the arguably the most important part of both these sales funnel software.
ClickFunnels Core Offering: Funnel Builder
Clickfunnels main purpose is to make it easy for you to build the best sales funnel for your business that gets you the highest sales possible. That’s why it gives you these features…
1. Ready-To-Use Funnels and Templates
Clickfunnels offers a huge number of prebuilt sales funnels.
You get funnels for collecting emails, selling products, hosting webinars, running memberships sites and more. Plus, Clickfunnels also gives you templates for landing pages, opt-in pages, thank you pages and more.
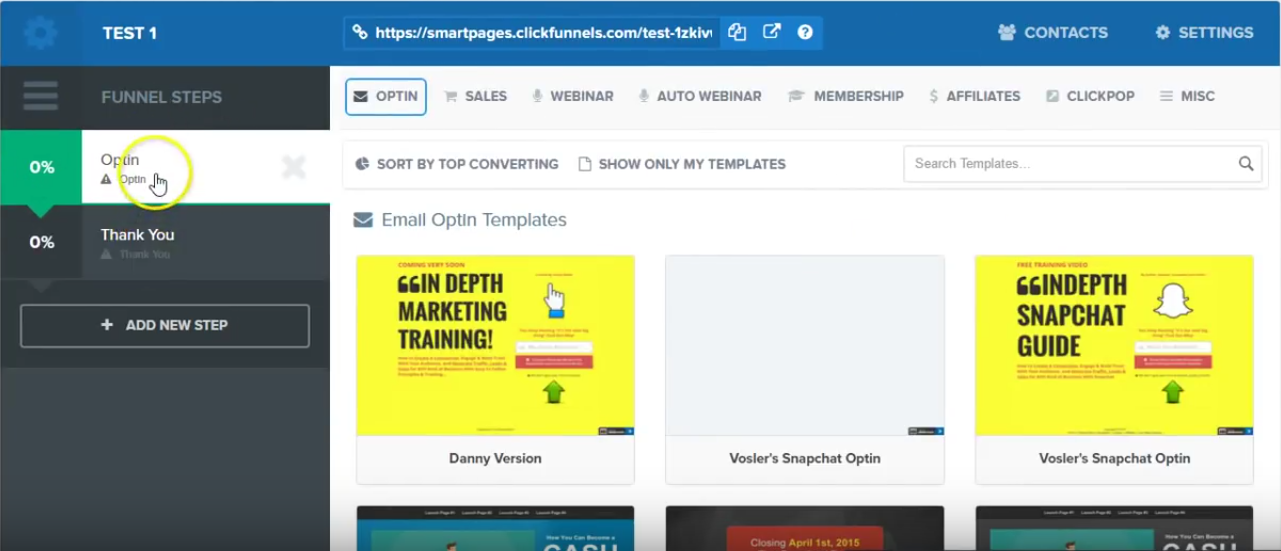
You can customize each funnel by adding new pages from the templates section or removing existing ones.
All you really have to do is edit the content within them with your own text, video, images, and offering.
2. The Page Editor
If you want, you don’t have to choose a preexisting funnel or work on a page based on a template. You can start with a blank page to create your sales funnel from scratch.
All editing is done inside the page editor, where you can add everything from text, pictures, videos, checkout forms, opt-in forms and anything else that a website has.
You can change fonts, divide the page into columns, add youtube videos as your page background and more.
Once you’ve built your pages – and your whole funnel, you connect it to your domain, WordPress blog, facebook ad or anywhere else you want and put your funnel into action
Kajabi Core Offering: Course and Membership Site Builder
Kajabi is target towards educators, and hence, it’s the biggest purpose is to help you gain revenue by selling educational content and courses.
Course Builder
Kajabi offers a robust course builder you can use to create a video course series or a membership site.
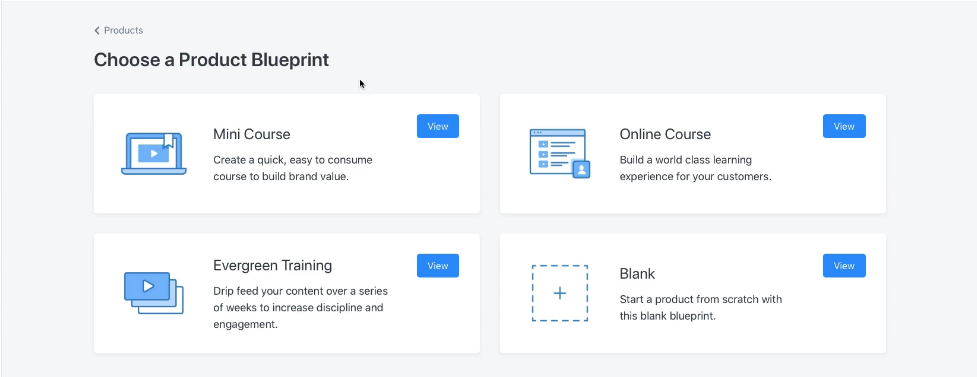
When you get started, Kajabi offers you three ‘blueprints’ to build a course curriculum:
1. Mini Course Builder
2. Online Course
3. Online Training
Or you can build a curriculum from scratch.
But let’s say you choose the online course blueprint. Here’s what you’ll be presented with:
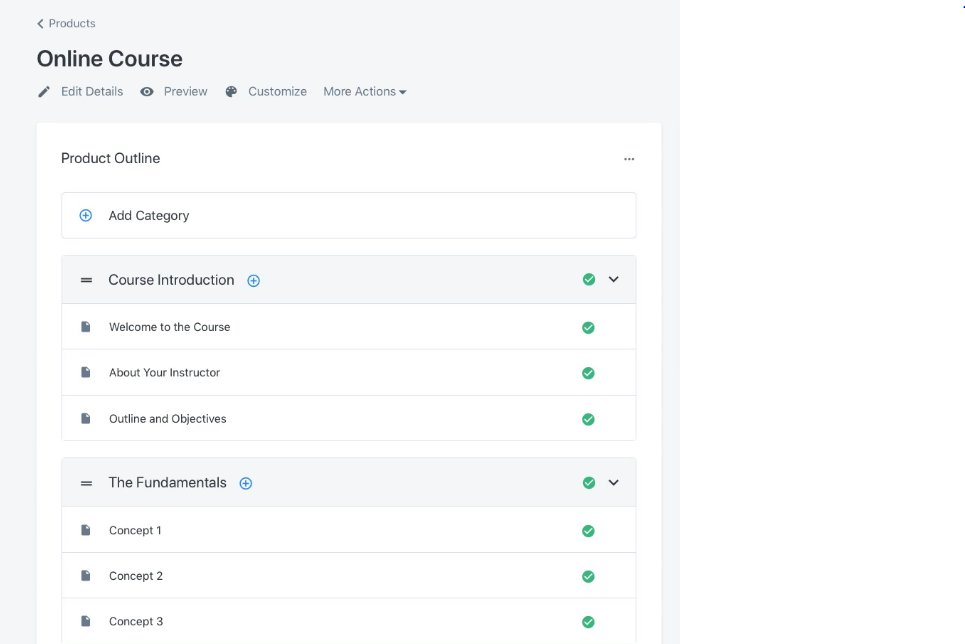
You’ll see the course has been divided into categories and sections for your convenience. You just have to edit them to match the topics of your course.
Once done, you can then set the price of your course – which can either have fixed price that they can pay in full or as monthly payments. Or you can add a subscription model that gives them access to the course as long as they pay a recurring membership fee.
The Website Builder
Then you move on to the website builder and build the website by choosing a theme or from scratch. The web builder, just like Clickfunnels, is robust. You’ll be able to add anything from images, videos, to opt-in forms.
One cool feature about Kajabi’s web builder is that you can add prebuilt ‘sections’ to your websites like pricing, sales pages, opt-in form bars, testimonials and more. In addition, you can also add social cards, comment sections, countdown timers, video, text and other elements as well.
Actionetics: Clickfunnels’ Email Marketing Solution
Email marketing is what comes after you’ve captured leads from your sales funnel. It allows you to keep in touch with your audience and keep giving them valuable information and updates to any new products and services you launch.
To do that, Clickfunnels has a robust e-mail marketing tool called actionetics.
Is basically allows you to store information about your leads, segment them based on how they interact with your funnel and send them emails and text messages with valuable information, offers and more.
Here are the top features of Clickfunnels Actionetics:
Contact Profiles: This is basically the CRM part of actionetics. Here, you can see the contact info, social profiles and other information about your leads. In addition, you can see when they’ve interacted with your funnel and what they’ve purchased.
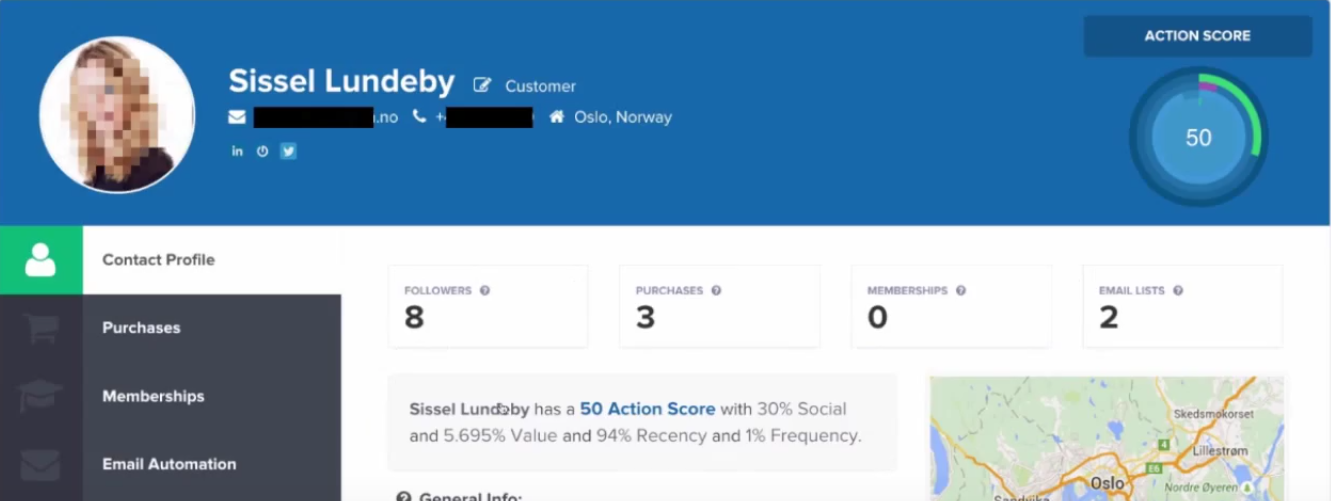
Email Lists: This is where you can segment your leads in different leads. You can categorize people based on what products they bought (or didn’t bought), which funnels are they interacting with, where they are located and more.
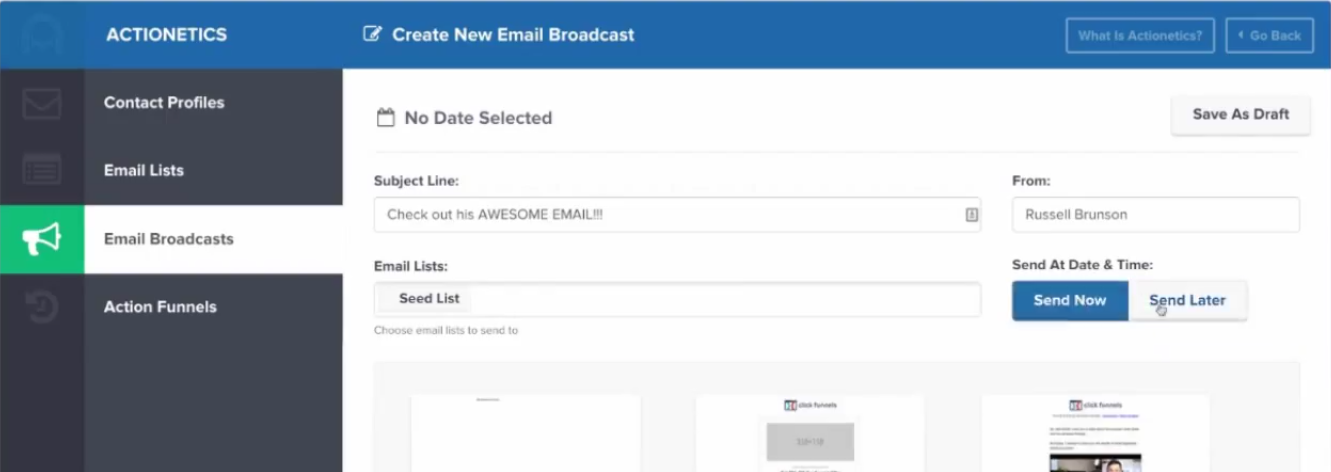
Email Broadcasts: In here, you can create new emails based on templates or from scratch, add text, images, videos and more. After you’ve ‘built’ your email, you can schedule it to be sent out at a specific time to whatever list you want. Or you can save it for later use.
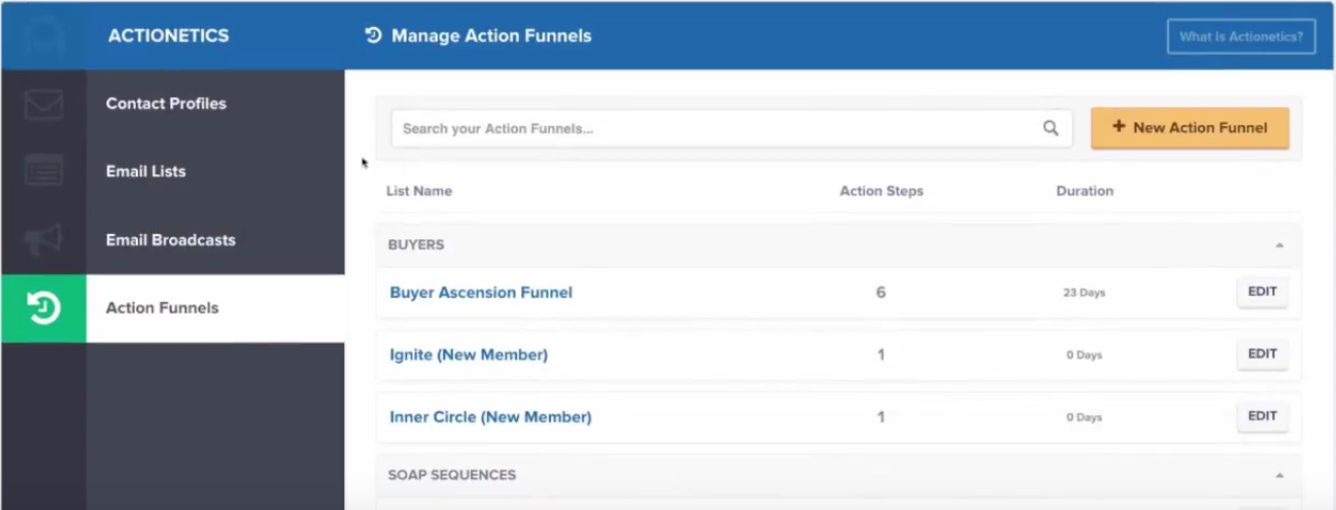
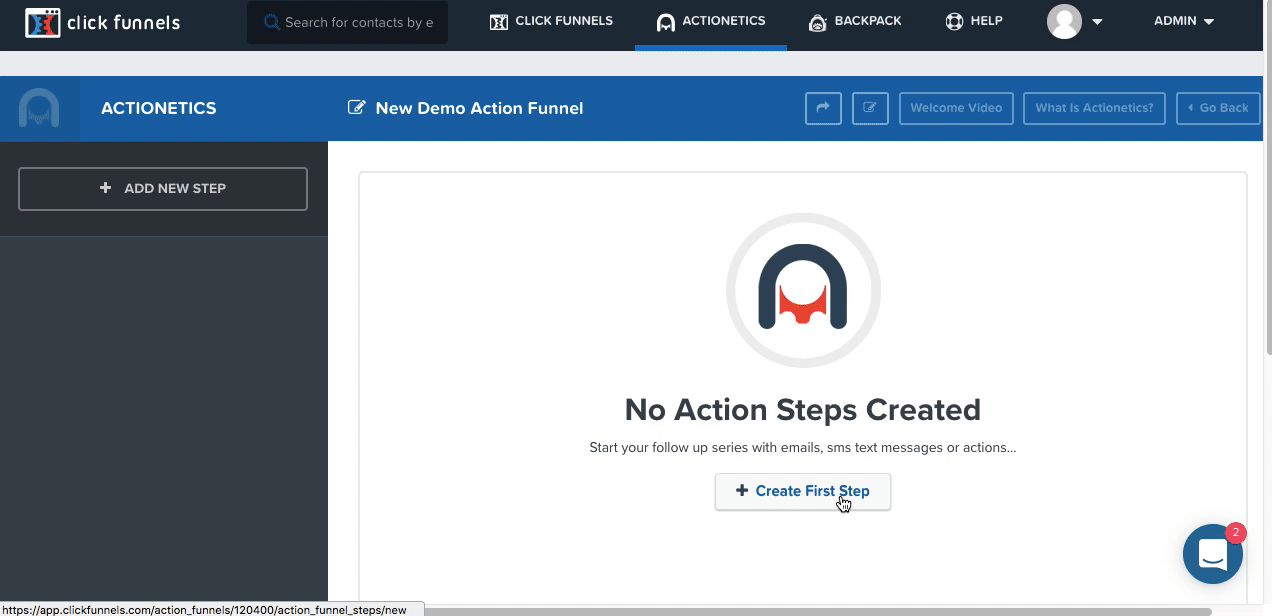
Action Funnels: This is the best part of actionetics. Here, you can create action steps for your leads to guide them into different funnels. For example, you can automatically set up actions to send them a series of emails when they join a list, make a purchase etc. Then you can add additional steps to send different offers to members of that list. Basically, if you want to automate your e-mail marketing campaign, this is where you’re going to do it.
Pipelines: Kajabi’s Email Marketing Solution
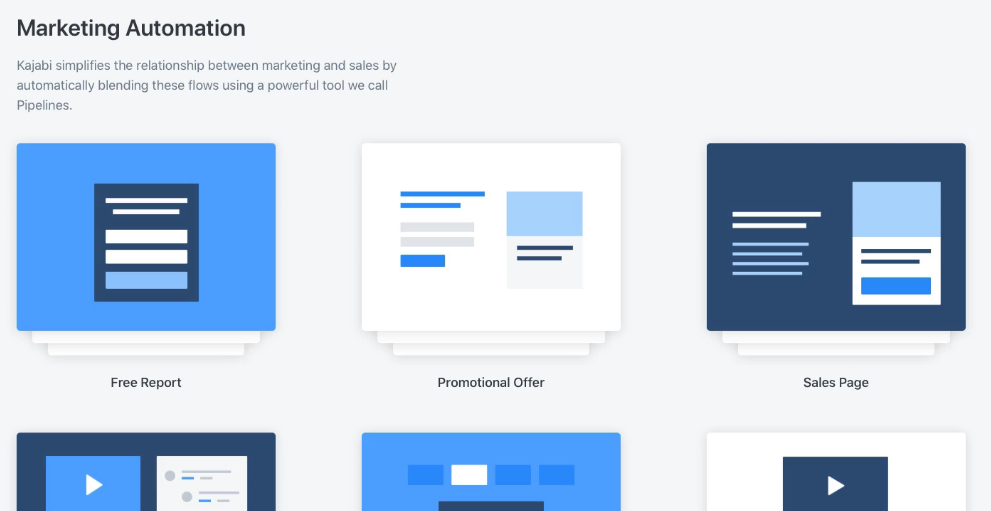
Kajabi offers a similarly feature-rich email marketing service called Pipelines. This is where you can create a fully automated sales funnel that will convert your visitors into leads.
To start, you’ll choose any of the prebuilt ‘pipelines’ which include funnels for promotional offers, reports, sales pages and more. Or as always, you can create your own funnel and emails from scratch.
But to show you how the pipelines work, let’s take the promotional offer pipeline as an example.
The first thing you will see is that you have to do two things:
1. Upload the free offer: This is the document (or any file) your users will get in sales page in exchange for their email.
2. Your product: This is the course or content your customers will buy at the checkout page.
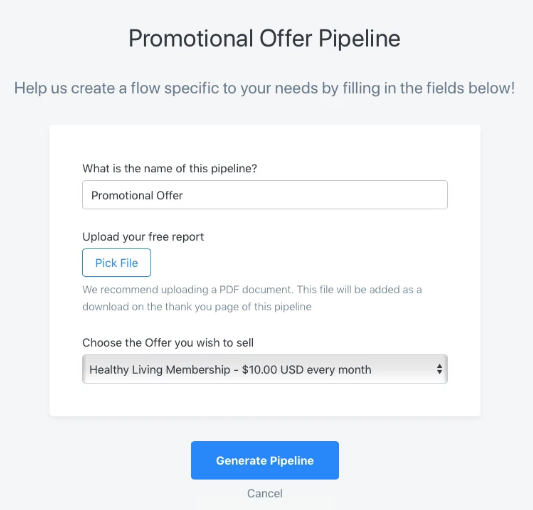
After you add this info, you’ll see the whole funnel has been created instantly.
- The pipeline will start with the ‘promotional offer’ page where visitors can enter their email in exchange for a free educational document.
- Next, they’ll receive two emails which will lead to your sales page.
- Finally, if your leads click your CTA, they’ll be directed to the checkout page where they can buy your product.
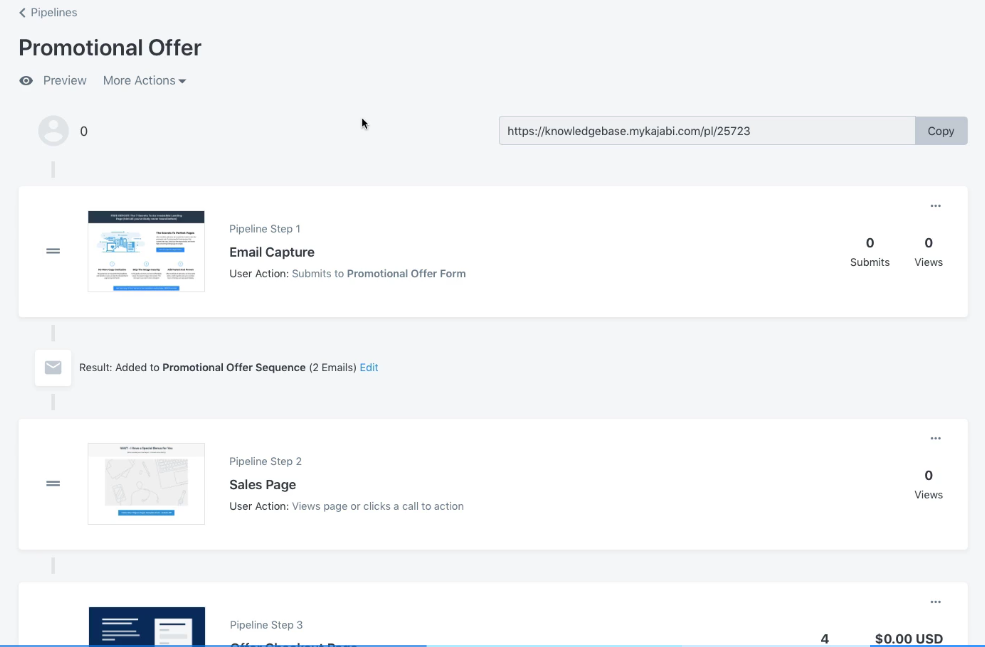
All you have to do is edit the text within the funnels with your own copy, images and videos. Of course, you can add or remove pages and emails in your pipeline and customize it according to your needs.
And in just a few hours, instead of days or weeks, you’ll have a funnel you can put in action on your website.
Pricing: The Final Deciding Factor
Clickfunnels pricing starts at $97 per month. Kajabi pricing starts at $129 per month.
In the starting plan, both limit their offerings but are still reasonable.
Clickfunnels limits are:
- 20 Funnels
- 100 Pages
- 20k Visitors a Month
Kajabi’s limits are:
- 5 Products
- 1,000 Active Members
- 1 Site
- 25 Pipelines
- 25,000 Marketing Emails /mo
It’s worth noting that Kajabi offers all of its top features in the starting plan.
Clickfunnels does not provide the actionetics feature which includes its email marketing and funnel automation service in the basic plan.
However, if you’re going to be using these products long-term and aren’t strictly going to sell e-courses, Clickfunnels is a better choice.
Because as your online business grows, the basics plan’s limits won’t cut it and you’ll have to upgrade to a bigger plan.
Unlimited Plans Compared:
The top tier unlimited plan of Clickfunnels costs $297 per month. The top tier unlimited plan of Kajabi costs $899 per month.
But it’s worth noting that with Kajabi, you also get a mid-tier plan as well which costs $389 per month but comes with its own limitations:
- 100 Products
- 10,000 Active Members
- 3 Sites
- 100 Pipelines
- 75,000 Marketing Emails /mo
Meanwhile, Clickfunnels’ top-tier plan has no limitations at all and is still less expensive than Kajabi’s top-tier plan.
Yes, Kajabi can be used as a CRM (if that’s what you’re looking for) but keep in mind it was originally used as for membership sales, digital courses but now has many other features such as landing page creation and sales funnel capabilities.
The top tier plan of Kajabi costs $899 per month, but you get a lot for your payment.
The top tier plan of Clickfunnels is $297, but there are other upsells you can invest in if you want to increase conversions.
My Final Decision
Ultimately, if you’ll be selling e-courses, you should still consider Kajabi as it offers a mid-tier plan which is not too expensive. But if you’re in the long term and will be selling all kinds of products, Clickfunnels is the ultimate choice for your entrepreneurial needs. It’s more versatile, meant for selling all kinds of things (even courses!) and much cheaper than Kajabi.
Further read:
- Clickfunnels Review: Will This Tool Help Propel Your Business?
- The Best Clickfunnels Alternatives: Better Options are Out There!
- Clickfunnels vs Shopify: Which Tool Works Best for Your Business in 2019?
- Clickfunnels vs Leadpages vs Unbounce: The Ultimate Battle
- Thrive Themes vs Clickfunnels: Which Sales Funnel Builder is Best?
6 of the Best SEMRush Alternatives: Hack Your SEO [2021 New Choices]
There’s no denying it. SEMRush is one of the top SEO tools in the market. Many SEO experts think it’s the only SEO tool you need in your marketing software arsenal. If you are looking for some amazing SEMRush alternatives, then stay here. We’ll give you the list, tell you why we think this is a great alternative, but of course, the final decision is up to you!
SEMRush does have great features. You can use it to do an SEO audit of your website, find great keywords, analyze your competitors’ website for keywords, backlinks and do much more.
However, SEMRush, while a great tool, isn’t great at everything, especially compared to other SEO tools in the market. Some are better at domain analysis and backlink research, others are better at finding keywords.
That’s why, in this article, I’d like to show you 5 tools which I think are just as great (and even better in some cases) at SEO. You’ll have heard some of the tools I’m about to mention, but others you might not have heard about.
6 SEMRush Alternatives You Need to Know About
The 5 SEMRush alternatives I’ll be talking about in this article are:
- Moz
- Ahrefs
- SpyFu
- SECockpit
- Hubspot SEO
- Serpstat [Updated choice]
All these SEO tools come with their own strengths, which is what we’ll look at in this article. So without further ado, let’s get started discussing the top 5 SEMRush alternative SEO tools…
1. Moz
Moz is one of the most recognizable and popular SEO tool in the market. The reason why it’s so awesome is because it is an excellent tool for keyword research and backlink analysis.

But what really separates Moz from other SEO tools is the fact that it has both a free and a paid version. Using the free version, you can get a really good idea how the tool works and operates.
There are five high-quality tools Moz offers:
1. Keyword Explorer: The keyword research tool is an excellent way for you to find a list of high-quality keywords. Just enter a keyword and you’ll get a complete analysis such as how difficult it is to rank with that keyword, how many people are searching for it, how many people are clicking it and you’ll even get a list of suggested keywords for that keyword!
2. Rank Tracker: This tool lets you see the performance of keywords on your website. You’ll be able to find out which of your keywords are ranking highest and which the lowest. In addition, you’ll be presented with a list of keywords that might perform better. Oh, and you’ll also get to analyze which keywords your competitors rank for. This makes this a really useful tool.

3. Site Crawl: There are many factors which influence a website’s SEO. With site crawl, you’ll be able to discover what technical issues are stopping your website from achieving a better ranking on Google and other search engines. In addition, you’ll also be presented with a list of suggestions as to how to solve these issues.
4. Link Research: Backlinks are a crucial part of your SEO strategy. Moz lets you discover what kinds of domains are linking back to your site. This will help you decide what steps you should take to increase your high-quality backlinks and what steps to take to decrease your spammy backlinks.
5. One-page Optimization: This handy little tool gives you suggestions as to how to SEO optimize the content on your site. You’ll get a handy list of keywords, content suggestions and more to improve your on-page SEO.
In addition, Moz also has a cool browser extension called the ‘Mozbar’. This lets you see the rank, authority, backlink quantity and other information about any domain on the internet.
2. Ahrefs
Ahrefs is another excellent SEO tool on the market. Their strength lies in the fact that it is extremely comprehensive in the sense that it provides data on nearly every metric possible. If you want to step up your SEO game, this is a great tool.

Like Moz, Ahrefs also offers five main tools. But from my experience, the data which Ahrefs providers is far more detailed than what is provided by Moz. But like Moz, Ahrefs also provides 5 main features (although much more advanced):
1. Site Explorer: Site Explorer is not a single tool. Rather, it is a collection of multiple tools which will let you analyze your competitors whole SEO strategy. In this single tool, you can see exactly which keywords your competition is ranking for organically, what kind of paid AdWords campaigns they’re running and the quality of backlinks linking to their domain.
2. Keyword Explorer: This is similar to Moz in the sense that you can discover high-quality keywords for your own SEO strategy.
3. Content Explorer: This is a tool which Moz doesn’t have. Using this, you can see what kind of content is performing the best for a particular keyword. You can see how much times a content is shared, on which platforms and how many domains have linked to it.
4. Rank Tracker: This tool basically lets you see the rank of your domains, keyword, pages and overall your whole website. This is exactly the same tool Moz offers. It’s purpose it to show you how your SEO strategy is performing.
5. Site Audit: Again, this tool is similar to the Moz Site Crawl tool. It will analyze your website and give you suggestions as to how to improve your SEO.
But that’s not all. As a cherry on top, you also get other cool tools in Ahrefs which let you perform domain comparison, give you the ability to analyze domains in batches, find domains linking to your competitors but not you and other cool stuff.
3. SpyFu
Obsessed about your competitors and their SEO strategy? Want to know their exact keyword, PPC, backlink and other strategies? Then SpyFu is the best tool for you. In their own words, “SpyFu exposes the search marketing secret formula of your most successful competitors.”
To be clear, this tool provides all the essential features to monitor your own SEO efforts. You can track the ranking of your keywords, see information about your domains and analyze your backlinks.
But, what makes this particular tool special is it is solely focused on gathering information about your competitors. There are two main areas in which Spyfu allows you to monitor your competitors.

1. Competitor PPC Research: You can download the exact list of keywords your competitors are using in their Adwords campaign, find out which of your competitors are bidding on your campaigns and discover new keywords your competitors are using but you aren’t.
One cool thing you can also do is find out which keywords your competitors tried to rank on but failed. This will allow you to quickly stop bidding on such keywords.
Plus, you’ll also get tools with which you can discover your own keywords and analyze how your own keywords are performing.
2. Competitor SEO Research: Just like with PPC, you can download the list of keywords your competitors are ranking for organically. In addition, you can monitor what websites are your competitors in your SEO niche – and how they are ranking. You can also find the most profitable keywords your competitors are ranking in. Also, you can track how a website or webpage is performing for a particular keyword.
A notable thing you can do in SpyFu is to find out which influencers can help you increase your rank for a keyword and Spyfu will also provide contact information so you can contact these clients.
4. SECockpit
If you’re looking for one of the best keyword research tools on the market, then look no further than SECockpit. This is a tool that’s solely focused on providing you with the most up-to-date analysis on keywords for your SEO.
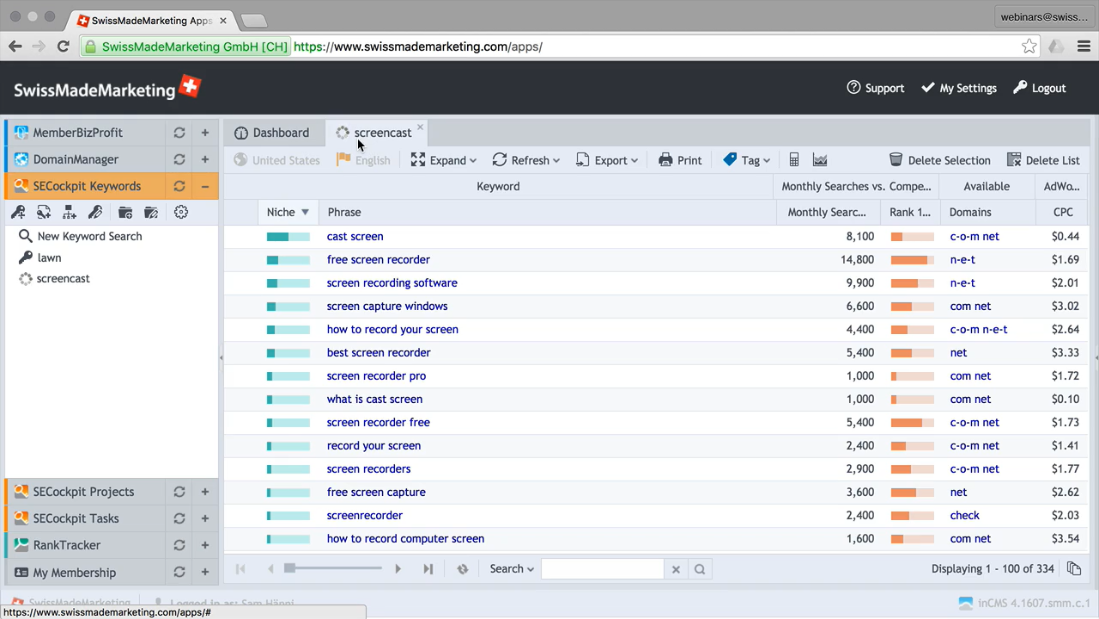
Here are a few of the things you can accomplish with SECockpit:
- Find high-quality keywords in a niche: When you enter a keyword in SECockpit, you’ll get a whole list of profitable keywords as a suggestion. You can use this list to find even better keywords for your website.
- See its competition pages: You can see exactly which websites and content is ranking on the first page of Google and other search engines.
- Analyze Information on keywords: See different metrics about a keyword to discover what’s the best keywords. Get information such as daily number of searches, difficulty, price of a keyword and more data.
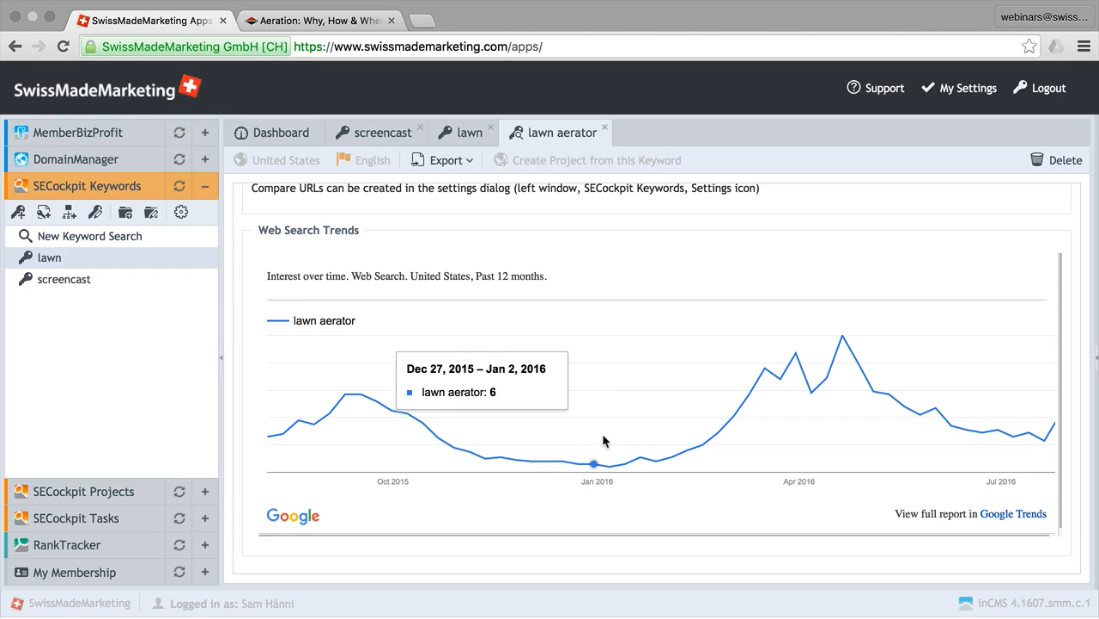
- Find keywords for Youtube, Amazon, Google Suggest, Related Searches and More: It’s not just search engines you need to rank for. If you have a product or a Youtube Channel, you also need to rank on platforms like Amazon and Youtube. SECockpit will give You keywords you need to rank on these platforms as well.
- See data from Moz, Google Trends and other places: SECockpit will give you valuable keyword data analysis from reputable sources like Moz and Google Trends.
Because of these features, SECockpit is the best tool among all SEO tools when it comes to finding valuable keywords, which as we all know, is the backbone of a good SEO strategy.
5. Hubspot Marketing Tool
Hubspot’s has its own set of marketing tools, of which SEO is part of the broad suite. You can use the HubSpot marketing tool to find create a whole content marketing strategy. This is specifically what this tool is designed for.

Here are a few things you can do this tool:
1. Plan your content marketing strategy: You can create and visually map out your whole content strategy. You’ll be presented with a list of relevant topics for a content topic you’ve chosen. You’ll be able to analyze your competition and see how easy it is to rank for your content.
2. Get real-time suggestions on how to improve your SEO: It’s important to optimize your content so you rank higher on search engines. Hubspot will give you real-time suggestions as to how to improve your SEO for any piece of content you write.
3. Measure and track results of your content: After you’ve published your content, you’ll be able analyze how much leads you’ve captured with each content, which keywords are responsible for improving your rankings and what amount of traffic each piece of content is generating for you.
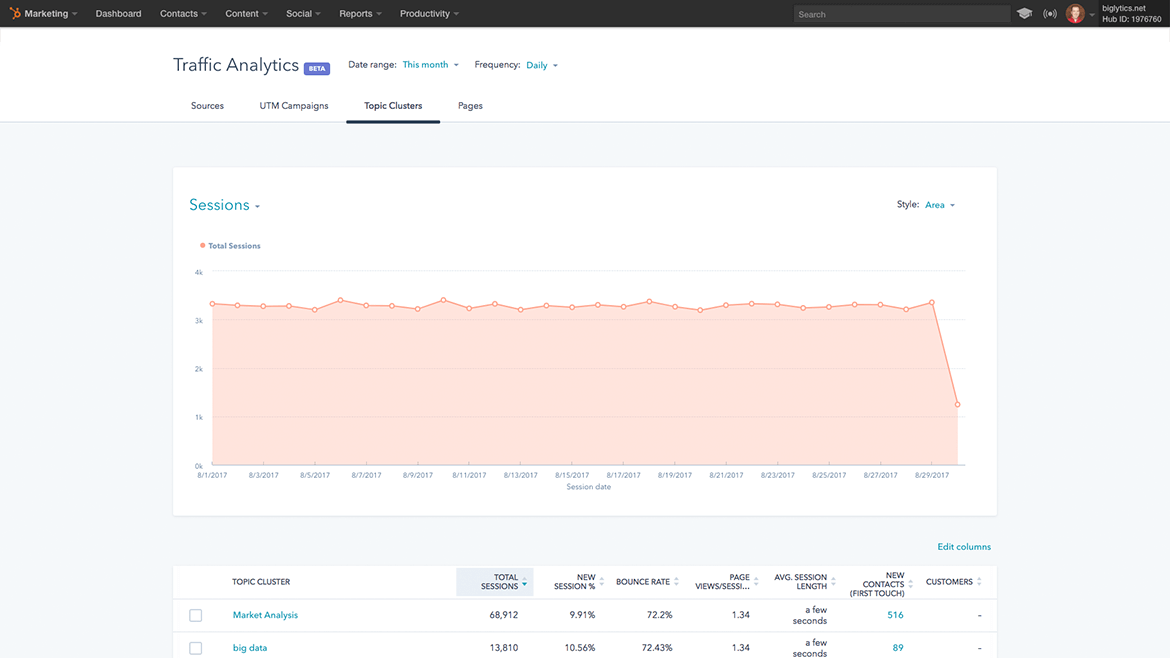
In addition, you’ll be able to automate your whole marketing department with this tool.
6. Serpstat
Serpstat is an all-in-one SEO platform. It’s one more great tool for every professional in SEO, PPC, content marketing, marketing, and search analytics niche. This service provides a ton of data and features. Unlike most of the other SEO tools, especially SEMrush, Serpstat is a quality service for a very nice price. Also, similar to Moz, it has both free and paid plans.
Like Moz and SEMrush, Serpstat has five main features: Website Analysis, Keyword Research, Backlink Analysis, Rank Tracker, Site Audit.
Website Analysis feature helps to do good competitor research. Enter the domain’s URL in the search bar and the tool will show you all info you need to know about your competitor. This report displays the overall info about visibility, traffic, the number of organic and PPC keywords. Also, you’ll see here: the detailed info about organic keywords (volume, CPC, etc.) and ads keywords; keyword position distribution; info about subdomains; visibility trend for year; traff trend for year; keywords trend for year; pages with the hichest visbility; competitors in organic search; competitors graph; competitors in ads, ads examples; backlinks overview; rank tracker; and site audit.
This tool has great features such as Domain vs Domain, URL vs URL, Top pages, Tree view, Batch analysis for PPC research, and Missing keywords for a separate URL (keywords, competitor’s pages rank for in top-10 and that are not present on the queried page).
Keyword Research is the most useful feature for SEOs, as for me. Serpstat has really great, and even the best one. It’ll display you the keyword’s search volume, CPC and also the keyword difficulty (which is the most accurate as for me). This tool can display you related keywords, search suggestions and search questions (which are an excellent help in creating content). One more unique feature is Top by Keywords.
Serpstat has a good database to use it for every project. It has databases of 230 countries and the biggest USA keyword database — 2.5B.
Serpstat Backlink Analysis is one more helpful tool. You can enter in any domain and analyze the backlink profile of it. It’ll display you the number of referring domains/pages, nofollow/dofollow count, backlink growth graph, top pages, etc.
Rank Tracker functionality can help you monitor rankings of the website regularly for a set of keywords. It’ll display the position, rank history, competitors, landing pages and also allows you to compare the rankings between the days.
Site Audit analyzes the site for basic onpage SEO and crawls errors. It also can give some suggestions on what you need to improve to boost the search traffic on your site. Serpstat has a unique feature here — one-page audit.
Despite these features, Serpstat has Keyword Clustering (grouping semantically related keywords) and Text Analytics (helps you semantically optimize your page for higher search rankings).
In addition, Serpstat has its free plugin which helps analyze the site by one click. With its help, you can make page and domain analysis, check on-page SEO parameters (site audit).
Serpstat Pricing
Serpstat has various plans, depending on your size and needs:

 Conclusion: What will you choose?
And that brings us to the end of our list of top 6 SEMRush alternatives. As you can see, except for Moz and SEMRush, every other SEO on this tool is unique in its own way. Yet all will help you boost your SEO efforts and will take your website to the top of Google!
If I had to choose one, I would choose SEOCockpit for the majority of my keyword research, not only does it give you more accurate competitive data (say then, Ahrefs), you can find and expand your searches to find untapped keywords you might not have thought of. It’s a tool that allows you to start broad, quickly narrow down and I really like that.
My second choice on this list would be Serpstat because I really like the Keyword Clustering tool – as many of you already know, Google doesn’t just rank you for the specific keyword you write about, it will cluster your efforts too. Think of keywords like buckets of keywords! With Serpstat, you can find these buckets and extend your SEO efforts quite well.
You might also enjoy:
Clickfunnels vs Shopify: Which Tool Works Best for Your Business in 2021?
So, you’ve finally decided to start an online business.
You’re going to sell an awesome product, or thousands of awesome products on the internet.
But you don’t know where you’re going to sell them.
That’s why I compare two powerhouse tools — Clickfunnels vs Shopify.
Which one will work best for your business?
If you’ve been searching online how to start an online store, you might have heard two services i.e. Shopify and Clickfunnels come up quite a bit.
And frankly, with all the dropshipping and ecommerce guides out there, it can get quite confusing to decide which ecommerce platform is the best place for you to sell your products.
In this article, we’ll explain to you exactly ecommerce platform you should run your online business on.
But here’s the thing:
None of these tools are perfect by themselves. Both have their own strengths and weaknesses. Ultimately, the platform you choose to run your business on depends on what kind of business you’re starting and what kind of products you’re going to sell.
Main Differences Between Clickfunnels vs Shopify
The main differences between Clickfunnels vs Shopify are:
- Clickfunnels has two plan options with a basic plan that is more expensive, whereas Shopify has three option plans.
- Clickfunnels doesn’t have a mobile app, whereas Shopify does have an app that is available on Android and iPhone.
- Clickfunnels offers several features including ready-made sales funnels, whereas Shopify does a better job at helping you manage your inventory and customers.
Now, let’s start with an overview of both these awesome services:
Shopify: The Ultimate Online Store Builder
If you’re thinking of creating a fully fledged online store with lots of products, Shopify is a great choice.
You’ll get lots of themes to build your website, an inventory management system to manage your physical products, payments integration and exclusive shipping rates from DHL, UPS and USPS.
Basically, you’ll get all the tools you need to set up and run your new online store without having to write a single line of code. Plus the Shopify developer community is awesome – meaning you’ll find solutions to any technical or non-technical issues you run into almost immediately with a few quick Google searches.
And if that wasn’t enough, you’ll also get access to a budding App Store full of plugins and integrations you can add to further enhance the functionality of your Shopify website.
Clickfunnels: The All-In-One Sales Funnel Software

If you’ve never marketed or sold a product in your life, then Clickfunnels is the software we recommend you use to sell your first product.
Why?
Because Clickfunnels comes with pre-built, scientifically proven to convert sales funnels. There are sales funnels especially made to sell products, memberships, courses, ebooks, webinars and even your services.
And not only can you create an online store to sell your products and services, you can also use Clickfunnels to build your email list and run automated email marketing campaigns.
Granted, the stores you create with Clickfunnels aren’t going to be as feature rich as the ones in Shopify, but it’s more than enough to get you started. And with Clickfunnels, you won’t need to pay for another marketing software ever again.
Clickfunnels Vs Shopify: Features Comparison
From the above overview, you might have gotten the impression that both these tools are for two dramatically different audiences. And if you have, you’re right.
Shopify Feature Rundown
Shopify is made for expert entrepreneurs who know how to integrate different marketing software with their stores, have advanced knowledge how to create funnels and turn visitors into customers and only need a robust tool to create and manage their online store.
That being said, here are the nine best features of Shopify:
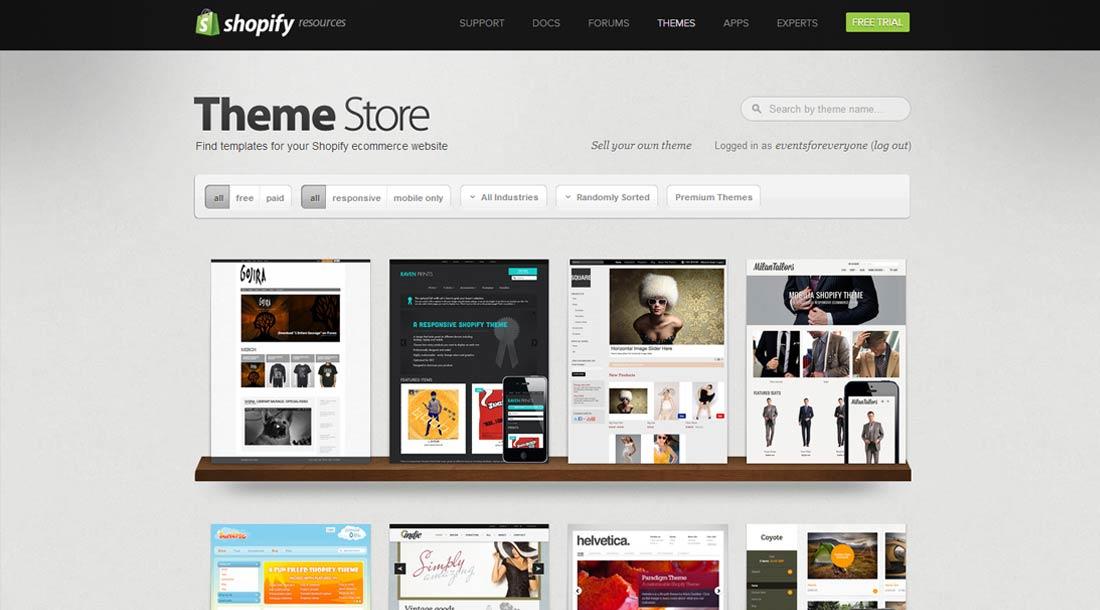
Online Store Builder: Shopify has an excellent collection of themes (free and paid) you can use to build your online store. The drag-and-drop website builder lets you customize every element of the theme. You can add your own text, color, and images to make your website truly your own. And if you’re tech savvy, you can add your own custom CSS and HTML code as well. In addition, you can also create blog posts with Shopify’s content management system. And every single website is mobile responsive so your customers can shop on your website even when they are on the go.
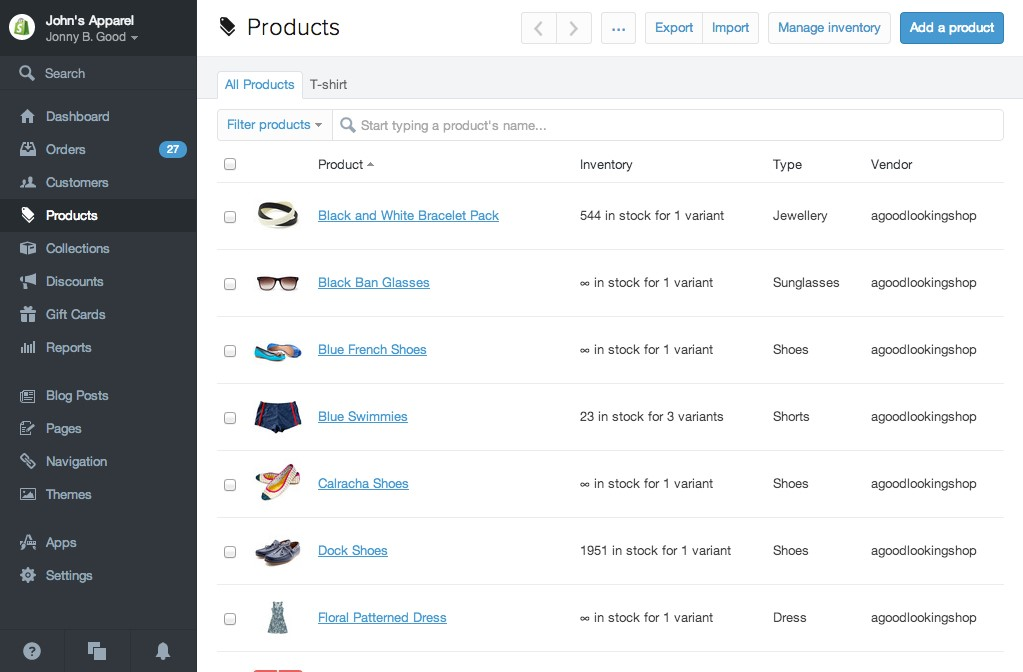
Inventory Management System: In Shopify, you can easily keep track of current and new inventory. Add new products, create different variants of it and post a few good-looking images of them and finally assign the number of items you have in store. Then Shopify will automatically track how many items you’ve sold so you know at once when to order more. Plus, you can also choose to sell (or not sell) a product even when it’s out of inventory and being restocked.
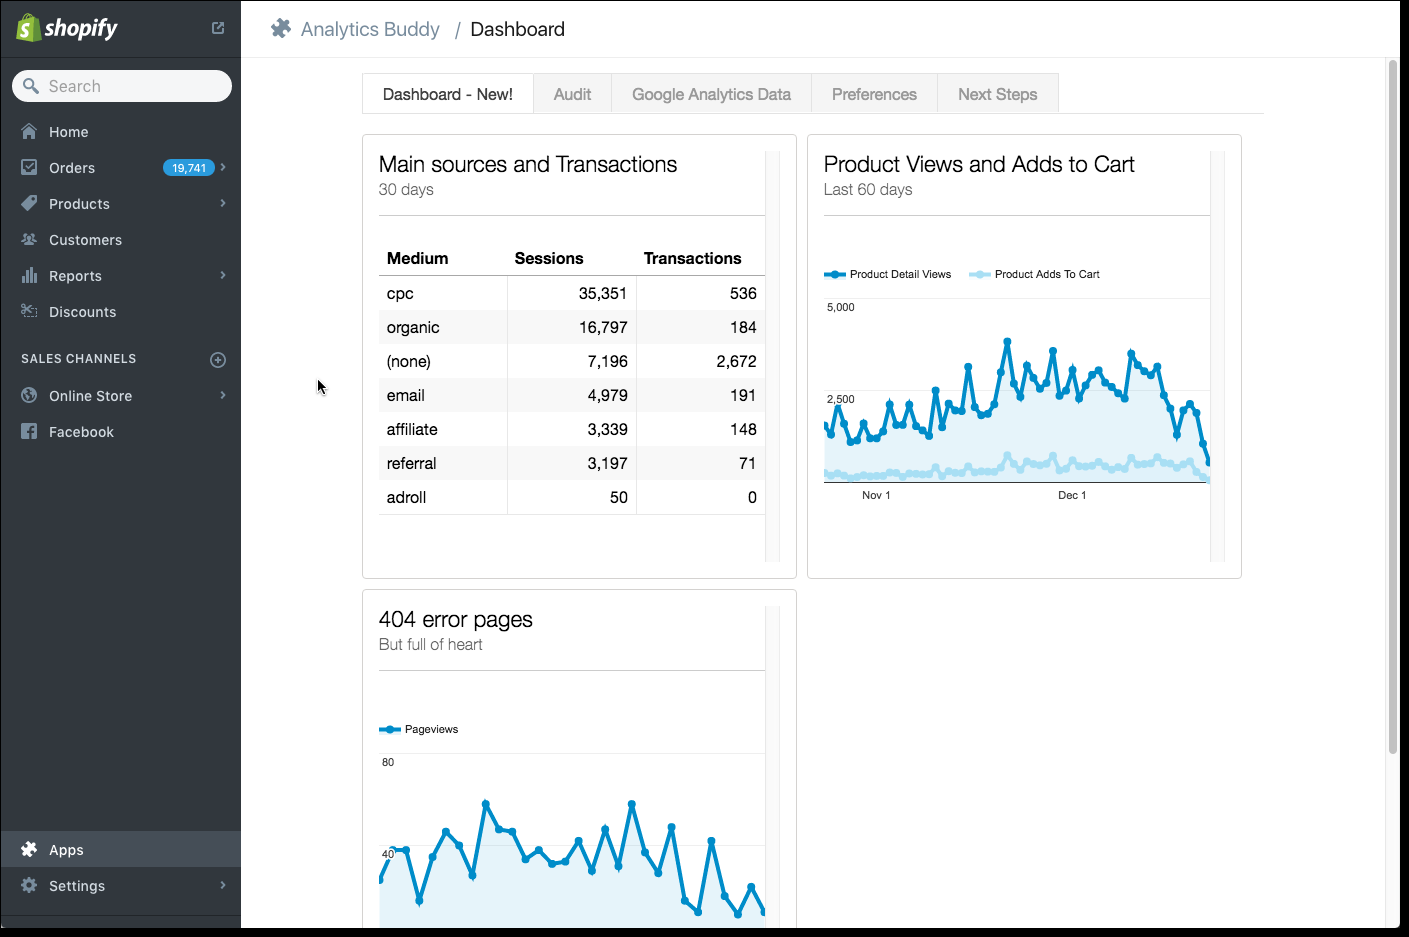
Analytics Dashboard: Shopify provides beautiful graphs of data that matter to you. You can see your traffic, orders, and sales at a glance. In addition, you can see where your customers are coming from, what they do and how much time they spend on your store thanks to Google Analytics integration. Plus, you can see the performance of each individual product i.e what’s selling and what’s not – and use this information to order new inventory accordingly.
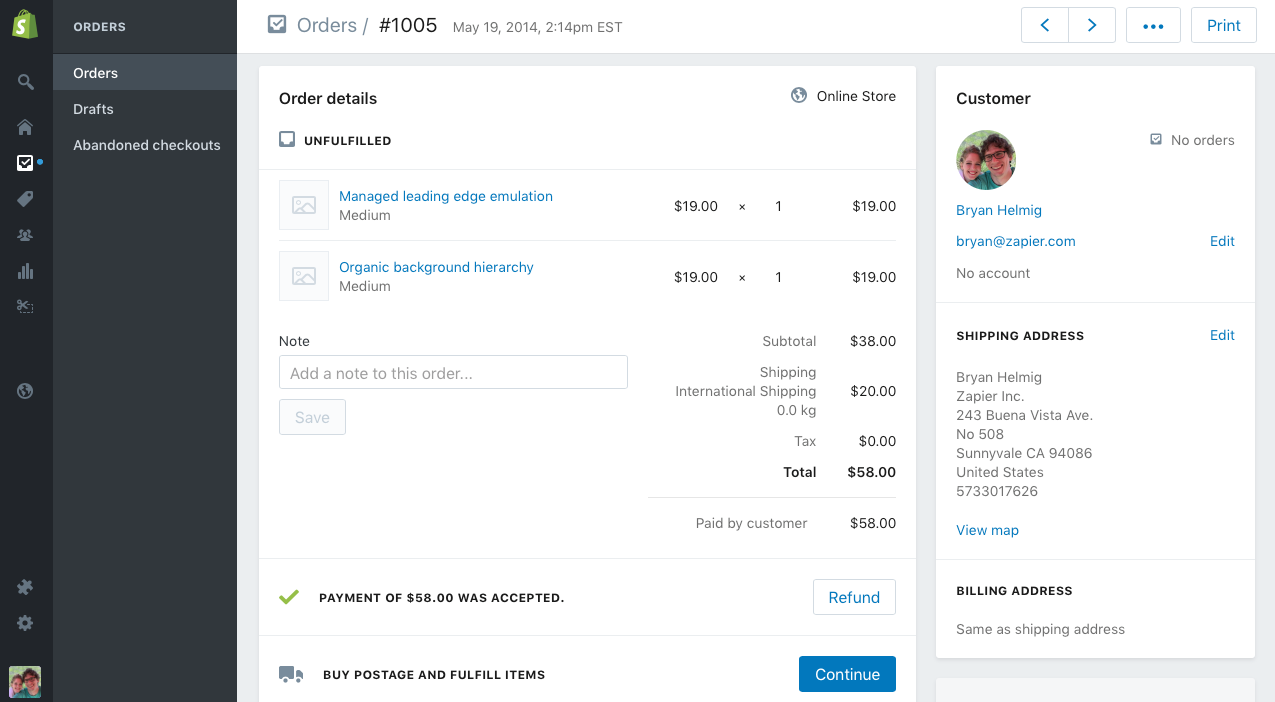
Customer Management System: Shopify lets you see the shopping behavior and info of customers who’ve purchased from your store. Plus, you can create membership sites to encourage repeat purchase and send these customers marketing emails (or give them the option to purchase as a guest). You can also organize customers in groups based on their country, product purchases and money spent. In addition, you can set up refunds for customers as well.
Sales Channels: You can use Shopify to set up stores inside social media networks like Facebook and Pinterest, Amazon, Ebay, your existing website and even your brick and mortar stores. This means customers can browse and purchases products right inside these websites and apps as well without leaving them.
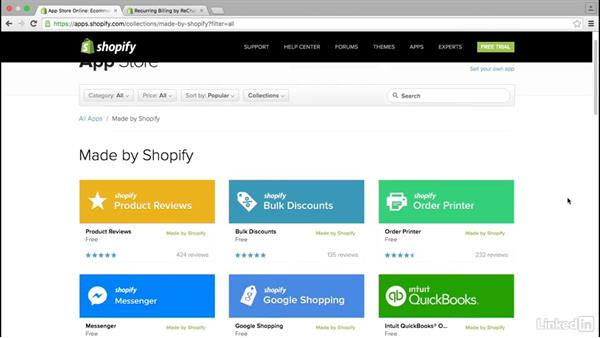
App Store: The Shopify app store is full of amazing plugins and integrations you can use to enhance the functionality of your shopify website. You can use the many apps available to create landing pages, opt-in forms, get additional analytics, run email marketing campaigns and more.
Payment Integration: With Shopify, you can accept payments from Visa, Mastercard, Discover and American Express, plus from 50+ online payment gateways like Paypal and 2Checkout. In addition, Shopify will handle city and state taxes of your country for you and gives the ability to offer customers free shipping.
Shipping and Delivery: Shopify has partnered will three major couriers i.e. DHL, USPS, and UPS to offer low shipping rates to your customers. Plus, because of their partnership with Oberlo, you can buy, ship and sell products to your customers without stocking inventory yourself.
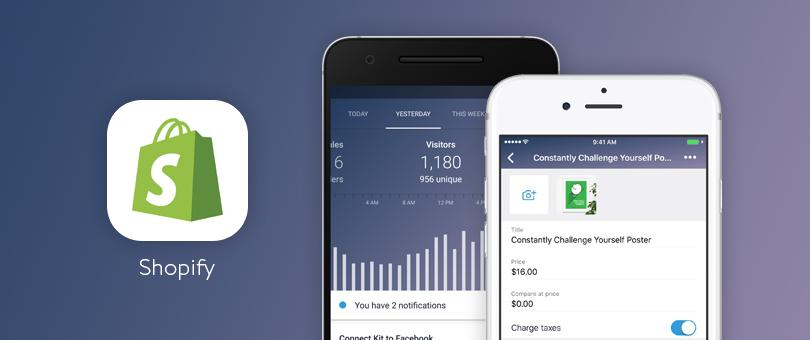
Mobile App: The Shopify mobile app is available both on Android and iPhone. You can use it to track your sales and orders, manage your inventory and email / call your customers on the go.
Clickfunnels Feature Rundown
Clickfunnels, on the other hand, is made for beginners and non-experts who want to start an online business, and need a simple and powerful tool that helps them set up not just a store, but their whole marketing funnel as well.
That’s why Clickfunnels offers extremely robust tools like these:
Ready-made Sales Funnels: With Clickfunnels, you get ‘funnels’ i.e full sets of web pages that guide your customers toward a checkout page – ready made for you. You’ll get funnels to sell every kind of product imaginable. There are funnels for physical products, digital products, courses, ebooks, memberships, subscriptions, webinars and more. In addition, there are templates for sales pages, opt-in pages, thank you pages and checkout pages as well. All you have to do is add in your own copy and images and your sales funnel will be ready.
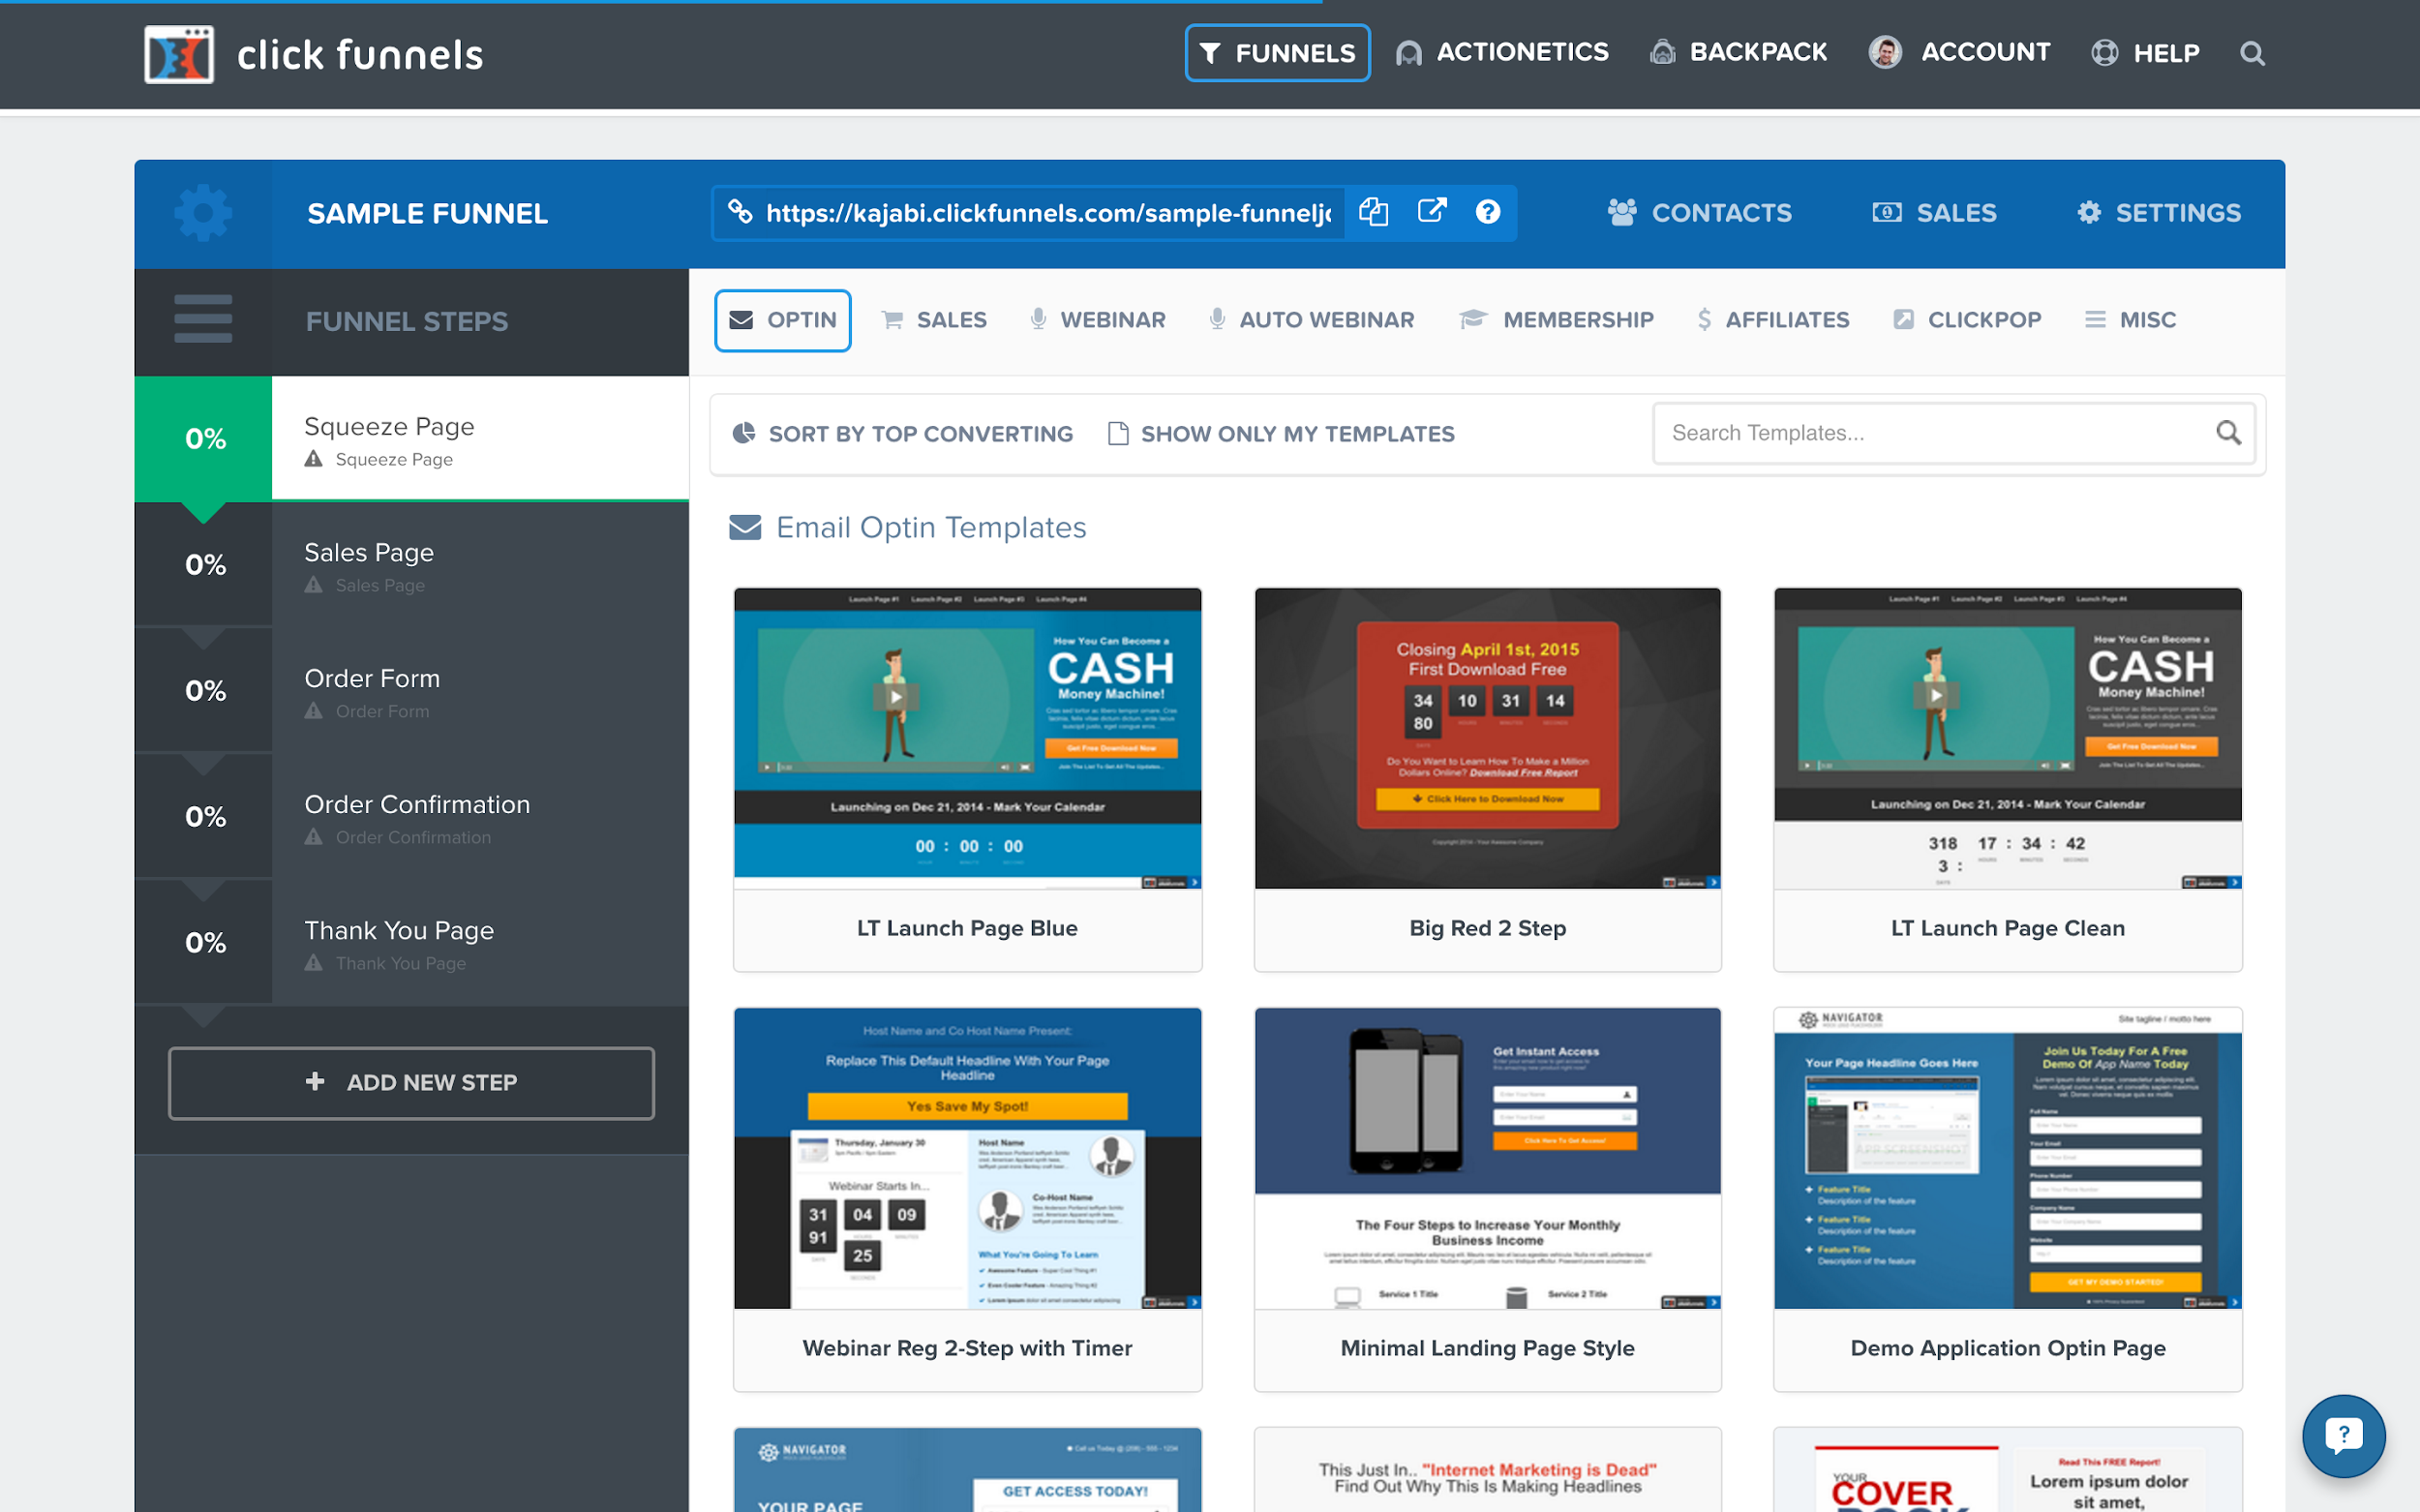
Website Building Tool: You don’t have to use the sales funnel templates. You can build your sales funnel from scratch with the website building tool. You can add text, images, checkout carts, payment integration, an opt-in form and anything else you need to build any kind of web page for your sales funnel.
Payment Integrations: With Clickfunnels, you can add payment integration to your sales pages and collect payments at once. Clickfunnels integrates with Paypal, Stripe and other payment processors.
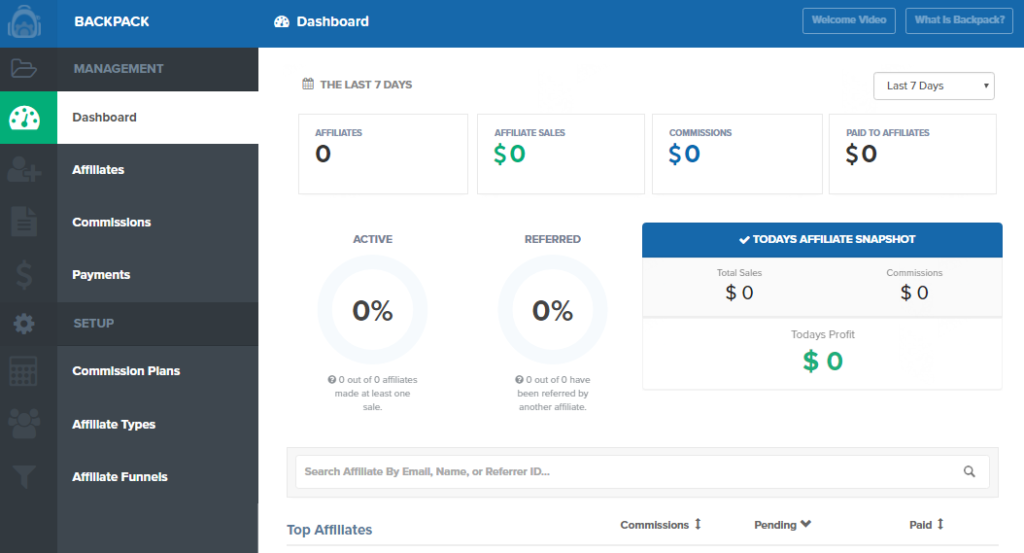
Affiliate Marketing System: This is a cool feature not many offers. Clickfunnels lets you create your own affiliate programs for products and services. This means you can give a link to other people to sell your product. And whenever someone sells your product for you, you can give them a commission. This way, you can create your own personal team of salespeople who will help you increase your sales.
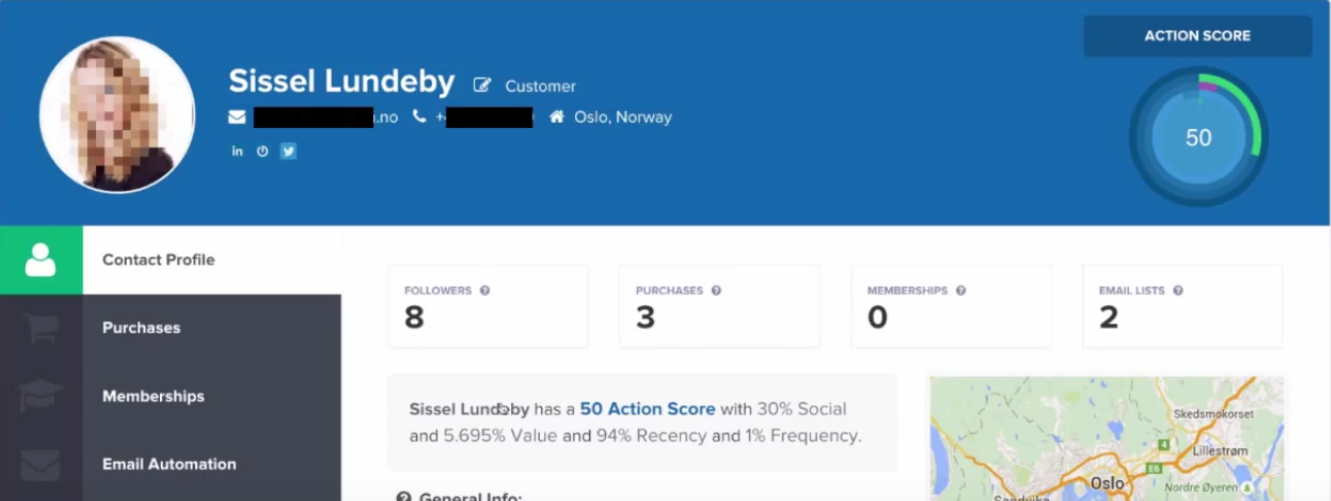
CRM System: Clickfunnels has a cool CRM system that lets you see in detail information about your customers. You can see where your customers are from, their email and social profiles, what they’ve bought from you etc. You can also group different customers based on their location, the products they’ve purchased, the money they spent etc. and put them in different email marketing campaigns.
Email Marketing Tool: You can create your whole email marketing campaign with Clickfunnels. You can write beautiful emails, arrange them in a series and automate the process so that anyone who opts in to receive your emails get them automatically. You can also send email campaigns to different segmented email lists.
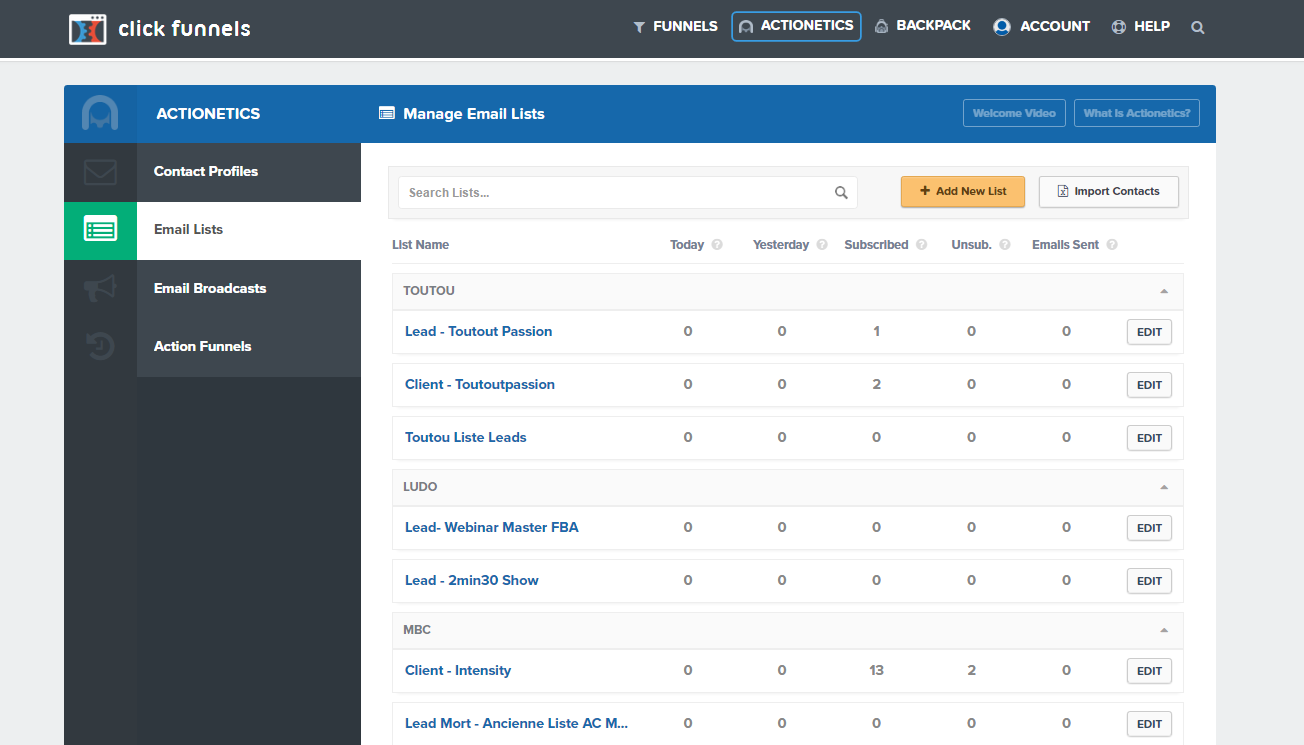
Action Funnels: The action funnel is the Clickfunnels automation tool. Using this, you can combine your funnels with your email campaigns to create the ultimate automated marketing machine. You can set up which ‘list’ a user should be added in after they opt-in (or opt-out) to your funnel and what emails they receive. You can also set up actions based on different triggers. For example, if someone purchases your product, you can auto add them to a new email list and put them inside a new campaign.
ClickFunnels vs Shopify: Pros and Cons
Based on the features, here are the top three pros and cons of Shopify and Clickfunnels.
Shopify Pros
- Shopify is the best platform to create and sell hundreds of products thanks to its inventory management system.
- You get super low shipping rates from delivery partners such as DHL, USPS and UPS.
- You get a mobile app to run your online store on the go.

Shopify Cons
- Shopify only provides a platform to sell your products. You have to learn how to market your website to get sales.
- You’ll have to integrate with other services for email marketing, building landing pages, creating affiliate programs etc which adds in cost.
- You’ll need a lot of time to set up your store, create funnels and will need technical marketing knowledge to do it right.
Clickfunnels Pros
- You don’t need to have any marketing knowledge to sell products. You’ll get prebuilt funnels tested for max conversions.
- You get a CRM system, email marketing tool and automation tool within Clickfunnels. No need to pay for another service.
- Building a funnel and selling your product takes only a few hours, not a few weeks.
Clickfunnels Cons
- The subscription is more expensive.
- Isn’t ideal for selling hundreds of products and running a full online store.
- No mobile app for on the go usage
Frequently Asked Questions
Yes! With Clickfunnels you can create landing pages for your dropshipping business and integrate with third-party shipping applications.
Also phrased as, “Can I trust Shopify?”. The answer? Yes, you can! This is a renown company with great customer service. If you have any questions about how Shopify works and its features, check out our complete Shopify review!
Of course, but it’s important to have a great marketing strategy. Also, consider integrating Shopify with marketplaces such as Etsy or Amazon to be able to reach a larger market.
Verdict
Shopify is a good choice if you’re a marketing pro and want to go full-time running and managing your online store. Its product management and delivery features are unmatched. But you need to know how to set up different integrations for building landing pages, running email campaigns and automating your online business.
That’s why Clickfunnels is the better choice if you’re just starting out selling products. You won’t need a lot of marketing experience to build your funnels and you’ll get all the services you need to run your online business – including hosting to get you started.
If you are going to choose, Shopify – you might want to invest in landing page editor app right from the start, such as Shogun.
You can learn more about Shogun in our full Shogun review.
You might also enjoy:
GetResponse vs Leadpages: Do You Need Both? Decide Here
Today I compare GetResponse vs Leadpages: One is an email marketing tool, one can help you get those email leads, which is better? It might not be that simple of a comparison, but let’s get started.
If you go to the market (or online) to get a new Desktop PC for yourself, there are two ways you can buy one:
- You can choose a branded, ready-made desktop PC, that already comes with all the hardware parts necessary to run your favorite games and software smoothly.
- Or you can get each individual PC component separately. You choose everything i.e. the motherboard, the chassis, the graphics card – by yourself.
Both these ways of buying a PC have their own advantages and disadvantages.
If you get a ready-made desktop PC, you’ll likely save a lot of time choosing the components yourself. But maybe it will have a processor that’s way powerful than you need. Or a hard drive that doesn’t have the required amount of storage you want.
On the other hand, if you build a PC yourself by buying each component, you’ll get every single component exactly according to your specifications. But it will take a lot of time doing that, plus maybe you’ll end up spending more than your original budget.
Wait a second… what does this have to do with buying marketing software?
Well, with marketing, you have different components as well. You need a landing page builder, an email marketing software, possibly a CRM and much more…
And just like the components of a desktop PC, you can buy each marketing service separately, or you can get all these services inside a single suite, like a ready-made PC.
In this article, we’ll talk about two marketing software which are just like that.
Leadpages vs GetResponse: Which Marketing Software Should You Get?
The Case For Leadpages
Leadpages is like a powerful component that will fit in your overall online marketing machine. It will do one job, but it will do it really well.
In the case of Leadpages, what it can do is build high quality, amazing landing page builders. Plus, since it does one job, in this software, you get extra features that other ‘all-in-one’ tools with landing page builders won’t give you.
For example, in Leadpages, you get the ability to directly launch a Facebook or Instagram ad for your landing page. This isn’t something you get in GetResponse.
Plus, the overall interface and every single feature which comes out is dedicated to helping you become better at creating landing pages. This is what makes stand-alone software like this unique and desirable.
The Case for GetResponse
Then, on the other hand, you have a marketing tool like GetResponse. It’s a complete, all-in-one marketing machine that gives you all the services you need to run your online marketing campaign.

It comes with a landing page builder, an email marketing tool, a CRM – and other services which you’ll need to run your complete online marketing.
And because of that, GetResponse is like a ready-made desktop PC. All the services i.e. components are there under one roof.
Now, let’s move on to discussing each tool’s features, so you can get a better idea of what each tool is capable of…
GetResponse vs Leadpages: Feature Rundown
As we’ve discussed above, both Leadpages and GetResponse are different kinds of tools. That’s why it won’t make sense to directly compare each other’s features.
Instead, we’ll look at the two tools differently from the start.
We’ll judge Leadpages as a landing page builder while GetResponse as an all-in-one marketing suite. With that being said, let’s start our feature rundown of the two tools to get an idea what’s possible with each of them.
Leadpages Feature Rundown
As a landing page builder, Leadpages is an incredible tool. If you need something to solely help you build landing pages, Leadpages is more than qualified for the job.
Here are the features you get in a tool like Leadpages:
Free Templates, Hosting and Publishing
With any landing page builder, the first thing you need is templates. Because chances are you have never built a landing page from scratch – or don’t want to. And in this case, templates really come in handy.
In Leadpages, no matter which package you get, you’ll get access to all 150+ landing page templates.

There are templates for selling webinars, courses, ebooks, services and more. Plus, you’ll find designs for specific industries like travel, fitness, and startup. And what’s more, you can sort your designs based on how their conversion rate so you can quickly select a landing page template that’s bound to get you higher conversions.
In addition, after you create your landing page, here are two great things Leadpages offers:
- Unlimited Publishing: No matter which plan you get, Leadpages will let you publish an unlimited number of landing pages on the internet.
- Free Hosting: After you create a landing page, you’ll need to host it on the internet. Thankfully, Leadpages will host all your landing pages for free so you can quickly launch your landing pages.
These features already make Leadpages an attractive offering. So much value right from the start!
Intuitive Drag-and-Drop Builder and Payments Service
The next thing every landing page builder needs is easy to use an editor with which you can edit your landing page templates.
You’ll be happy to know the Leadpages offers exactly that.

Its drag-and-drop builder is extremely user-friendly. Plus, it gives you lots of intuitive elements to put on your landing page, like a pricing table section, social media sharing buttons, background video wallpaper and much more.
And that’s not all.
You also get 2-step opt-in forms with which you can much more easily collect both emails and payment.
That’s because Leadpages also offers its own payments solution with which your visitors can quickly pay for your products and services directly on your landing page
Facebook Ad Builder
Once you build a landing page, you’ll want to promote it. And Facebook is one of the best places to do that.

If you’re lazy like us, you’ll appreciate the fact that you can directly create advertisements, create custom audiences and launch ads to Facebook directly from within Leadpages,
Also, Leadpages gives you the ability for quick ‘pixel placement’ which enable you to easily retarget your ads to visitors.
In-Depth Reports
After your landing page has launched and you start getting traffic, you’ll want to measure the performance of your landing pages.
Leadpages, without a doubt, comes with the most effective reports for that. You can clearly see how your landing pages are converting by looking at the data it gives you.
But yes, to be frank, the data it gives you, while easy to understand, isn’t as in-depth as you’d want it to be. For that, we recommend you use Google Analytics as well.

Its data is much more in depth than what you get with Leadpages.
GetResponse Feature Rundown
As a marketing suite, GetResponse offers nearly every kind of service you’d need to run your marketing operation. Because unlike Leadpages, which is a landing page builder, GetResponse has a landing page builder. Big difference!
Anyways, here’s the set of services you get in GetResponse…
Landing Page Builder
In GetResponse, you get a landing page builder, which is kind of like Leadpages.
For starters, GetResponse, like Leadpages, gives you access to 150+ templates. And it gives you free hosting for any landing pages you create
Plus, the drag and drop editor works just as well as in Leadpages. You get tons of elements to put on your landing page.

One notable thing which GetResponse gives you that’s not included in Leadpages is 5000+ free images from Shutterstock to put on your landing pages as well.
Email Marketing Service and Autoresponder
Once you create a landing page, you’ll want to collect emails so you can build your email list. But more important than that, you’ll want to nurture your email list so you can turn your subscribers into customers.

For that, GetResponse comes with an email marketing service.
Using it, you can send different kinds of emails to your subscribers. There are many templates available with which you can quickly create professional-looking emails.
In addition to that, you can set up GetResponse so it only sends your emails to your subscribers based on their timezone and only when they are most active.
Plus, you can also segment your email subscribers and put them into different autoresponder campaigns. Because in addition to an email marketing service, GetResponse comes with an autoresponder tool. This tool allows you to create different sequences of emails which you can then send to a targeted audience.
Webinar Service
GetResponse is one of those rare marketing tools which come with a service with which you can quickly set up your very own webinar.
The email and landing page templates with which you can market your webinar are already there. But in addition, you get the infrastructure to run your webinars as well.

GetResponse gives you the tools necessary for your subscribers to quickly go live from their PC or phone. Plus, they can chat during the webinar as well. You, on the other hand, can record the webinar, share it on social media, send files and do much more.
Overall, this is a great, unexpected tool that you’ll surely appreciate once you become aware of the importance of webinars!
Marketing Automation
This handy service is a must-have, especially if you sell a lot of products on your website or run a complicated marketing campaign.
Why?
Because marketing automation, as the name implies, can help you automate the marketing activities that are happening inside your website or emails.

For example, if someone joins an email list, buys one of your products, subscribes to services or does anything else with which you want to trigger an email, schedule a call, send a message, add to an autoresponder campaign – or do something else, this feature can help.
It’s something you should really use if you want to do all your marketing as effectively as possible.
CRM Service
After all this tiresome process of setting up your online marketing campaign, you’ll hopefully have a lot of customers. And once you do, they’ll have a lot of feedback and complaints. Plus, you’ll want to turn your existing leads into new customers by establishing a one-to-one relationship with them.
The CRM feature in GetResponse lets you do that.
To get started, you get to build a profile for each of your email subscribers. You’ll be able to see who they are, what relationship they have with your company, what email campaigns they are in, what products and services they’ve bought – and other useful information.

In addition, you’ll get the ability to set up reminders, schedule calls and segment your contacts into different lists as well by ‘tagging’ them.
The point of this CRM service is to help you improve your relationship with your customers so you can sell them more effectively. And while GetResponse CRM service isn’t as powerful as other CRMs out there, it’s more than capable of increasing your business’ sales and improving your customer service.
Pricing: Which of The Two is Worth it?
Leadpages offers simple pricing.
Paid annually, its standard plan costs $25 per month. It doesn’t matter how much traffic you get, how many pages you create or whatever you do. In this plan, you’ll be able to build a functional landing page builder.
Take Leadpages out for a test drive with a free trial here!

But if you subscribe to the bigger $48 per month plan, that’ll unlock unlimited A/B testing, which is crucial to have in a landing page builder. Other than that, you’ll also unlock the ability to provide online payment facilities to your users in this plan.
GetResponse plans are more complicated.
For example, if you subscribe to the cheapest ‘email plan’, you’ll simply get an email marketing and autoresponder tool, a basic landing page builder and a barebones marketing automation system. But it’s cheap and costs $12.30 a month per year.
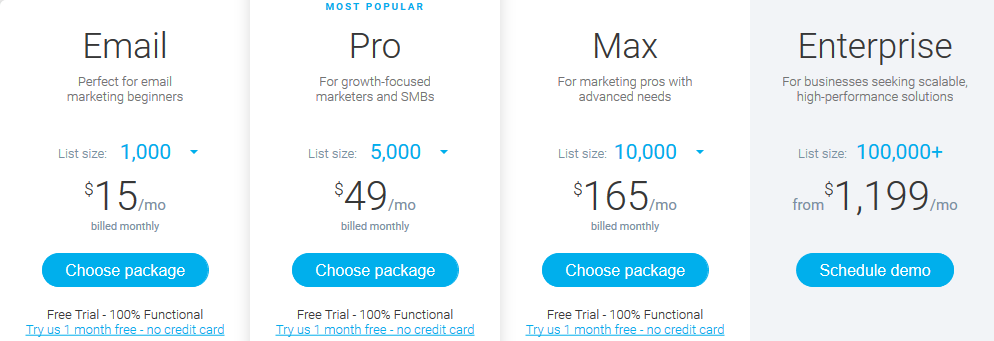
But if you want to unlock the pro plan, which has the CRM, webinar tool and unlocks all the functionality of the landing page builder and marketing automation tool, you’ll have to pay $40 a month.
And here’s where things get complicated.
This pricing is for a specific number of contacts. If let’s say, you have 10,000 email subscribers. In this case, the basic plan will cost $53.30 instead of $12.30. And the pro plan will cost $60 instead of $40. And as your list grows, so will you plan cost.
But still, if you look at the big picture, Leadpages pro plan costs $48 alone. This means once you separately buy other services like a CMS, marketing automation tool, email marketing software, combined, this can move your costs to $300+ a month or more.
With GetResponse, compared to the above, pricing will ultimately be cheaper since you’ll be getting all the services under one roof.
Conclusion: Which Should You Choose?
In the end, it will all depend on what kind of marketing machine you’re trying to build.
If you want the absolute best services for each part of your marketing campaign, you should get Leadpages. It will allow you to get other powerful services that’ll fulfill your exact requirements. But keep in mind that subscribing to additional tools and setting them up will take a lot of time and money – which you might not have.
In that case, GetResponse would be a better choice. While all its tool might not be best in class, they sure are enough to get the job done. But remember this also, once you’re locked into GetResponse, migrating to another tool might not be an easy thing to do.
Take Leadpages out for a test drive with a free trial here!
We say why not try both together and build an email list that you can continue to grow!
Other resources:
OptimizePress vs Leadpages: Which Landing Page Builder is Best?
Choosing the right landing page builder is more important than you think…
Here’s why:
You see, a professional chef will always use different kinds of knives for different kinds of food.
For example, if the chef is going to cut vegetables, they’ll pick the trusty all-purpose chef’s knife. This handy knife is easy is work with, and can dice and slice an onion precisely the way the chef wants.
But if the chef want to cut something tougher, like a whole chicken, they’re not going to use the same chef’s knife. Instead, they’ll probably use a cleaver. This heavy knife has a broad steel blade that is great for hacking through bone, which is just what the chef needs to cut that chicken.
The result of choosing the right knife is that the chef gets the exact result they want. The onions come out perfectly diced and the chicken pieces come out cut exactly in the right places.
And just like choosing the right knife is important for a chef, choosing the right landing page builder is important for you if you want to create the perfect landing page…
OptimizePress and Leadpages: Which One’s Right for You?
Different landing page builders let you do different things.
One might have better templates while the other might have a better drag-and-drop builder. One might offer better features in their basic plan, the other might offer more features in their premium plan.
And for you to successfully build a good landing page, you need to choose the right tool for the job. And what might be the right tool for you, might not be for other people.
And that’s ok…
Because in this article, we’ll take a look at two different, yet equally amazing landing page builders. We’ll show you how they are similar and how they are different. And in the end, you can decide which landing page builder is the right choice for you (and which isn’t).
The two tools we’ll compare in this article are:
- OptimizePress
- Leadpages
First, we’ll start by taking a look at what exactly you can expect from both these landing page builders.
Then we’ll move on to discuss their differences and pricing, after which we’ll try to come up with an accurate conclusion.
Let’s get started…
What You Can Expect From The Two Tools…
OptimizePress and Leadpages. These are the two tools we’re about to discuss. But before we can compare their differences, let’s see what you can expect from both of them…
A Variety of Templates to Get You Started
Landing page builders come with a wide variety of different templates. This is necessary because most people have never built landing pages in their life – and won’t likely know how to build one.
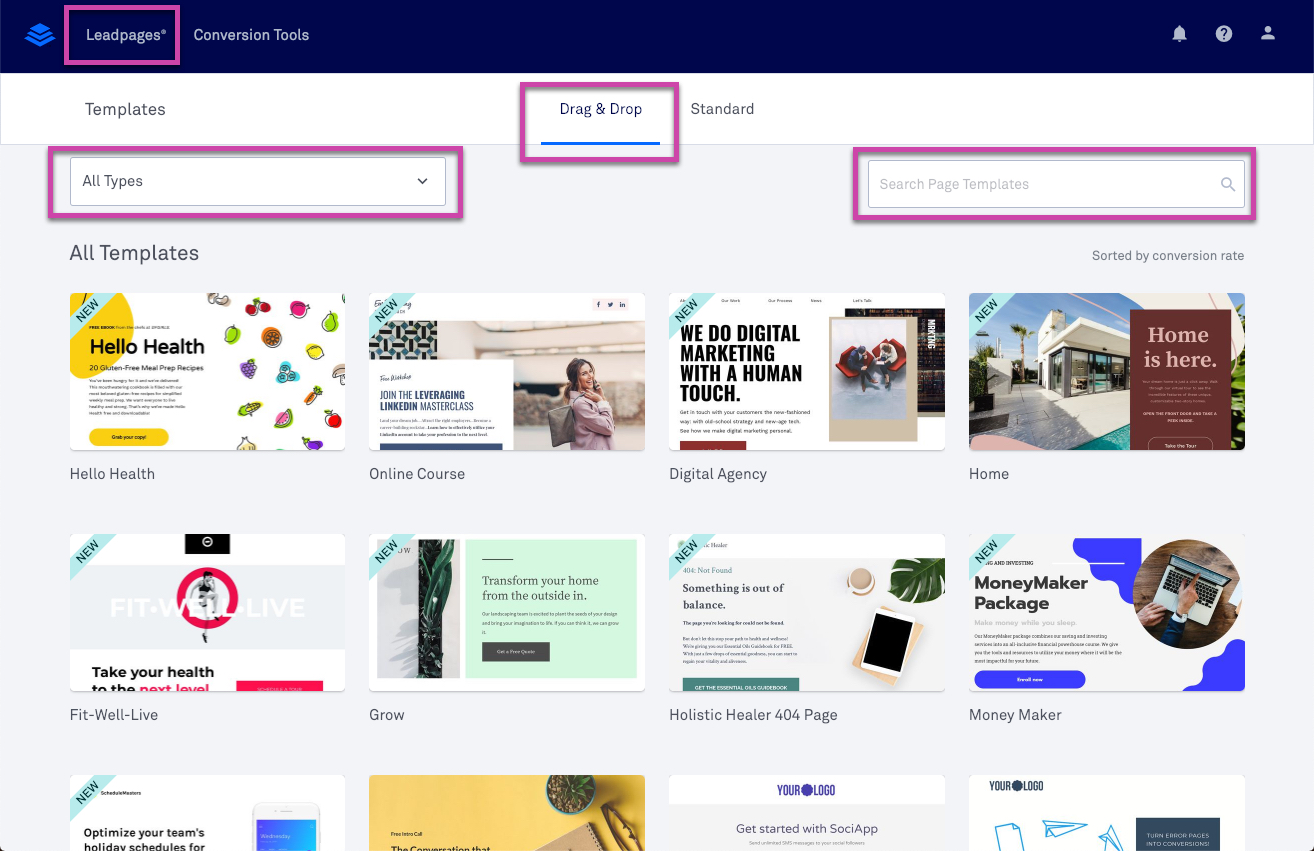
Therefore, both OptimizePress and Leadpages come with a lot of templates.
There are landing page templates for selling courses, webinars, products, services and more. Plus, they are designed professionally and in a way so you get the maximum conversions possible.
The only difference between the two landing page builders is the number of free templates you get with them. Other than that, both these two tools offer really beautiful landing pages for a wide variety of purposes.

And the best part?
No matter which tool and which plan you get, both of them let you publish an unlimited number of landing pages on the internet.
An Easy To Use Drag-and-Drop Builder
No matter how good a template a landing page builder offers, in the end, you’ll always need to edit it inside a drag-and-drop builder. And the one that comes with both Leadpages and OptimizePress are great.
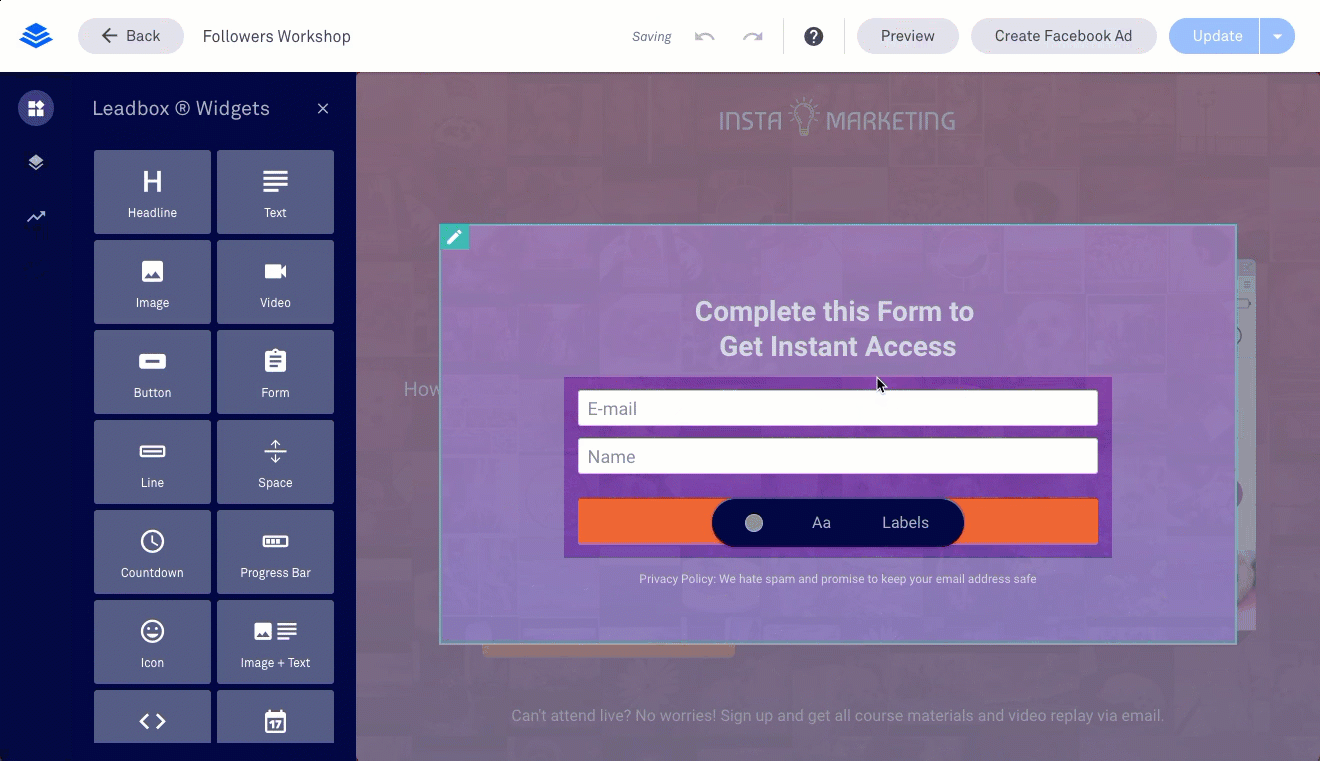
Their drag-and-drop editors are easy to use and offer many elements for you to choose from.
For example, in addition to the traditional elements like text boxes, image, and video players, you also get complete sections like pricing tables, social media boxes and more.
This is important and exciting because it means you can add literally any feature, functionality or information to your landing page without hiring an expert.
Plus, as new updates to the tools come along, new elements get added for you to use.
Easy-to-Understand Analytics and Reports
Another important feature both the landing page builders will give you is in-depth reports on how your landing pages are performing. You’ll find out information such as:
- How many visitors are visiting your landing pages.
- What’s the average duration a person stays on your landing page.
- How many people clicked on your CTA button.
… and more.
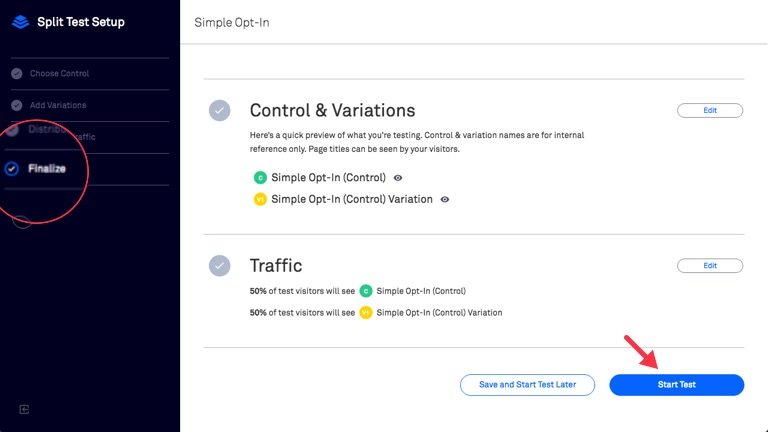
All this information will come in handy when you A/B test your landing pages.
A/B testing is when you create two seperate versions of the same landing page with one single variation in one of them. For example, you can create a duplicate of a landing page and change the heading, the CTA copy or something else and test it. The one which gets you the highest conversions wins.
And the only way you can get the data necessary to A/B test your landing pages is by looking inside the analytics report offered by your landing page builder.
Also, as far as A/B testing is concerned, both of these tools don’t let you do A/B tests in their basic plans. You’ll have to get an upgraded plan in order to access this feature.
OptimizePress vs Leadpages: What’s The Difference
By now, you’ve got a pretty good idea of what to expect from both these landing page builders. But what you really want to know is where the differences lie – and in this section, we’ll discuss exactly that.
And let me tell you in advance – the differences are pretty stark.
It’s up to you to weigh in which features matter to you so you can decide which tool to get. And we suggest you take this advice seriously because there are some major differences in pricing as well.
With that said, let’s begin comparing OptimizePress and Leadpages.
How do both tools work?
The first thing you should know is how easy it is to get started with each tool – and what it takes to set each tool up.
Leadpages
Setting up Leadpages is easy.
To get started, all you need is to sign up, pay for the plan that suits your needs (we’ll discuss plans more below) and simply get started building landing pages.
There’s no need to set up hosting or anything. Leadpages will let you publish an unlimited amount of landing page – and it will host these landing pages for you.
You don’t even need a domain (but it’s highly recommended you get one) as it helps improve your SEO and overall, makes the landing page appear more trustworthy.
OptimizePress
Setting up OptimizePress is harder than setting up Leadpages, mainly because OptimizePress works only on WordPress.
This means before you can even get started with OptimizePress, you’ll have to get a domain and hosting package on which you install WordPress. This alone can cost you up to $100/year since doing this isn’t optional like it is in Leadpages.
But to be fair, OptimizePress offers excellent step-by-step instructions on how to get hosting, buy a domain and setup WordPress. And these tutorials can go a long way to reducing the frustrations and complications non-technical people have when it comes to installing WordPress.

But once that’s done, all you have to do is install the OptimizePress plugin, buy a plan and sign in. Easy!
Templates: Which of The Two Tools Offer A Better Deal?
If you’re going to rely on templates most of the time to build your landing pages, you need to know which tool’s going to offer you a better deal on it.
Leadpages
No matter which plan you’re subscribed to, Leadpages offers all of its 150+ templates for free.
You’ll find landing page templates for ebooks, courses, webinars, upsells, thank you’s and more – all which you can sort by industry such as travel, fitness, photography etc. to help you find the perfect design.

In addition, all the landing page templates are designed for mobile as well.
OptimizePress
In the templates department, OptimizePress loses out to Leadpages in terms of value. That’s because out of the 300+ templates available on their platform, OptimizePress only offers approx. 60+ templates for free.
This is a bummer, because where OptimizePress leads ahead when compared to Leadpages is in the diverse variety of templates it offers.
Because, you see, in addition to the standard templates for landing and sales page, OptimizePress also offers:
Membership Sites Templates: Using these sites, you can give access to people to exclusive content after they successfully act on your landing page CTA. OptimizePress gives you the tools and the templates necessary to create your membership portal.
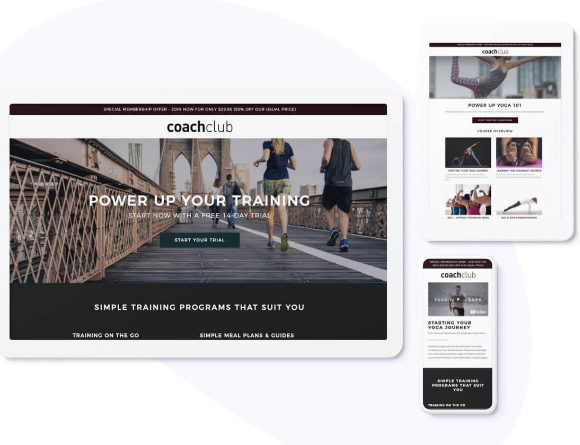
Blog Themes: Since OptimizePress works on WordPress, it offers themes for your blog section as well. This is so you can put your valuable content inside a compelling and beautifully designed blog section.

If you plan to sell courses or educational content, then these two additional features offered by OptimizePress is a must-have.
Landing Page Advertising: Which Tool Offers It?
After you create your landing page, you’ll want to advertise it in order to attract visitors and drive traffic. Because without traffic, your landing pages are literally worthless.

And if you plan to advertise your landing page on Facebook or Instagram, Leadpages is the only one of the two tools that will let you do it.
In Leadpages, after you create the landing page, you’ll be able to choose your custom audience from Facebook and place a Facebook Pixel on your landing page for easier retargeting.
But if you plan to use some other platform i.e. Google Adwords or LinkedIn, this feature is not going to be of use to you.
Pricing: Which of The Two Offers The Best Bang for The Buck?
Remember how at the start of this section we told you how pricing would play a major role – and that you should think long and hard about what features matter to you?
Well, this is where you learn why we said that…
Leadpages
The Standard Leadpages plan, provided you buy an annual subscription, costs $25/month or $300/year. In it, you get nearly all the features with the exception of unlimited A/B testing, which means you can only run A/B test a limited number of times.
The Pro plan, again if bought annually, costs $48/month or $576/month. In this plan, you unlock unlimited A/B testing, one-click signups from email, the ability to send SMS campaigns and more.

And finally, the Advanced plan, bought annually, costs $199/month or $2388/year. In this plan, you unlock the ability to integrate with services such as Pardot, Marketo and Hubspot, free Leadpages Workshops and priority phone support.
And of the three, the best plan to get is the Pro plan as it doesn’t compromise on any important features – and offers the best value for the money.
OptimizePress
OptimizePress pricing is simple. Their Core package costs just 97$/year, compared to Leadpages standard $300/year plan. In it, you get all the basic features you need to create landing page, expect that you can’t do any A/B testing.
Their Publisher package costs $197/year, which is still $100 cheaper than Leadpages standard plan and nearly 2.5x cheaper than Leadpages pro plan. In it, you unlock A/B testing, exclusive plugins archive and all other features.

And finally, OptimizePress also has a Publishers package, which costs $297/year, which is approx. 7x cheaper than Leadpages Advanced Plan, which can run you $2388 a year. It unlocks everything, gives you priority support and is the best there is.
And of the three, the best plan to get is the Publisher package as it doesn’t compromise on any important features – and offers the best value for the money.
Conclusion: Which One Wins?
Crazy though it will sound, it still depends on you.
For example, if you don’t want to go through the hassle of setting up WordPress, want access to the 150+ templates offered for free and want direct access to Facebook ads, Leadpages is one to go for.
But if you rather skip through these features, and want the core landing page building tools for a lot less of the price, get OptimizePress.
In our opinion, the value it provides isn’t just something you can say no to. No other landing page builder with OptimizePress level of capability exists in the market for that low of a price – and therefore, in the context of this article, this is the landing page builder we recommend.
ConvertKit vs. AWeber: Decide Which Email Marketing Tool Will Work for Your Business
You know the money is in the (email) list. And you’re looking for a great email marketing software which will help you make that list, grow that list, and make money from that list.
Well, you’re in the right place.
In this article, I’m going to talk about two of the most awesome email marketing tools ever: ConvertKit vs. AWeber.


Which of these two tools are right for you?
That’s what you and I will try to figure out in this article. And I say ‘try’ because ultimately, there is no definite, single answer. Maybe ConvertKit’s automation features will woo your heart or maybe you’ll fall for AWeber’s better email editor.
Right now, I don’t know – and neither do you. So let’s find out…
ConvertKit & AWeber: What Kind of People Are These Tools Made For?
Creators who have just bought hosting for the first time. Budding entrepreneurs who are still figuring out how Shopify Works. Bloggers who’ve just installed WordPress.
That – and anyone who isn’t a multi-million dollar company and is just getting their online business off the ground- that’s the kind of people for whom both these tools are made for.
Why do I say that?
Because of three main reasons:
- They have affordable pricing that starts at a price you can actually afford.
- You don’t have to deal with unnecessary features that aren’t related to email marketing.
- It doesn’t take a thousand years to learn how both these tools work.
In short, the highlight of both these email marketing tools is that they do one job: Build, grow and monetize your email list. And they do that job really well.
In the next section, we’ll show you the exact features these tools have – and what makes them different.
ConvertKit vs. AWeber: What You Need To Know About Their Features
But before we get started, here’s one thing you should know.
Both ConvertKit and AWeber are really similar tools. This is because they serve the same audience, and hence, have many similar features.
What actually makes ConvertKit and AWeber different is the unique ways these features work in both their environments.
For example, both ConvertKit and AWeber provide you with a system to organize your subscribers using tags and segments. But the way this system works in both tools is drastically different than you’d think.
That’s why, to help you properly understand the difference between both these email marketing tools (so you can choose the best email marketing tool for your business), we’re going to systematically look at the feature they provide – and then compare the different ways each feature works in each tool.
Before we get to my comparisons, check out my full ConvertKit review here to learn more!
Let’s get started…
ConvertKit Vs. AWeber: Feature List + Comparison
In email marketing, you need to do these three things:
- Managing Your Subscribers: The first thing you every email list needs are subscribers. Both ConvertKit and AWeber have their own way of letting you capture new subscribers, adding them to list(s) and segmenting them which we’ll discuss in this section.
- Writing Your Emails: The second thing you need to do is write emails for your broadcasts, autoresponders and automated campaigns.
- Automating Your Email Marketing Process: The last thing you need to put together is the automations of your emails. This is what lies at the heart of every email marketing software. We’ll discuss in-depth in this section how both ConvertKit and AWeber approach automation.
You can think of these things as ‘steps’ you need to accomplish to fully create your automated email marketing campaigns.
That’s why, I’ve divided this section into the above three steps – and listed (and compared) each feature of both the tools under each step so you can easily understand how ConvertKit and AWeber are different.
Step 1: Managing Your Subscribers
To start your using your email marketing software, you’re going to need to add some subscribers into it first.
There are two ways you can do that:
- If you’re starting from scratch and don’t have any subscribers, you’ll want to create opt-in forms to put on your website or on a domain.
- If you already have a subscriber list, you’ll want to import it as a CSV file into your email marketing software.
This brings us to discussing…
Feature # 1: Forms
In ConvertKit, you can build an opt-in form or a landing page to collect emails of your new subscribers. But in AWeber, you can only create an opt-in form.

However, in AWeber, you get 70+ templates for your opt-in forms, each designed for a different purpose. But in ConvertKit, you get three kinds of forms which aren’t even templates, just different versions (full, minimal and stripped) of the same design.

But it’s important to note that you can also create a landing page on ConvertKit and in this case, the template selection is much more diverse. In AWeber, landing pages are pretty much nonexistent.
Now, moving on to the similarities, in both these tools, you can customize pretty much everything about your form. You can change the colors, the images, the text, the location of the elements and even add your own custom CSS.
And the best part?
If you don’t have a website, both ConvertKit and AWeber can host the forms (and landing pages too in ConvertKit) which you create in each respective tool for you. No domain required!
Once you’ve started getting subscribers, you’ll need an intelligent way of sorting them based on their interests.
This brings us to…
Feature # 2: Segmentation
Once you start gathering subscribers, you’ll want to segment them based on how their interactions with your emails.
For example, let’s say you have a photography course. One evening, you decide to send an email to all of your 500 email subscribers promoting it. Next morning, you’re delighted to see 5 people have bought your course.
The smart thing to do would be to send them emails showing how they can make the best of your course – and even send them advanced tips.
To do that, you’ll want to segment the 5 people who’ve bought your course so only they receive your emails.
Both ConvertKit and AWeber approach segmentation in different ways. Let’s discuss how:
ConvertKit Segmentation:
In ConvertKit, you can only create one list of subscribers. That list can then be categorized using tags.

For example, for those customers who bought your photography course, you can tag them as ‘photography_course_buyers’. If someone clicked on the link to your course but didn’t buy it, you can tag them as ‘photography_course_interested’.
Once you create the tags you want, you can organize your tags further into ‘segments’.
For example, suppose you have three courses: photography, photoshop, and web design. You want to divide your list depending on what subject your subscribers are interested in.
In this case, you’ll want to add the tags ‘photography_course_buyers’ and ‘photography_course_interested’ into a segment – and repeat the process for your other two courses as well.
And in this way, you can manage your subscribers in ConvertKit.
AWeber Segmentation:
AWeber’s segmentation is more robust, mainly due to one feature: You can create multiple lists – with each list having its own subscribers, tags and segments.

The rest of the process i.e. adding tags and segments – works in a similar fashion to ConvertKit. You add the tags you want to a subscriber and add those tags to a segment to organize your subscriber list.
But since AWeber lets you create multiple lists, you can manage different businesses and websites within one account without having to pay for another.
Step 2: Writing Your Emails
Ok. Once you’ve added your subscribers and now know how to segment them, we can move on to writing emails for them.
Both ConvertKit and AWeber give you three ways to create an email
- As a Broadcast: Broadcasts are one-off emails you can send to all your subscribers.
- As an Email Sequence: An email sequence is a sequence of emails which are sent over a period of time to a subscriber. For example, if you want to send a 5-part email course, you can send that automatically using an email sequence.
- As an Automation: An automation is when you create tie in your email sequences – and the actions your subscribers take when they interact with them – with specific triggers which leads to a fully automated email marketing campaign.
This isn’t anything new. Every email marketing tool lets you do this. The difference is when it comes to actually creating emails. Which of the two tools is best for that?
ConvertKit Email Editor
ConvertKit’s email editor is nothing out of the extraordinary. And that’s what makes it special.
Crazy, right?
Well, here’s why:
In ConvertKit, you can only create text-based emails. No fancy templates. No nothing. Not even videos.

Just plain simple text – combined with some basic color, font and size editing along with some pictures and gifs (yes!). That’s what your emails are going to look like in ConvertKit.
This is because ConvertKit claims that text-based emails have a higher conversion rate and will help you avoid most spam filters.
But, I really wish ConvertKit would have given the option to create fancy emails if we wanted too. Completely taking away templates seems like a drastic move.
AWeber Email Editor
AWeber’s email editor is far superior that ConvertKit’s basic text editor.
First of all, you can create both simple text-based emails and fancy template-based emails. Your choice (as it should be). And you get many templates to choose from (over 700+!) for your emails.

In addition, AWeber has a really awesome ‘elements’ panel on the left side of the editor which allows you to drag and drop any ‘element’ you need in your email.
This means you can easily add images, a text box, social media share icons, and even coupon codes to your emails in an instant. All you need to do is edit the elements. No need to spend time messing with the arrangement of the elements on the email.
But you’re still not finished.
Once you create your emails, one final thing which still remains is…
Step 3: Automating Your Email Marketing Process
The importance of this step cannot be underestimated.
Automating your email marketing process is directly tied with the activities you did in step 1 and 2.
In fact, it isn’t an understatement when I say that the success of your whole email marketing depends upon how well you automate your email marketing process.
That’s because, without effective automation, you won’t be able to:
- Categorize your email subscribers into relevant tags and segments when they interact with your emails.
- Which means you won’t be able to engage them with the relevant content your email subscribers deserve.
- This will lead to bad conversion rates, failed campaigns and ultimately, low sales.
Automations stop this from happening.
In our example in the first step, we mentioned how you can tag the people who bought your photography course with ‘photography_course_buyers’ tag.
Well, with automations, you don’t have to do that. The moment a subscriber of yours buys your course, your email marketing software can tag them based on that ‘trigger’ i.e. a subscriber purchasing.
Here’s how ConvertKit and AWeber approach this crucial step.
AWeber Automation:
In AWeber, creating automation is a simple process.
You simply select which subscribers, tags, and segments you want to put in an email campaign. Then, you send them the relevant emails – and assign additional tags at the end of each email to trigger the next email.

And whenever you want, you can add the subscribers you tagged from previous automation to a new email marketing campaign by simply creating new automation.
But there’s the main problem with AWeber:
Every single automation is created separately in a new window. This means whenever you want to create a new automated email marketing campaign, you’ll have to do that in a new window.
And because of that, you won’t be able to see how your different automations ‘connect’ with each other.
ConvertKit Automation:
In the automation game, without any doubt, ConvertKit wins.
When compared to AWeber, ConvertKit offers a much more visual, coherent and better automation system.

You get a visual graph in which you can easily start with an email, tag it with a specific action your subscribers take when reading it and then follow up with other emails and campaigns.
Yes… campaigns.
Unlike AWeber, ConvertKit lets you connect email campaigns within automation. And since it’s all visual, you can see exactly in which campaigns your subscribers will go based on the actions they take.
In my opinion, this feature alone single-handedly makes ConvertKit a more powerful email marketing tool than AWeber – just because it is so much better at automation.
The Final Verdict: Which is Best for YOU?
As with all things, pricing often plays a bigger influence on our decision – simply because of many of us have tight budgets (more than we’d like).
Well, the good news here is both ConvertKit and AWeber offer similar pricing, with AWeber’s pricing getting better the bigger the plans get. But the difference isn’t that much that AWeber should sway your decision based on pricing alone. And thankfully, both give you access to all their features regardless of which plan you get.
Here’s a screenshot of both their plans you can check out:
ConvertKit Pricing
You can get a free trial of ConvertKit and test out this email marketing platform for yourself today!
AWeber Pricing
You can start your Free Trial with Aweber today!
The main difference in both these tools is this:
- AWeber lets you build separate lists and has a better way of segmenting your subscribers. If you have multiple businesses, you’ll save a lot of money because, with ConvertKit, you’ll have to create another account to get another list.
- ConvertKit gives you a better automation tool than AWeber. You can clearly see how you different email campaigns interlink with each other using the visual builder. In AWeber, each automation is in a separate window which makes things disjointed as time progresses.
With that being said, both tools are awesome and don’t have any deal breakers which make the other one the outright winner. We can confidently recommend both, depending on your needs.
If I had to choose one that’s best overall, I would say I prefer ConvertKit’s automation tools and visual builder the best and that’s the one I would choose!
So, based on the features we’ve discussed above, which email marketing tool will you choose?
Further reading:
ConvertKit vs GetResponse: One is Better!
When you’re faced with choosing an email marketing tool for your business, remember this: You shouldn’t be on the lookout for a tool that has ‘all the features’. Rather, you should be getting a tool – or any kind of software – based on whether it has the right features. That’s why today I compare ConvertKit vs GetResponse: Which tool will work best for your business?
For example, if you’re a solo entrepreneur who wants to sell an online course on your website, you don’t probably need a full-fledged marketing software with CRM, ad tracking and advanced segmentation. But, if you run a million-dollar ecommerce business, an email marketing software without these features is no good for you.
That’s why, when ‘shopping’ for email marketing software, your goal should be to choose one that’s a fit for your business.
ConvertKit Vs GetResponse: Which Email Marketing Tool is Right For You?
In this article, we are going to compare two popular email marketing tools: GetResponse and ConvertKit.
None of these tools are, so to say, ‘bad’.
But, because of the huge difference in features, only one is going to be the right fit for you. We’ll contrast the features in both tools which will help you decide which one will suit the needs of your business.
And again, that’s what ultimately matters.
Before we get started on that, though, here’s a brief intro of both tools – who they’re for and what they’re good at.
ConvertKit
If you are a creator, a one-man business or a solo marketer who sells limited products or operates within a niche, ConvertKit is designed for you.
Here are some features which make ConvertKit unique:
- It is a ‘subscriber-centric’ email marketing software. This means it provides great functionality that makes it easy to segment your audience and nurture them with targeted content.
- The tool is easy enough to be operated by one person or small teams, yet the features it gives you are powerful enough to support your growing subscriber-base – and business.
- Its automation tools are as good, or even better than what you get from ‘bigger’ email marketing tools like ActiveCampaign or InfusionSoft. Plus, the software is a pleasure to use because it’s so easy to understand.
With that being said, ConvertKit is just an email marketing tool – but a really good one. But you won’t find a great landing page builder or a CRM tool bundled with it. For that, you’ll have to subscribe to other marketing tools and integrate them with ConvertKit.
If you are really interested in learning more about ConvertKit, please read my full Convert Kit review here.
GetResponse
If you run a business that stocks a high number of products, have a sales and/or marketing team, and are particularly focused on developing relationships with your leads and customers, GetResponse is a perfect email marketing tool for you.
Here’s are the features which make it unique:
- It is a ‘customer-centric’ email marketing software. This means its functionality can help you build a lead database, follow-up on them with personalized emails and convert them into your customers.
- It has multiple tools bundled together under one roof. This means you’ll need a dedicated team to fully take advantage of GetResponse.
- It is a tool that’s focused on helping you make sales. That’s why GetResponse isn’t just an email marketing tool. You also get a CRM service, landing page and webinar builder – and much more.

In essence, Getresponse is a great all-in-one marketing suite with some pretty diverse tools. But it isn’t easy to operate single-handedly. To take full advantage of all the features, you’ll need a dedicated team for it.
Here’s why:
With GetResponse, don’t think of it as just an email marketing tool. Rather, view it as ‘a complete CRM (customer relationship management) software which comes with email marketing capabilities’.
And in conclusion, the main difference between both tools is this:
ConvertKit IS an email marketing tool. GetResponse HAS an email marketing tool.
ConvertKit Vs. GetResponse: Feature Walkthrough
The difference between the number of features ConvertKit and GetResponse have is huge. Here’s a helpful overview of exactly what features you get with ConvertKit and GetResponse:
|
Features |
GetResponse | ConvertKit |
| Email Builder | Yes | Yes |
| Form and Landing Page Builder | Yes | Yes |
| Survey Builder | Yes | No |
| Marketing Automation | Yes | Yes |
| Subscriber Scoring Based on Activity | Yes | No |
| Webinar Marketing | Yes | No |
| CRM | Yes | No |
| List Building and Segmentation | Yes | Yes |
| Email Autoresponder | Yes | Yes |
So let’s start by taking a detailed look at what it’s like to use both ConvertKit and GetResponse. This will help you see better what each tool is capable of – and what you can really accomplish with them.
ConvertKit: The ‘Subscriber Centric’ Email Marketing Tool
With any email marketing tool, the first thing you should check is how good it is for writing emails, creating autoresponder campaigns and automating the whole process. In addition, you also want to examine how well of a system it provides you for getting and managing your subscribers.
First, let’s start with the form builder of ConvertKit which is how you’ll gain subscribers in the first place:
ConvertKit Form Builder
In ConvertKit, there are two ways you can capture the emails of your subscribers to grow your email list:
- Forms
- Landing Pages
I’ll be honest right from the start, there aren’t a lot of customization options. There are just three templates for creating forms and similarly, a limited amount of templates to create landing pages.
But overall, the functionality of these are pretty good.
First of all, you can host your forms and landing pages on ConvertKit itself. You don’t even need a website. Second of all, if you decide to put it on your website, you can set triggers as to when you want your forms to appear. You can put them in between text, as a pop-up box or as a slider.
In addition, after people subscribe through your forms, you can redirect them to a thank you page, send them a downloadable file and more.
ConvertKit Email Features
The Editor
In ConvertKit, you get a WYSIWYG (What You See Is What You Get) editor in which you can write your emails.
And to be honest, it is a pretty barebone editor.
There aren’t any templates to get you started. This means you can only add text, images and GIFs to your emails. The best you can do is change the background and element colors in your emails – and that’s that.
ConvertKit says they don’t include emails because ‘barebone’ emails have a higher chance of converting.
But even then, the functionality of ConvertKit’s editor is pretty limited. You can’t drag and drop elements like text, images, GIFs and other cool widgets to create your email. It’s like you’re working in a Word processor.
Email Autoresponder (Campaign Creator)
Like any email marketing tool, ConvertKit’s email autoresponder is great.
You can easily create a series of emails for different marketing campaigns – customize the timings as to when you want to send each email, choose the dates when you want each email to be sent – and more.
In addition, you can create a broadcast, which is a one-time email you can send to all your subscribers.
Overall, ConvertKit’s user interface of writing emails and creating campaigns is pretty solid. On the left side, you can see all your emails in the sequence – and quickly navigate to the one you want to edit.
The only thing that’s really lacking when it comes to email in ConvertKit is the editor. Whether you love its simplicity or not – is up to you.
ConvertKit Subscriber Management System
To manage your subscribers, ConvertKit gives you just one list. And in that list, you can divide your subscribers using ‘tags’ and ‘segments’.
Tags are simply how you divide your subscribers based on their demographics, activity or relationship with your business. And segments are how you categorize different tags to further create the user groups you want. Nearly most of the time, this system works well.
This is because tags act as custom fields and you can put as many tags as you want in a subscribers profile. And since segments allow you to further organize your tags, you can pretty much divide your subscribers into any kind of audience you want.
The only problem is you get one list. This is a bummer because if you are running two separate businesses or websites, you can’t create another list of subscribers. For that, you’ll have to create a whole new account.
ConvertKit Automations
ConvertKit gives you a full section called ‘automation’. This is a powerful feature where you can automate nearly every single aspect of your email marketing. Here, you can do things like:
- Start an autoresponder campaign when a subscriber joins your list.
- Tag subscribers based on how they interact with your emails.
- Trigger ‘actions’ based on something a subscriber does (or doesn’t do).
- Connect multiple autoresponders together and send them automatically to the right audiences.
Ultimately, automations in ConvertKit is a powerful service that as you use it, the easier it will make email marketing for you. Subscribers will automatically receive new emails, get segmented into tags and segments, be added to autoresponder campaigns and more – all without you having to do a thing!
GetResponse: The ‘Customer-Centric’ Email Marketing Tool
With GetResponse, you get many marketing tools for your business. Let’s break them down one by one and see how GetResponse differs from ConvertKit as a whole:
Email Marketing
In GetResponse, you truly get a fully featured email marketing tool for your business.
Right of the bat, there are 500+ unique email templates for you to choose from for every kind of email imaginable. And once you land in the email editor, you can a really intuitive drag-and-drop builder that allows you to simply drag text, images, videos and other cool elements onto your emails. Plus, there is an HTML version of the editor that lets you create simple text-based emails like in ConvertKit.
If that’s not enough, you also get 1000+ professional iStock photographs to put in your emails.
Plus, you can create autoresponder campaigns just like with ConvertKit. But unlike ConvertKit, you get a cool ‘calendar view’ in GetResponse with which you can see exactly which dates which emails in the campaign will be sent to your subscribers.

Landing Pages
GetResponse’s landing pages deserve its own section. That’s because when compared to ConvertKit, or any other email marketing tool really, they offer a much better selection (and better designed) landing page templates. There are literally hundreds of them with beautiful graphics and vectors which make it a pleasure to use.

There are templates for Opt-in pages, squeeze pages, promo pages, downloads pages and more. Plus, like for emails, you get 1000+ iStock images and an image editor to edit them to suit your needs.
With ConvertKit, if you truly want to create a professional landing page, you’ll have to subscribe to a service like Leadpages or Unbounce. With GetResponse, you don’t need to.
But if you plan to put forms on your website only, this feature of GetResponse might not be of much use to you.
Webinars, Forms, and Surveys
In GetResponse, you get more ways to capture subscribers.
Sure, like ConvertKit, you can create forms and landing pages to get emails. But other than that, what you also get are webinars and surveys.
This is a feature which very few email marketing tools have.
In GetResponse, you can easily host a live webinar and create forms which let you capture the email of your attendees. Your subscribers can easily join your webinars using their phones and tablets.

Plus, the Webinar tool in GetResponse isn’t ‘basic’. Your attendees can chat with each other, you can write things in a virtual whiteboard, create polls, surveys and much more.

It really is a full-fledged webinar solution.
And finally, GetResponse gives you a full survey tool to create professional surveys with which you can get emails (and valuable feedback) of your website visitors.
CRM Tool
To be honest, GetResponse’s CRM isn’t a feature-packed as other dedicated CRMs like SalesForce. But it’s more than powerful for you to keep track of your ‘leads’ and turn them into your customers.

For starters, you can a five-column dashboard which is divided into ‘New Opportunity’, ‘Qualified’, ‘Presentation’, ‘Won’ and ‘Lost’.
It is an extremely visual place where you can put your leads and prospects in the above categories, assign users to follow-up on them and custom fields and tags, right within the CRM tool.
Plus, you can add notes, events and time-based to-dos so you always know how to follow up on each lead.
Marketing Automation
Finally, tying all this together is GetResponse’s automation feature. Like ConvertKit, it is visual, lets you set triggers which activate based on behavior, allows you to link your many autoresponder campaigns and much more.

And while it is similar to the one in ConvertKit, it is so much more powerful in its functionality.
Because with ConvertKit, you are only able to automate your email marketing. But with GetResponse, you can automate activities that are happening inside your webinars and CRM as well.
This significantly increases the scope of what you can automate in GetResponse, and allows you to tie not just your email marketing, but also sales activity and live webinars together as well.
Final Deciding Factor: Pricing
If pricing were similar, the clear winner would definitely have been GetResponse. But in this battle, this is not the case.
Convert’s pricing starts at $29 per month for 1000 subscribers. The more subscribers you have, the more you’ll pay. But no matter which plans you get, ConvertKit gives you all of its features.
But GetResponse has different pricing. Their basic plan starts at $15 for 1000 subscribers and gives you just email autoresponders and the ability to create landing pages. This plan isn’t that good – and if you want something like this, you should get ConvertKit instead.
But if you want to open up features such as the webinar, full landing page builder and CRM, you’ll need to subscribe to the $49 plan, which when compared to ConvertKit, gets you more features at a better price.

But in the end, it all depends on what you want.
Do want a service that’s fully dedicated to email marketing? Or do you want a service that also takes care of your sales with a CRM, gives you a webinar tool + provides email marketing? The decision is yours…
To make your decision, how about doing some further reading?
ConvertKit vs. MailChimp: Who Wins?
The battle has started. The war between two of the most popular email marketing tools on the planet: ConvertKit vs. MailChimp Which one is best?
Which of the two tools should you choose for your next email marketing campaign?
MailChimp comes in first, touting its many advanced capabilities that ConvertKit doesn’t have. ConvertKit looks upon it smugly, claiming to have a more superior system of email marketing.
Both are right – and capable in their own ways. But unfortunately, only one will win your heart.
So which is it?


Will you choose the lovable MailChimp with its adorable monkey mascot? Or will you choose ConvertKit, where all the cool kids are hanging out?
To help you decide, we’ll compare both these tools one-on-one in this article. There will be no mercy. Strengths and weaknesses, pros and cons, features, quirks – we’ll discuss it all.
So, without further ado, let the games begin!
MailChimp Vs. ConvertKit: A Brief Introduction
Before starting this review, I think it’s important you know which kind of audiences Mailchimp and ConvertKit want as customers.
MailChimp loves to have small businesses on its platform, especially small ecommerce stores. All their current features and future updates are geared towards making email marketing crazy simple and powerful for people who sell products.
To show you just how much Mailchimp loves small businesses, here’s a recent tweet of them confessing their love:

ConvertKit, on the other hand, has a huge crush on ‘creators’. They make it extremely clear that all their features, services and long-term strategy will go towards making email marketing easy and powerful for creative professionals.
Also, here’s ConvertKit literally confessing they exist for creators:

This means MailChimp wants small businesses to use its email marketing services and ConvertKit wants creators to use theirs.
Here’s a quick rundown of the services both email marketing tools offer:
ConvertKit Highlight Features
- Build website forms and landing pages so your visitors can subscribe to your email list: Unlike Mailchimp, ConvertKit only lets you create website forms and landing pages only.
- Organize your list with tags and segments: ConvertKit keeps things simple. All your contacts get stored in one list. That list can be sorted into tags and segments. As we’ll discuss down below, this may seem less powerful than MailChimp, but it isn’t.
- Create email sequences and one-off broadcasts to send to your subscribers: ConvertKit has two separate sections for sending emails. The broadcast section lets you send single emails to your subscribers and the sequences sections let you create and send a series of automated emails.
- Build a visual automation workflow with which you can see the exact journey each of your subscribers will take: This is one area where ConvertKit absolutely trumps MailChimp. The automation section lets you combine workflows and email sequences to help you create a truly awesome email marketing automations.
- View detailed reports of your emails, broadcasts, sequences, and subscriber list: Just like Mailchimp, ConvertKit lets you see the performance of your emails, broadcasts, sequences and subscribers listing, including tags and segments.
Don’t forget to check out my full ConvertKit review!
MailChimp Highlight Features:
- Create website forms, landing pages, Facebook ads, Instagram ads, Google ads and even physical postcards: With MailChimp, you aren’t just limited to getting subscribers through forms and landing pages. If you don’t have a website, you can also create Facebook, Instagram and Google ads as well.
- Organize your list of subscribers into lists, segments, groups and tags: In MailChimp, you can create multiple lists for your subscribers. This is really useful if you have more than one website or businesses – and want to keep each business’ subscriber list separate. Within a list, you can organize your subscribers into different segments, groups and tags.
- Send automated emails when a subscriber completes a specific action you want, gets added to a specific group, segment or tag or if an event or date passes: Using MailChimp, you can send emails to your audience when they take the specific action you want. These emails can then be followed by other emails which trigger after a set date or another action taken by the user. In this way, you can create automated email campaigns in MailChimp.
- Get personalized reports on how your forms, automations, emails and ads are performing – and the state of your subscriber list: You can view how your ad campaigns, landing pages, emails and website forms are performing. You can see open rates, click rates, people subscribed, people unsubscribed and more.
ConvertKit Vs. MailChimp: Advantages and Disadvantages of Each
By now, you’ve got a general idea what each of these tools is capable of.
And since this article is a comparison between two tools, we’re not talking about the basic functionality of them. Both these tools are capable of the basic stuff… you know… creating emails, building drip campaigns, A/B testing, reporting etc.
What we’ll talk about in this article are the main things which differentiate both these tools.
This way, you’ll get a better understanding of which tool will suit your needs…
That being said, here’s what we’ll talk about both the email marketing tools in this article:
- The ‘builder’ tools and their functionality.
- How they let you manage your subscribers (super important).
- How they let you automate your email marketing process.
Let’s start by taking a look at each tool’s ‘builders’:
ConvertKit Builder:
ConvertKit gives you two ways to capture subscribers for your email list:

- Website Forms: You can build forms which you can display on your existing website. Or display it on a separate web page creating in and hosted by ConvertKit.
- Landing Pages: Landing pages are stand-alone web pages you can build in and host on ConvertKit. You can directly take your subscribers there and host it separately on your domain or in ConvertKit.
As far as templates go, ConvertKit doesn’t have a lot of them.
Both the landing page and form templates are extremely limited. And the only true way you can customize your forms in MailChimp is by adding custom CSS.
MailChimp Builder:
The MailChimp builder comes loaded with much more functionality. You can use MailChimp to create:

- Forms: Similar to ConvertKit, you can build forms and put them on your website, but you cannot host them on MailChimp.
- Landing Pages: You can build landing pages with which your subscribers can directly buy your products.
- Social Media and Google Ads: This is a feature which only Mailchimp has. You can build Facebook, Instagram and Google Ad campaigns using the templates provided or from scratch.
- Postcards: ‘You’ve got mail!’ – literally. Because MailChimp lets you send physical postcards to your esteemed customers. Straight from the U.S of A.
Also, MailChimp offers much more templates that ConvertKit, which provides more exciting possibilities for you to customize and create personalized forms, landing pages and more.
Now, let’s take a look at how each of the tools let you manage their subscribers…
ConvertKit Subscriber Management System
First, it’s important to note that ConvertKit only lets you create one list – and not a single more than that.

And in the list, there are two simple ways for you to organize your subscribers.
- Tags:
Each subscriber can get a tag based on their behavior i.e. an item they purchase, a link they click, a form they enter etc. It’s up to you which tag you want to give a subscriber based on which action they tag.
Suppose you want to identify those subscribers who’ve bought something from you. For that, you can tag your subscribers with tags such as ‘customer_ebook’, ‘customer_course’, ‘customer_videoseries’ etc depending on the product they’ve bought.
- Segments:
Once you tag your customers, you can organize your tags into segments. Segments are a way to organize those tags which share the characteristics you want.
Suppose you want to send an email sequence to all your subscribers who are customers. For that, you’re going to create a segment called, let’s say, ‘all_customers’ and put all your ‘customer_’ tags in that segment. This way, you will be easily able to send emails to just your subscribers.
MailChimp Subscriber Management System
MailChimp takes a totally different approach when it comes to subscriber management.
For one, you can create multiple lists of subscribers. This will allow you add subscribers from different websites or businesses under one account – something you can’t do in ConvertKit.
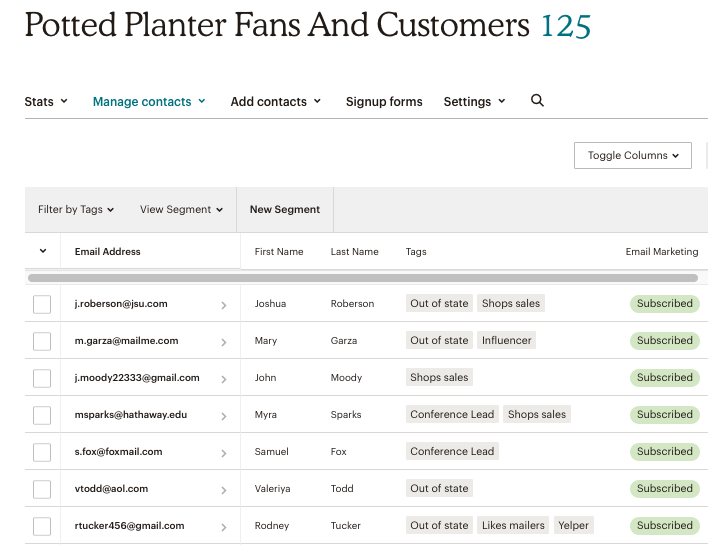
Mailchimp offers three ways to organize subscribers in a list:
- Tags:
In MailChimp, you can also tag your subscribers to further identify them. But unlike with ConvertKit, you have to manually tag them. There is no way to automate this process.
- Groups:
Your sign-up forms can have different options your subscribers can choose before they subscribe. Depending on the option they choose, they’ll be placed in that group.
- Segments:
In Mailchimp, you can segment your subscribers based on purchase activity, geographical and personal information, tags and segments and much more.
In ConvertKit, you have to create tags yourself and then assign that tag to a specific behaviour. In Mailchimp, this happens automatically and you can choose the segment you want. This is definitely more convenient, but a bit less flexible when compared to ConvertKit.
Now that you understand how you can organize your subscribers in both these tools, let’s move on to the final differentiating factor between the two, i.e. automation.
ConvertKit Automation:
If there is one place where I can confidently say ConvertKit trumps MailChimp, it’s in its visual automation section.
You see, ConvertKit lets you see exactly what your whole email marketing automation looks like – and lets you edit it right from the visual graph!
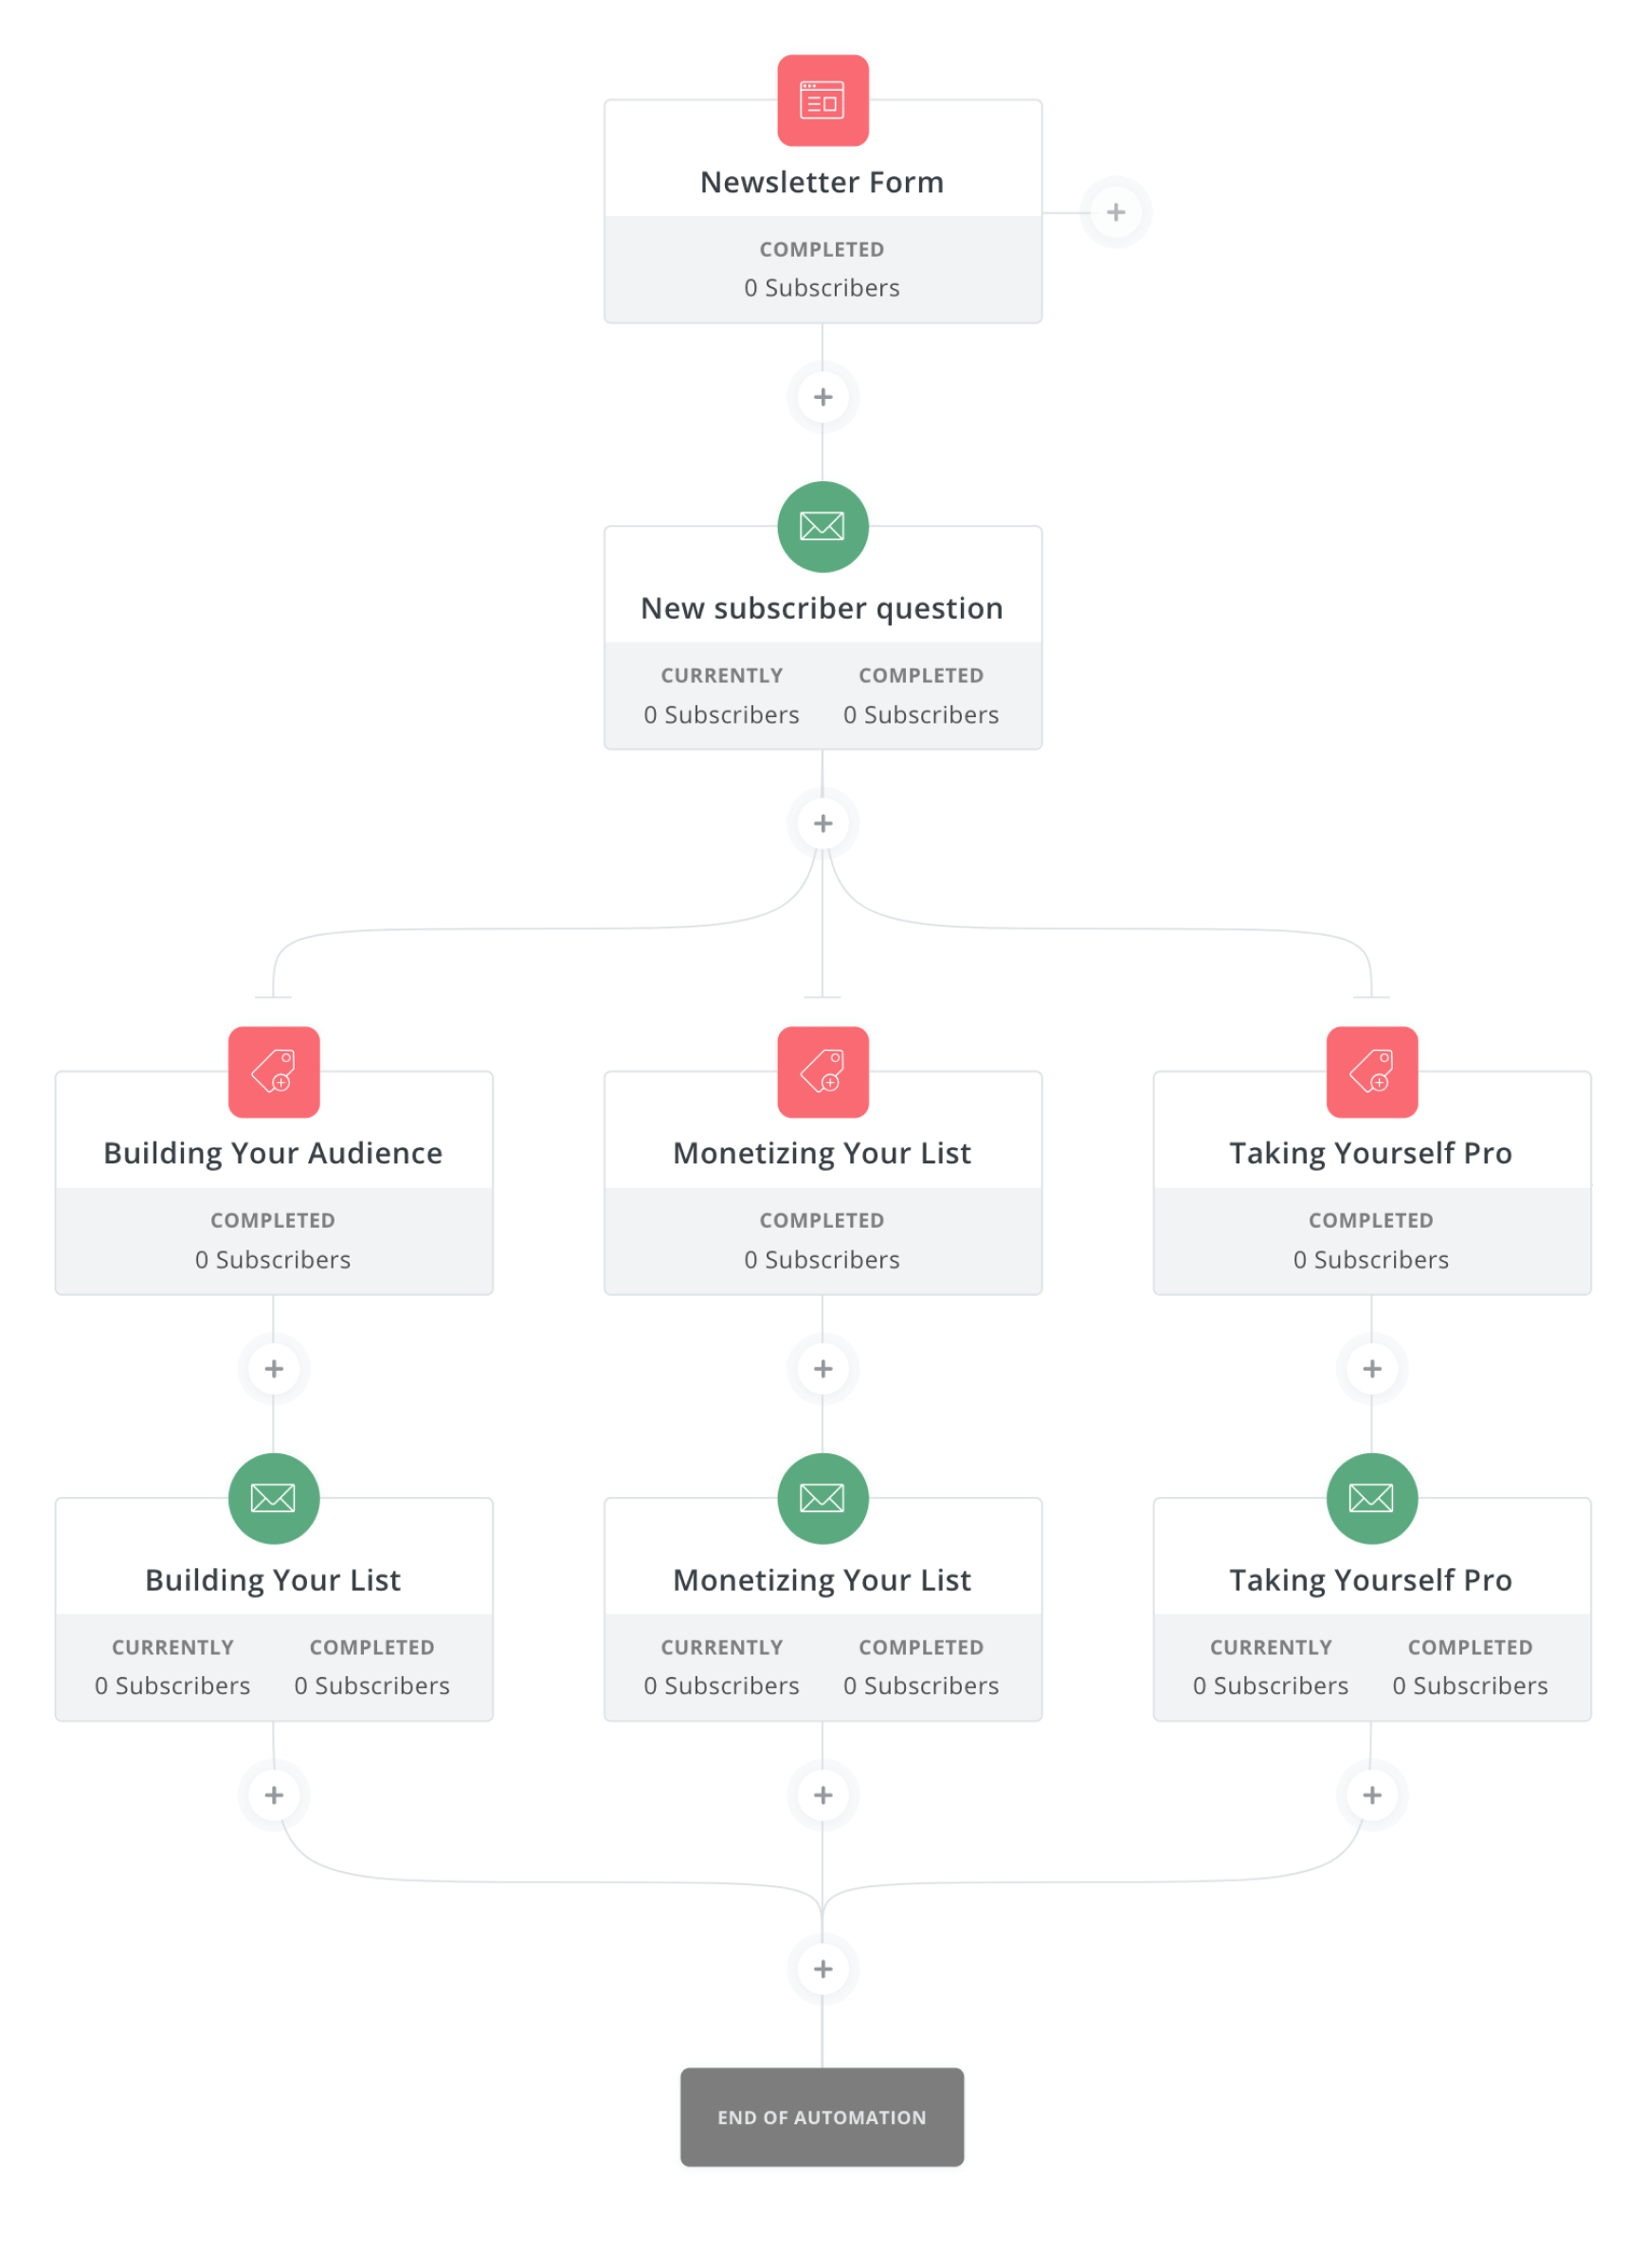
This feature is really very awesome.
I mean, you can directly see which form a subscriber will enter through, put them into an email sequence you’ve created, edit that email sequence, assign the subscriber a tag or put them into a segment based on the action they take and much more.
It’s truly an amazing automation system not unlike the one found in bigger ‘business-class’ email marketing softwares.
MailChimp Automation
Mailchimp has its own unique take on automation, but it isn’t quite as well built as ConvertKit is.
What I mean to say is there is no way to see exactly how your whole email marketing system is operating. Everything looks disoriented and there’s no way to see the moving parts within your campaign.
Other than that, you can definitely still automate your whole email marketing process.
You can create complete email sequences and assign them to be sent to subscribers based on the actions they take or the tags they get assigned to.
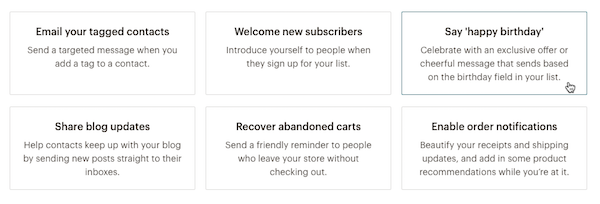
More than that, Mailchimp offers pre-built automations right from the start. There’s an automation for a welcome sequence, cart abandonment, order notifications and much more.
How Much Does This Cost? A Look at Pricing
ConvertKit starts at $29 for its most basic subscription, which limits you to 1000 subscribers but gives you access to all its features, which is the case no matter which plan you subscribe to. The more subscribers you have, the more you’ll have to pay. You can calculate your pricing here: https://convertkit.com/pricing/
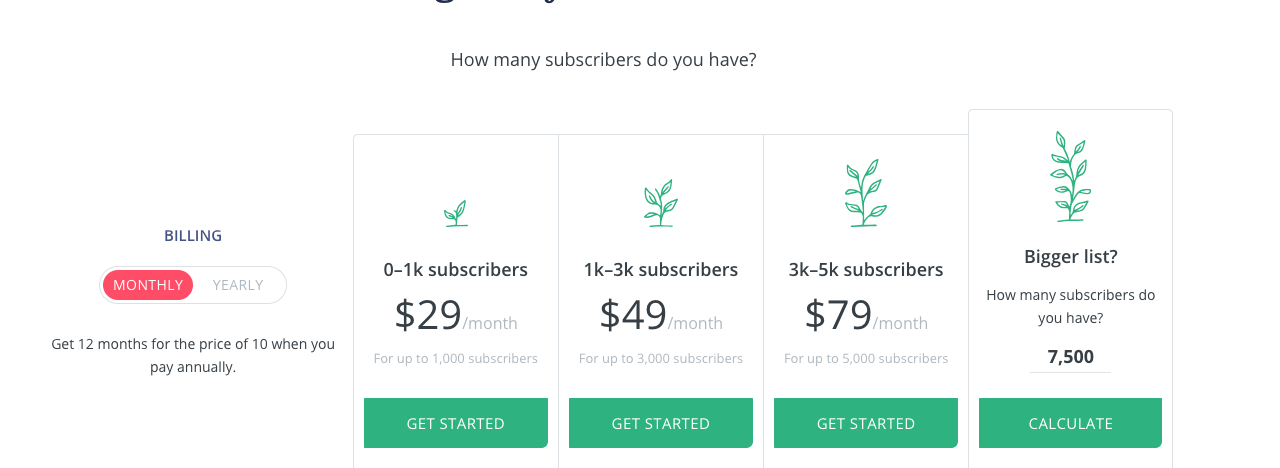
You can start your free trial here — get 14 days for free!
Mailchimp, on the other hand, offers more complicated pricing.
Their biggest advantage is they offer a free service which limits you to 2000 subscribers and 12000 emails / month – but restricts access to features such as advanced segmentation, which lets you apply even more detailed filters to your subscribers and more, delivery by time-zone and more.
Their basic plan starts at $10 and limits you to the 500 subscribers but opens up functionality such as predicted demographics, which lets you see the gender and age of your audience, delivery by time-zone and more. Similar to ConvertKit, the more subscribers you have, the more you’ll have to pay. You can calculate your pricing by going here: https://mailchimp.com/pricing/
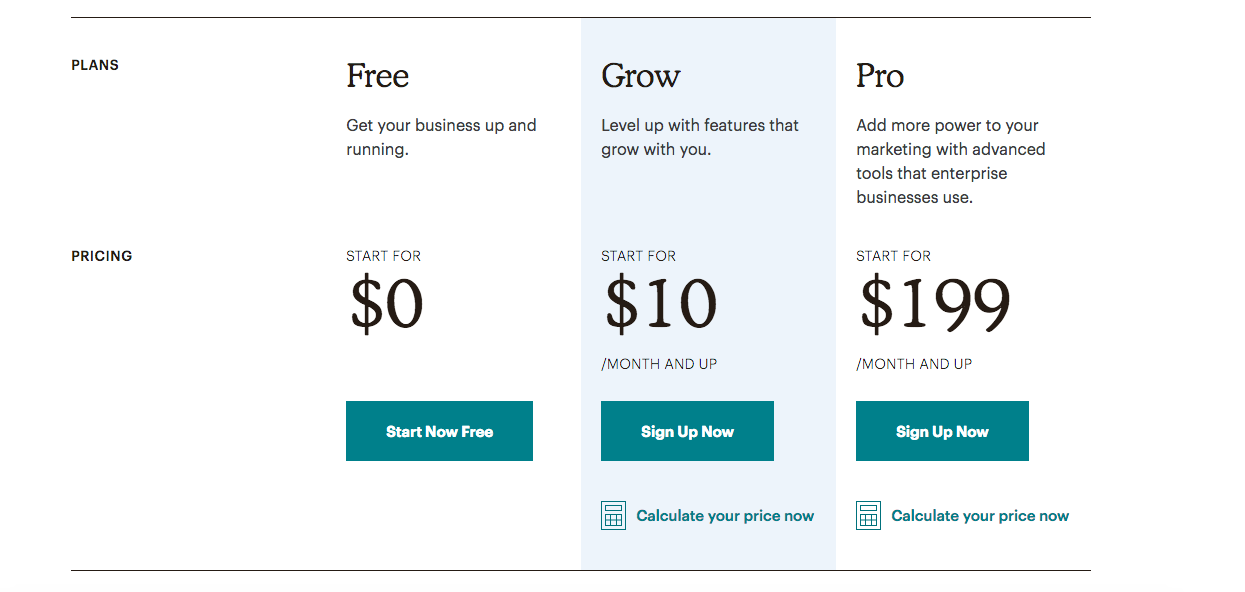
But the advanced segmentation, comparative reports and multivariate testing feature however, are still reserved for the pro plan, which costs $199/month on top of your existing subscription.
Still Unable To Decide? Here Are Some Thoughts That Might Help You
In the end, let me ask you a final question: Who are you?
Are you self-professed ‘creator’? Or are you an entrepreneur with a small business?
The difference between the two might not be much. After all, both of you will sell something to your audiences, whether it’s a beautiful piece of art or some latest gadget.
But what you identify yourself as will be deeply reflected in the way you approach your online business – and consequently, the way you run your email marketing campaigns. And knowing who you are professionally will help you choose the email marketing service that you are most compatible with – and that is compatible with you.
And not so fast.
Features also matter. If one service isn’t offering you the features you want, go with the other one.
For example, if you’re a small business, but visual automations matter a lot to you – then go for ConvertKit. Similarly, if you’re a creator, but want the ability to get subscribers with Facebook and Instagram ads in addition to forms, go with MailChimp.
And hey, don’t think of this as a marriage, but rather a first date. So don’t take too much time deciding.
Both ConvertKit and MailChimp offer some breathing room for you to test their services. MailChimp offers a free plan which lets you test most, if not all the features. And ConvertKit offers a free 14 day trial for you to test their complete service.
Take both of them for a spin, and then decide which one you want to get things started with.
You might also want to check out:
ConvertKit vs. ActiveCampaign: Why We Chose ActiveCampaign!
Choosing the right email marketing tool for your online business is hard. There are so many tools out there you don’t know which one is best for your online business. To make the right decision, you should first do a serious assessment of how you run your business and what your current needs are. To make it easy for you to do that, in this article, we’ll do an in-depth comparison of ConvertKit vs ActiveCampaign.
![]()
ConvertKit vs. ActiveCampaign: The Comparison Begins
Here’s a quick glance of the services each tool provides:
ConvertKit Features
- Form and Landing Page Builder: Create forms and landing pages and put them in your domain or host it on ConvertKit.
- Email Sequence and Broadcasts Creator: Create email series or one-off emails.
- Tags and Segments: Manage your subscribers in your list.
- Visual Automation Tool: Automate tagging, segmenting and emailing processes.
ActiveCampaign features
- Email Marketing Tools Including Form Builder: Build beautiful forms with many templates. Add onto your own website or host in ConvertKit.
- Marketing Automation: Automate your complete sales and email marketing processes.
- Sales and CRM Tool: Store leads, track them and follow up easily.
- SMS and Site Messages Capabilities: Send text messages on your subscribers’ phones and display targeted messages when they visit your website.
- Facebook Ads Integration: Add and remove your subscribers to and from different Facebook custom audiences based on the actions your subscribers take in your emails.
- Website and Event Tracking: See how subscribers behave when they visit your website.
If you carefully look at each tools feature list, you’ll notice that ConvertKit’s features revolve around only email marketing.
But ActiveCampaign’s features support a wider aspect of your business’ marketing efforts i.e. sales automation and customer relationship management (CRM)
With this, we can conclude that ConvertKit is an email marketing tool while Active Campaign is a broader suite of marketing tools, of which email marketing is a part of.
Now, let’s compare both tools step by step and see what’s different about them.
Need more info on ConvertKit — Read my full ConvertKit review here to learn more!
2019 Update Up Front: Why We Chose ActiveCampaign (and Switched Over) at Change Creator
This past year, we have made a lot of important changes here at Change Creator. One of the big ones is us moving our email marketing to a new tool — ActiveCampaign. For years, we had stuck with Aweber, that was seemingly a cost-effective and adequate tool. We did a lot of great things with Aweber, but the data and the automations were just not enough for us to grow.
Here are 5 reasons why we made the switch:
- Behavioral Marketing: ActiveCampaign allows you to really customize your emails based on the behaviors of your users, i.e.) Clicks, opens, how much they read, watch and has a lot of integrations for us to get even more data
- Better Automated Series: With ActiveCampaign, you can create better, more personalized email series. What happens if someone doesn’t read or download something? What can you send them next?
- Better data overall: The amount of data you get on your email users in ActiveCampaign is by far superior to a lot of tools out there. We’ve just started to dig in and we’re super excited!
- Already seen improvements on click rates. Why? We’ve created automations that give people a second chance to open an email.
- Already seen improvements on open rates? Why? Personalization. Knowing what to share and when to share an email is key to improving open rates.
While we are just starting our journey with ActiveCampaign, I can tell you that it’s been a great investment so far. As we dig around and test the tool more, I will share those updates too. You can take ActiveCampaign out for a free 2-week test, that’s enough time to explore the Dashboard, see if it can work for you.
ConvertKit Vs. ActiveCampaign: How Are They Different?
Since ActiveCampaign is a full-on marketing suite with other features than email marketing, while ConvertKit is a full-on email marketing service, both of them are extremely different in how they operate.
Here, we’ll discuss exactly what makes these two tools so different from each other.
Let’s get started…
1. Form Creation To Get Subscribers: What’s the Difference?
ConvertKit gives you two ways to build a form i.e. within a webpage or with a landing page. But Activecampaign gives you just only one way to build a form i.e. within a web page.
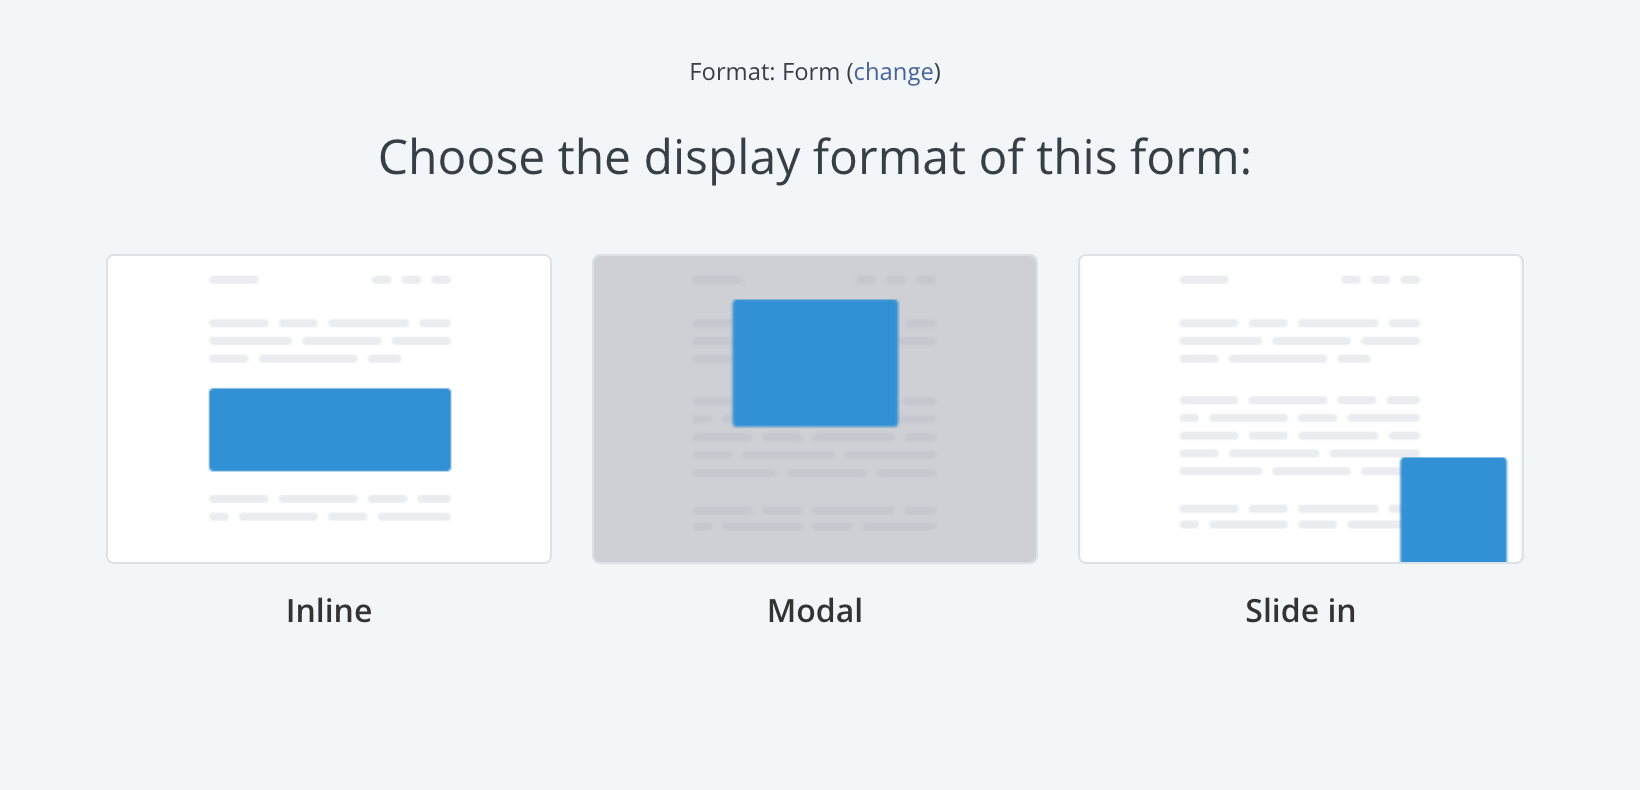
When it comes to creating a form, ActiveCampaign offers more flexibility. For example:
- Using ConvertKit, you can place three kinds of forms in three different positions on your website:
- Modal Popup: Over your website
- Inline: Inside a piece of content, sidebar or footer
- Sliding: From the bottom-left or bottom-right part of your website.
ActiveCampaign offers a fourth way to place a form i.e. as a floating bar. You can place this kind of form of the top of your website.
- ActiveCampaign offers far more templates for your forms. ConvertKit takes a simpler approach and offers three distinct form styles i.e. Full, Minimal and Stripped.
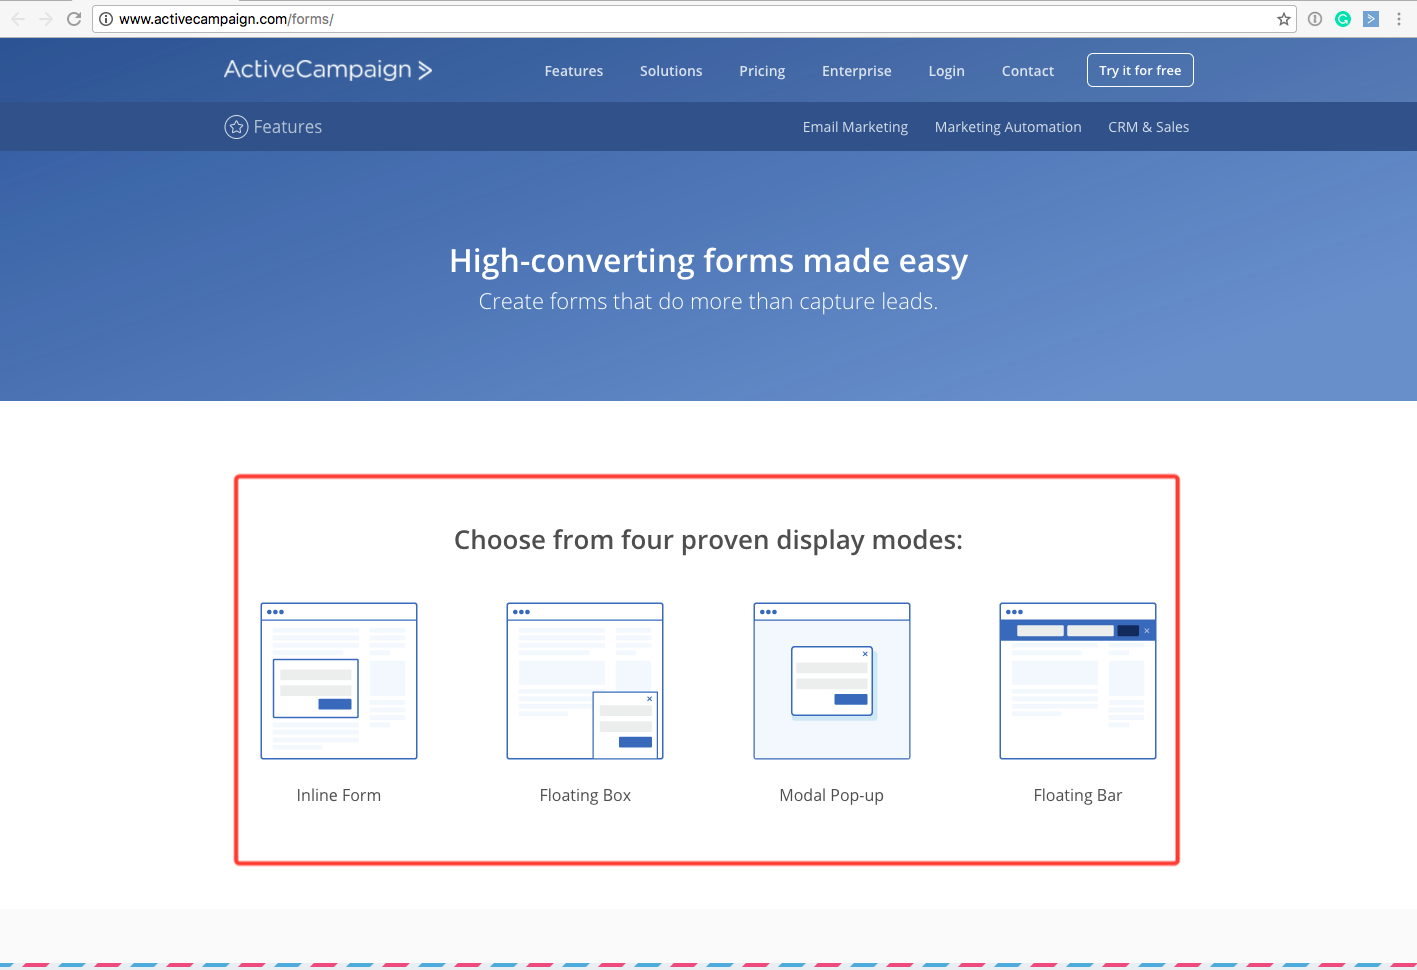
A set of features exclusive to ActiveCampaign is the ability to reach your audiences on:
- SMS: You can send SMS messages to your subscribers after they take an action you want – or simply because you want to.
- Facebook Audiences: Based on how your subscribers interact with your emails, you can add them to similar facebook audiences to show them better ads.
- Site Messages: You can talk to your audiences when they land on your website by showing them engaging messages.
2. Subscriber Management: What’s the Difference?
ConvertKit provides you a simple way to manage subscribers. There’s just one main list in which all your subscribers reside. You can organize them further using tags and segments.
ActiveCampaign however, takes a more ambitious approach. You can have as many lists as you want. And if one subscriber is in multiple lists, ActiveCampaign will recognize that and will count that as just one subscriber.
In my opinion, ActiveCampaign’s approach is much better.
Why?
Because if you have multiple businesses or websites, you can isolate your subscribers from each website or business into seperate lists – and each list can then be organized separately. To do that in ConvertKit, you’ll have to create a new account for each business.
3. Segmenting Your Subscriber List: What’s the Difference?
Here as well, ConvertKit’s way of doing things is simpler. You get two ways to organize your list in ConvertKit:
- Tags: With tags, you can divide your customers based on the actions they take, who they are, where they are location and other factors.
- Segments: Segments are a way to organize your tags, which allow you to create specific audiences based on the conditions you want.
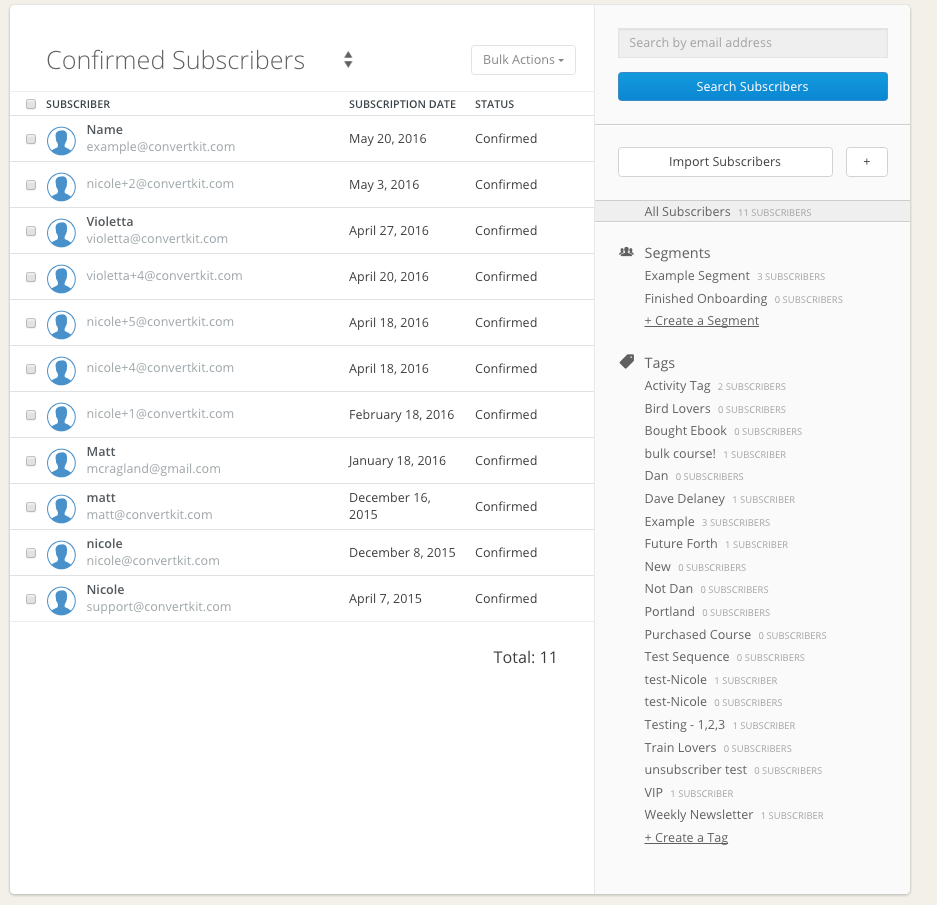
Here’s how you can organize your subscriber list in ActiveCampaign:
- Tags: In ActiveCampaign, tags are a way to add temporary identifying points to your subscribers. You can change tags much more frequently than in ConvertKit, where tags play a much more permanent role.
- Custom Fields: Custom fields can have any information you want – and are attached to your subscribers through the forms their submit. Things like secondary email, date of birth, city and other info can be entered through custom fields.
- Segments: Segments play a similar role in ActiveCampaign as they do in ConvertKit. You can add different tags, custom fields and other info to create custom audience of your choice through tags.
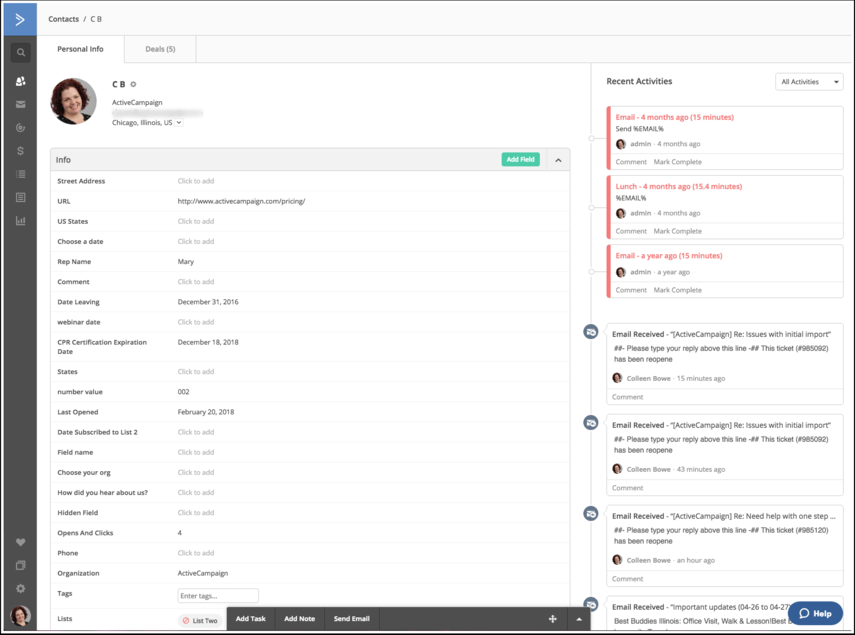
In addition to that, ActiveCampaign gives you a full CRM to manage your subscribers. You can:
- See every single thing about your subscribers including which lists, tags and segments they are a part of.
- Your sales team can assign activities to a contact which can be automated, followed upon and integrated with your email marketing.
- See which lead i.e. subscriber has the highest chance of becoming your customer based on ActiveCampaign’s scoring system.
These features are unique to ActiveCampaign and not offered at all in ConvertKit.
4. Automating Your Marketing: What’s the Difference?
It’s easy to automate your campaigns both in ActiveCampaign and ConvertKit. Both offer a visual automation window where you can automate every single thing in your marketing such as:
- Adding subscribers to lists, tags and segments.
- Putting them into email sequences and drip campaigns.
- Triggering different actions based on subscriber activity, time or behavior.
… and much more.
But here’s the major difference between the two:
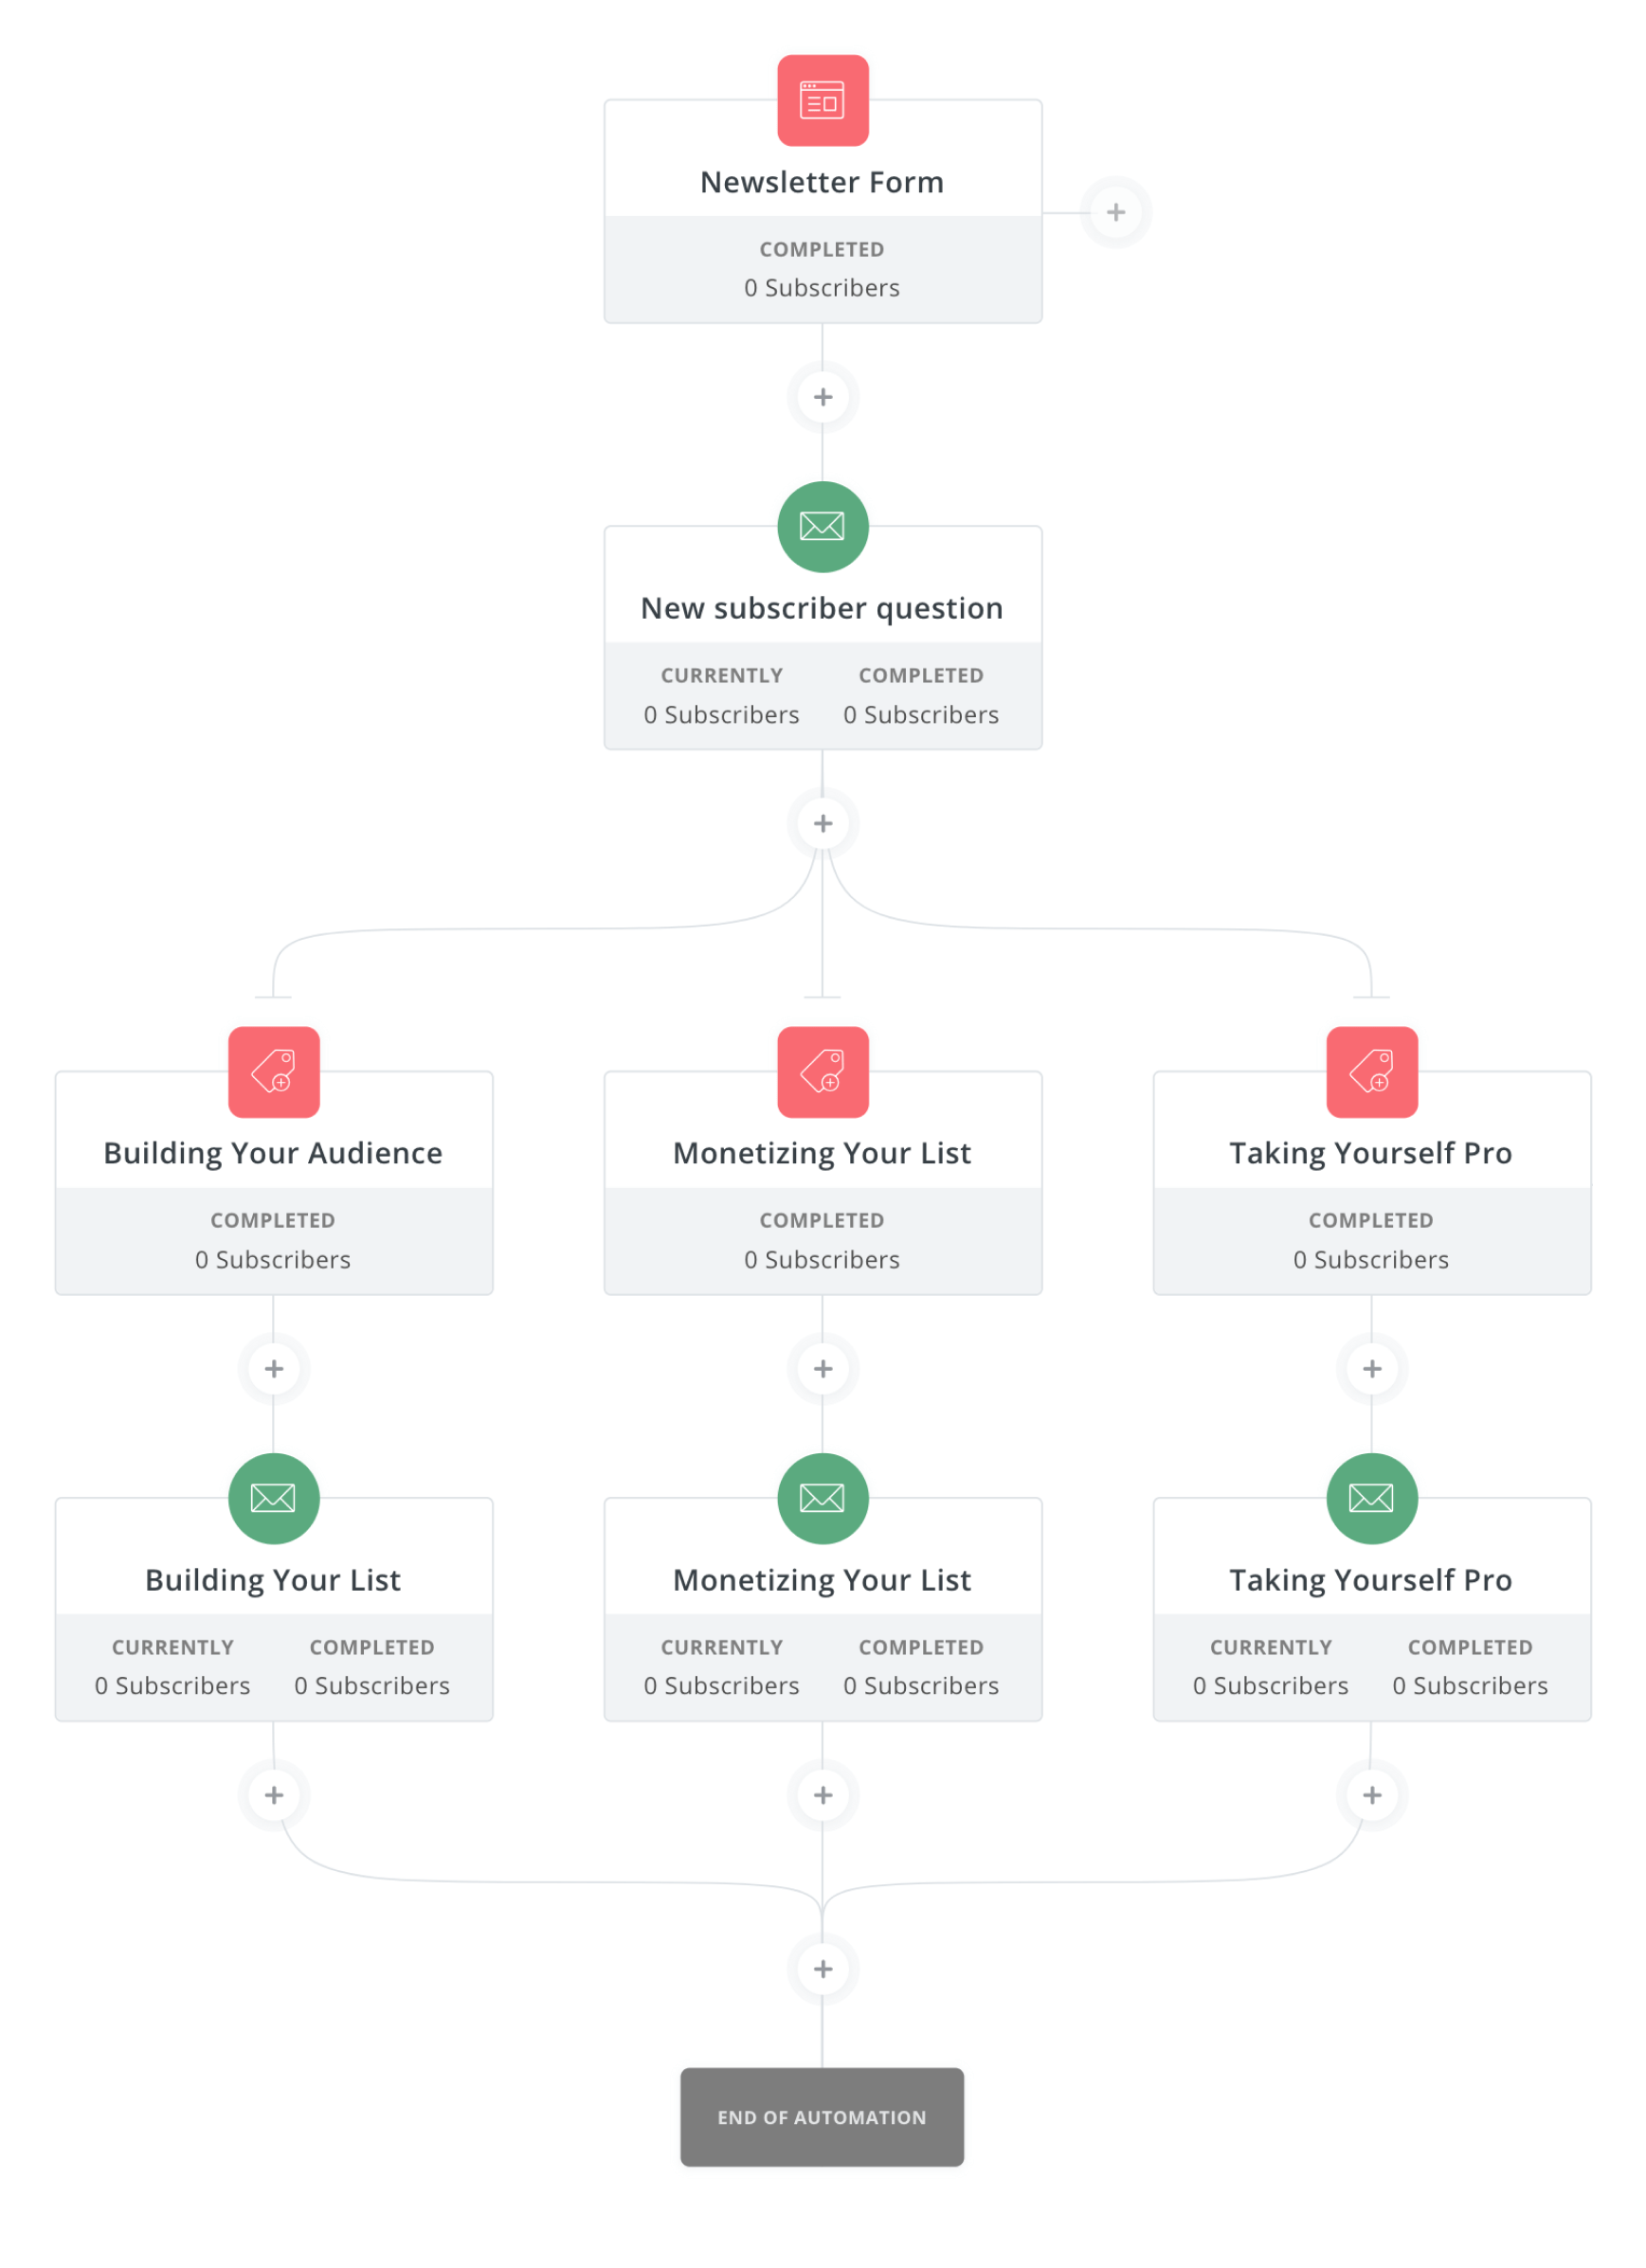
ConvertKit only has the ability to automate email marketing related tasks for you. ActiveCampaign, on the other hand, can automate both your email marketing and sales. And if you use Facebook custom audiences, ActiveCampaign can automate which audiences your subscribers go to based on the actions they take there as well.
Plus, ConvertKit can only trigger automations based on what subscribers do within emails. ActiveCampaign can trigger different emails, tags and other automations based on what your subscribers do on your website as well.
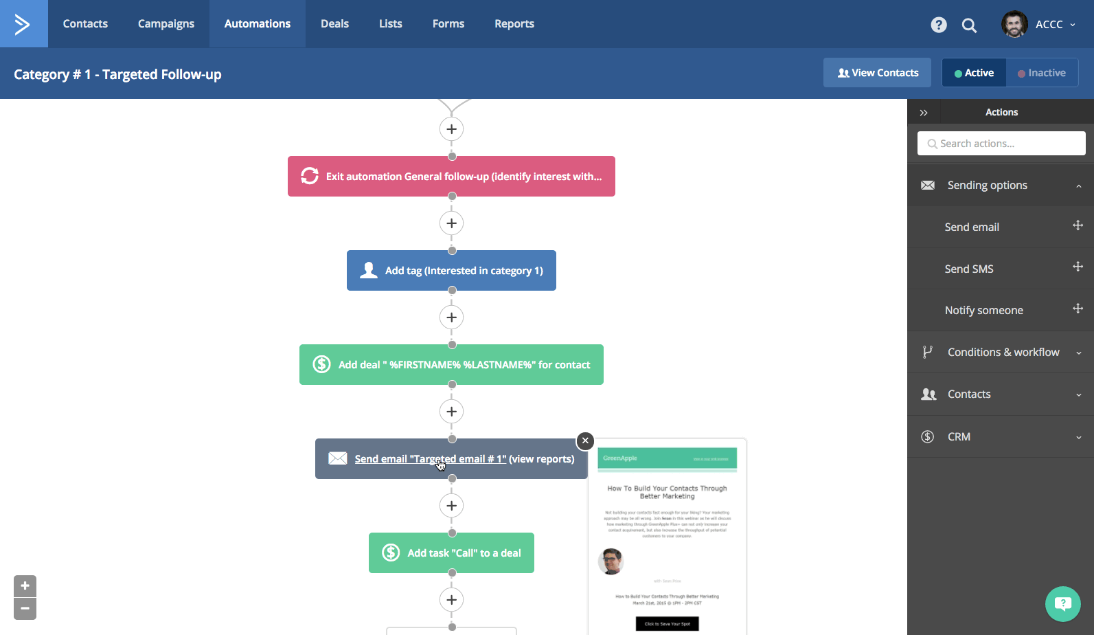
And last but not least, ActiveCampaign comes with tons of ‘automation recipes’ which you can use to quickly automate welcome emails, follow-up messages and more.
5. Reports: What’s The Difference?
Both ConvertKit and ActiveCampaign offer excellent reporting for the activities they help you do. In both, you can see how your forms, email sequences, broadcasts, and automations are performing.
But again, here’s where things go in favor of ActiveCampaign:
That’s because they give you a lead scoring system.
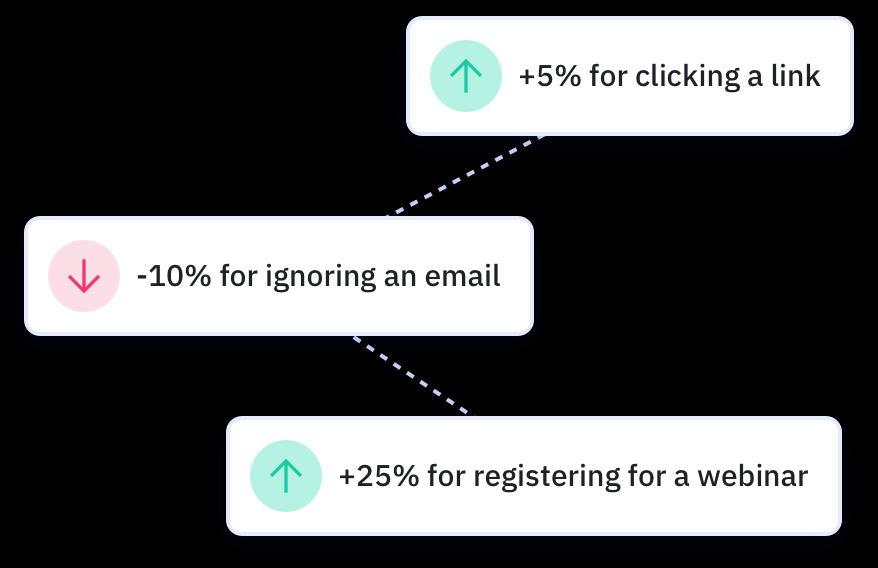
Depending on the actions your subscribers take i.e. clicking a link, open an email, watching a video etc., ActiveCampaign will give them points. And if your subscribers don’t take the action you want i.e open your emails, click on links, ActiveCampaign will deduct points. The more the points a subscriber has, the higher the chances of them converting into your customers.
5. Pricing: What’s The Difference?
Usually, it’s the price that ultimately ends up being the deciding factor. But to properly make the decision, you need to understand what you get for a said price.
Here it is:
ConvertKit’s pricing strategy is simple.
No matter what plan you subscribe to, you get all the features. No questions asked. That being said, their basic plan starts at $29 and limits you to 1000 subscribers. And the more subscribers you have, the more you pay.
ActiveCampaign’s pricing strategy is a bit more complex.
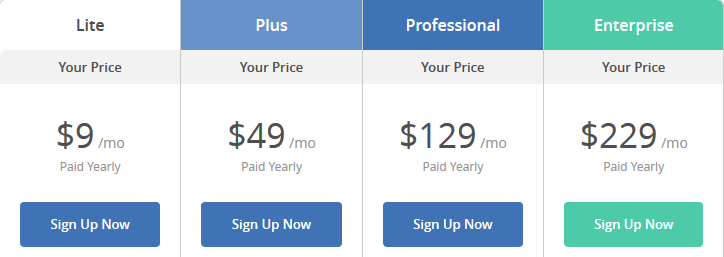
They have four plans i.e. Lite, Plus, Professional and Enterprise. Each plan starts at $9, $49, $129 and $229 for 500 subscribers respectively. The more subscribers you have, the more each plan’s price increases.
But the lite plan, which starts at $9 for 500 subscribers, gives you all the features ConvertKit has. This means everything from email marketing to automation capabilities is included in the subscription.
But yes, if you want the CRM, sales automation, Facebook ads integration, website tracking and the other stuff we mentioned, you’ll need to get a better plan.
Final Thoughts
Don’t be fooled by ActiveCampaign’s pricing. Their starter plans only give you access to email marketing tools – the same as ConvertKit.
That’s why if you plan to just do email marketing, I think ConvertKit is a better choice. It’s much simpler to use, is as powerful as ActiveCampaign in its automations, and is overall a better choice for email marketing.
But, if you’re thinking of doing sales or want to keep an extensive amount of data on your customers that moves beyond the realm of email marketing, you should go with ActiveCampaign.
Because while it definitely costs more, it’s better to use this as it will help you automate your sales activities and will give you a fully-fledged CRM service – in addition to ConvertKit-like email marketing capabilities.
You might also be interested in:
Clickfunnels vs. Shopify: Which Tool Works Best for Your Business in 2018?
ActiveCampaign vs Constant Contact: Which is Best?
Clickfunnels Review: Will This Tool Help Propel Your Business?
The Full ConvertKit Review: Is This the Email Marketing Tool for Your Business?
Choosing an email marketing tool can be a tough job. You want a tool that’s easy to use, doesn’t cost a ton of money and ‘just works’. That’s why I wanted to share my ConvertKit review with you here — is this the email marketing tool that you’ll love and use?
After all, starting email marketing itself can be a tough job – and as a solo entrepreneur, you want an email marketing tool that will make your life easier – not harder.
In this article, I’m going to take you through one of the best email marketing services I know.
It’s called ConvertKit – and in my opinion, it’s the best tool you can use to do email marketing – especially if you run your online business by yourself (or with a small team).
Let’s get started.
ConvertKit Overview: The Best Email Marketing Tool For Solo Marketers & Small Teams
You probably have a website. And you want the people visiting it to become your customers (and more importantly, raving fans).
Convertkit is the software that makes it easy for you to do this.
You see, with email marketing, you’re looking to create a proper revenue-generating system that works with minimal supervision on your part. You want it to work when you’re awake, asleep, in the toilet, or on a holiday.
For that, your email marketing system needs to do three things:
- Collect emails of visitors interested in hearing what you have to say.
- Send a series of email messages based on specific ‘triggers’ or ‘actions’ to the relevant audiences.
- Segments each subscriber based on the way they interact with your email campaigns.
And most importantly, you want all this to happen automatically. ConvertKit, in all its awesomeness, makes it insanely easy for you to set up a system like that.
In the next section, let’s walk through each of the five features of ConvertKit we’ve listed above…
ConvertKit Features Breakdown And Review
In no time, you’ll see how easy it is to create your first email marketing campaign with ConvertKit.
With it, you can:
- Create forms for both your website and individual landing pages where your visitors can submit their email addresses
- Set up a sequence of email messages that go to your subscribers exactly when you want them to.
- Intelligently categorize each of your subscribers based on the actions they take so you can easily send the right messages to the right audience.
- See all your automated email campaigns and the activity of your subscribers in each campaign in a visual way.
- Get detailed reports on how your email marketing campaigns are performing.
Plus, getting hang of ConvertKit and all its features is easy.
That’s because it’s well-designed, which means first-time users like yourself will be able to understand how to use it without much effort.
Forms:
Before you can start your email marketing campaign, you’ll need to collect emails of your visitors. For that, you’ll want to create ‘opt-in’ forms, where people can submit their emails.
Create a Form or Landing Page
ConvertKit offers you two options to create email opt-in forms:
a) You can create a form and put in on your website or embed it on your landing page.
OR
b) You can create a landing page and host it in ConvertKit or on your own domain with WordPress.
Here’s what the actual menu looks like:

If you don’t have a website, the second option of creating a landing page can be especially useful.
Style The Form
I’ll be frank with you from the start. ConvertKit doesn’t offer a lot of customization when it comes to forms.
There are three main types of forms you can create: A full form complete with an image, a minimal form without an image and a stripped down, clean form with just the bare essentials.

After you select the template, you can customize the form by changing the color of its elements i.e. text, button and background. In addition, you can customize the text anywhere on the form and add whatever description and pictures you want.
One cool thing about ConvertKit is it lets you see a ‘live preview’ of your form, with which you can quickly check out what your form will look like and how it’ll work once it’s live.
Plus, you can also change the form’s design by entering custom CSS code, either by yourself or by hiring a professional web designer.
Style The Landing Page
Landing pages are another story.
ConvertKit offers much more different-looking templates for landing pages than it does for forms.

The rest of the process is similar.
You can customize your landing page with different colors, typography, images and text – and if you want, add custom CSS code as well.
Configure How And When A Form Appears
It’s not just enough for change the appearance of your forms. You also need to make sure it appears at the right moment as well.

For that, ConvertKit lets you create three types of forms:
- Modal Forms: These forms take over the whole page and can be closed by the user. You can trigger this form based on time, scroll-percentage or exit-intent. Or you can trigger it after a visitors clicks on a button or link on your website.
- In-line Forms: These forms appear in-between your content, in the sidebar or footer. You can’t customize when and how they appear. Once you add them to a location on your website, they’ll always appear there.
- Slide-in Forms: These forms pop-up from the bottom-left or bottom-right corner of your website. You can set them to trigger after a fixed time or scroll-percentage.
Other Cool Settings in Forms:
In ConvertKit, once you create a form or landing page, style it and set its triggers, you can can then set up what you want to happen after a person subscribes to your form.
Some cool things you can do are:
- Take them to a thank-you page or any other webpage you want.
- Send them a downloadable item (like a video, .zip file or PDF)
- Tag and segment them in a list of your choice for further action.
… and more.
Subscribers:
In ConvertKit, all your subscribers are stored under one list. This list will show you their emails, when they subscribed and what’s their ‘status’.
Status shows you what’s the current state of your subscribers i.e. confirmed, unconfirmed, complained, canceled, cold and bounced. Your confirmed subscribers are the ones you need to pay attention to as they are getting your emails and interacting with them.
ConvertKit gives you two ways to organize the subscribers in your list:
- Tags: When you get subscribers, you’ll want to identify them based on their interests and activity to make sure you send the right messages to the right people. Tags let you do that. You can add tags to a subscriber when they click a link or dont, or when they make a purchase (or don’t). Each subscriber can have multiple tags.
- Segments: Suppose you’ve tagged your subscribers by products they’ve purchased, the links they’ve clicked and forms they’ve submitted their emails to. Since each subscribers will have done multiple of these things, you will have a lot of tags. To organize these tags, you can place them into segments.
For example, suppose you sell three products i.e. a wallet, a keychain and a purse. When any of your subscribers buy these things, you can tag each of them with ‘customer_wallet’, ‘customer_keychain’ and ‘customer_purse’ depending on what they’ve purchased.
Then suppose you want to know how many customers you have in your list of subscribers. You can then store all three ‘customer_’ tags in a segment called ‘existing customers’.
And in this way, you can organize your subscriber list.
Plus, you can set up automations after which ConvertKit will automatically add a subscriber to a tag or segment after they take the action you want.
Sequences:
In your email marketing campaigns, you may want to send a series of emails to your subscribers over a period of time. In ConvertKit, that happens under a menu called ‘Sequences’.
Here, you’ll get a glimpse of all your email sequences. You’ll be able to see how many emails each sequence has and for how long it will run.
In addition, for each sequence, you’ll see important statistics like:
- No. of Subscribers
- Open Rate
- Click Rate
- Unsubscribers

This area is where you’ll be able to create new emails to send to your subscribers.
You can add as many new emails to a sequence as you like. Once you’ve written the email, you can set it to ‘draft’ or ‘publish’. Only emails that are set to ‘publish’ will be sent to your subscribers. It’s up to you to choose which date and time you want each email in your sequence to be sent.

After you’ve set up your email sequence in ConvertKit, you’ll then have to choose which of your subscribers you want to send them to.
You can do this by selecting the tags and segments you’ve created earlier.
For example, suppose you want to send an email sequence only to people who’ve bought a course of yours. Since you’ve created a tag of those people, you can simply select that tag (or segment) and your email sequence will only be sent to subscribers within that tag.
Broadcasts:
There are times you want to send only one-time messages to your subscribers instead of a whole sequences. For that, broadcasts are a perfect option.
In broadcasts, you can quickly create a single email and send it to all of your subscribers, or to ones with a specific tag or in a specific segment.

Bonus Tip: You can resend a broadcast to those subscribers who hadn’t opened your email to boost your open rates.
If you want to send blog post newsletters, special announcements or obligatory security messages to your subscribers, broadcasts is the perfect place to go.
Automations:
In the above sections, we told you how can tag your customers, put them into different segments, send them different email sequences and broadcasts.
Well, doing this manually for each and every subscriber you get is a tiresome thing.
And that’s where automations can help you.
The automations section provide you with a visual map which let you see exactly the steps a subscriber has taken throughout your email marketing campaign – and a place where you can set up different automations.

Right now, there are three types of automations you can create in ConvertKit:
- Actions: When a subscriber takes a specific action like making a purchase, clicking on a link or subscribing to a form, you can create an action-based automation. For example, adding a tag to customer who’s brought your course is an example of an action-based automation.
- Events: When something happens i.e. a customer buys something, a tag is removed etc., a event-based action will move that subscriber forward in the automation towards a new path. For example, suppose a customer buys a course they got through your email sequence. An event-based automation will pull them out of that sequence to a thank-you email sequence.
- Conditions: If you want to send an email based on whether an action or event has happened or not, you can apply conditions. For example, suppose some of the subscribers in your email sequence haven’t bought your course and you want to send the non-buyers to another email sequence. You can do that with a condition-based automation.
This makes the automations section the heart of ConvertKit. Here you can literally automate every single aspect of your email marketing campaign so you automatically get subscribers and turn them into your paying customers without lifting a finger.

Reports
Last, but not least, are the reports.
Reports let you see exactly how your email marketing efforts have performed. You can see reports of your:
- Forms and Landing Pages:

- Sequences

- Broadcasts

In addition, there is a main reporting page where you can see the exact numbers of subscribers you’ve gained throughout a specific period of time. Plus, you can filter and view which specific tags and segments got how many subscribers. And finally, you can view your number of unsubscribes as well.

These reports, if not anything else, provide a quick visual look at how your email marketing is going. And with the power of A/B testing, this information will help you make the most sales possible with your email marketing campaigns.
ConvertKit: The Final Conclusion
If you are starting from zero, or have less than a thousand subscribers, ConvertKit costs $29 a month.
But price itself is not the lone metric with which you measure ‘value’. For that, you’ll have to put the services you get in this price in the equation as well.
Keeping this in mind, ConvertKit gives you each and every feature they have at this price i.e. $29. Plus, there’s no limit to how many emails you send or how many forms you create, which, if you look at competing email marketing software, is a pretty big deal.

That’s not to say ConvertKit isn’t without its flaws.
I personally feel they could make a lot of improvements in the way they offer templates. Right now there’s just not enough different designs to go through.
To solve this, you can integrate ConvertKit to another, better form-building service like Optinmonster or LeadPages. You can head over to https://convertkit.com/integrations/ to check out what other marketing software ConvertKit lets you integrate with.
But other than that, yes, I totally think if you’re new to email marketing, and want an easy-to-use, yet powerful email marketing tool for your online business, ConvertKit is the way to go.
You might also enjoy:
Ucraft Review: Is This the Perfect Web Builder for Non-Coders?
Looking to build a website without a lot of effort, confusion and time? Then consider a web builder. While there are many website builders out there, I thought we’d talk about one that people have been asking me about, Ucraft. Does it live up to the hype? Will it work for coders and non-coders alike? If you want to build a website from scratch and you don’t know how then you are going to want to read my Ucraft review!
What’s a website builder anyway?
A web builder is an easy to use tool you can use to build your own extremely professional website, which requires zero learning to use. This means you don’t have to rely on so-called web experts to build a website for you.
Instead, you can save thousands of dollars and a lot of time building a website. And because you do the job yourself, you can be sure you’ll get a website you’re satisfied with.

Ucraft is what we’ll be talking about in this article. It’s an incredible website builder you can use to build your very own professional website in a matter of hours, or dare I say, in a matter of minutes.
That’s because when you use a web builder like Ucraft, you can simply click, drag and drop your way towards a complete website. We’ll discuss that in detail how you can do that.
But for now, all you need to know is that if you want to build a website without spending time, money and other limited resources – and want a website that works the exact way you intended it to be, Ucraft is the perfect tool for you.
Try Ucraft for free, start today!
Now, let’s get started with the review…
Ucraft: How It Works and What You Can Do Inside It
Let’s dive right in.
Ucraft is divided into six major components:
1. Website Builder
2. Free Landing Page Builder
3. Logo Maker
4. Ecommerce
5. Create a Blog
6. Designer Tools
With all these components, you get a powerful all-in-one tool with which you can build a website that not only has a landing page, but also one which has a whole blog section and an integrated ecommerce section.
Unless you want to build the next Facebook, Ucraft is the perfect website building solution for your business.
Now, let’s get started by discussing each component and see how you can use each of them in building your website:
1. Website Builder
To begin, the first thing you’ll have to do is choose a template. A template is a website design which you can use as the basis of your website. Ucraft has many templates you can choose from. There are templates from photography, business, travel, restaurant and many other kinds of website.

All you have to do is simply select a template, add your own text, images and photographs, put in your own content and voila, you have just create your very own website within minutes.
But, if you feel you want to create something different, a design totally out of this world, you can start from scratch.
Starting from scratch will give you the ability to build each and every nook and cranny of your website by yourself. You decide what color, font, text, element and shape you want on your website.
And yes, it’s hard work. But Ucraft will give you all the tools you need to build your website in the drag-and-drop builder:
1. Customization Tools: The drag and drop builder gives you tools which will let you customize your website the way you want. You can change the color, typography, and effects of your website. You can add as many pages as you want, change the menu, add buttons, create links, add media elements and exciting widgets to enhance the functionality of your website.
2. Optimization Tools: Thanks to technologies like Cloudflare, responsive web design and SEO optimized design and code, you can make your website built on UCraft extremely fast and user-friendly for your visitors. All these optimizations will ensure your website loads at the fastest possible speed and works on everything from phones and tablets to PCs and laptops.
3. Analytics Tools: Analytics and marketing tools are included in Ucraft. These will allow you to monitor the performance of your website. You’ll be able to see the traffic coming into your website, your sales and other web related statistics.
2. Free Landing Page Builder
The landing page builder works exactly – and is exactly – the same as the website builder you get when building your website.
Here’s how it works:
Start by choosing a template. As we mentioned above, there are a lot of template designs you can select from. The next step is to connect your landing page to your domain. You can either connect your landing page with an existing domain or with a completely new one (purchased separately) on Ucraft.

Next, simply edit the landing page until you’ve customized the design to suit your own branding. Then, add your own text, image, video, and other media elements to make the landing page look more alive and attractive. Finally, write down professional copy that’s optimized both for search engines and your target audience which will help you sell your product.
And that’s it. Hit publish and your landing page will be live.
3. Logo Maker
Every website needs a logo. The logo maker tool provided by Ucraft is probably the easiest way you can make a custom, professional logo for your website. What would have cost you hundreds of dollars can now be done for free.

All you have to do is choose different high-quality icons and vector art to design your logo – . Next, you have to add a font which you can also customize to your own liking. Finally, with the combination of two, the final thing you have to select is your background, which can either be dark or light. And that’s it.
With a few simple steps, you’ll have your own professional logo ready to go.
4. Ecommerce
Ucraft offers users an ecommerce platform included within the tool. So this means, in addition to the website and landing page builder, the logo maker, you also get a fully functional ecommerce platform within Ucraft all within one subscription.

To get started, Ucraft will let you upload as many as 50 products to your website. In addition, it won’t charge any transaction fee so you can keep more of your profits (or offer attractive discounts). In addition, you can also do business in multiple currencies. Plus, you can get paid through 70+ payment channels and provide multiple shipping methods to your customers.
And these features are just in the basic plan.
Features of the Ultimate Plan
If you decide to subscribe to the ultimate plan, here’s what else you’ll get:
- Ability to offer discount coupons.
- Edit your invoices
- Put up your Ecommerce store on social sites like Facebook, Yandex and Ebay
- Tax exemption and the ability to reverse charge VAT.
- A store management app
- The favorites / wishlist option for your visitors so they can save items for later purchase.
In addition, if you subscribe to the advanced plans, you can manage your store online through your mobile phone. You can add new items, modify existing ones and process new orders on the go.
5. Create a Blog
Till now, we’ve covered it all. We’ve shown you how you can build a landing page, run your own ecommerce store and design your own logo. The last, but arguably the most important feature Ucraft provides is the ability to build your own blog on your website.
For that, you’ll get a dedicated articles app.

In this app, you can write down your own articles, customize it with your own images and video files, tag it and add a comment section to it.
There’s no fuss. It’s a simple app with a text editor that lets you create highly polished articles and blog posts for your website.
6. Designer Tools
Designer tools are nothing more but a set of three tools you case use to completely customize every single aspect of your website.
There are three designer tools provided by Ucraft:
1. Typography: This tool lets you modify your website fonts. You can change the typography, the color and even the opacity of the text on your website.

2. UI Kit: The UI Kit will assist you in customizing the buttons and forms on your website. You can change the color, shape, border and other factors of your buttons and customize them to suit the design of your website.

3. Layout: It’s important that every single element on your website is properly spaced and in alignment with each other. The layout tool, with the help of the grid, helps you make sure every single part of your website is on the exact location you want.

With these three design tools, combined with the website builder, logo maker, ecommerce platform and the articles app, you can easily create the best website for your business or personal use.
And the best part is you need only one subscription, one tool, and zero coding skills to get all this done!
Pricing: Which Plan Should You Get?
Their best (and most popular) plan starts at just $14 a month in which you get all the tools we’ve mentioned above. The reason why we recommend this plan is because it includes ecommerce functionality, allowing you to sell up to 50 products on your website.
And once you get a hang of things, you can subscribe to the unlimited plan, which costs $60 and removes every single limitation, allowing you to truly create a powerful professional website. In this plan, you can add unlimited products to your ecommerce store and sell items on social platforms such as Facebook, Yandex and Ebay.
But if you don’t want these fancy features, you can subscribe to the ridiculously cheap $6 plan in which you get enough features to build your personal website, but don’t get live tracking features or the ability to sell products on your online store.
So, whenever you are ready to build a professional website, be sure to give Ucraft a try!
Looking For A Ucraft Alternative? Try Wix
If Ucraft seems too simple for you – and if you’re looking for a more complex alternative that gives you more features – like a code editor or thousands of plugins, give Wix a try.
This tool is similar to Ucraft but offers far more. You’ll get more templates, more integrations, more effects, an app marketplace and even a logo maker. And that’s just the start.
In addition, you can also add your own code and upload your own CSS files. Plus, like Ucraft, Wix also gives you the ability to create your own ecommerce store. Also, Wix gives you integrations for a music player, gallery, blog and events which you can use on your website.
Which Tool Should You Choose?
Wix is one of the world’s most powerful website builders. If you’re looking to build a feature-rich website with lots of functionality, give it a try. But if you’re looking for a simple tool to quickly build your personal website or ecommerce store, Ucraft is more than qualified for the job.
Ucraft Vs. Wix: Feature Comparison
Price Templates Ecommerce Blog App Store Music Player Gallery Booking Functionality Hosting Free Domain
| Price / Month | Templates | E-commerce | Blog | Appstore | Ability to Code | Image Gallery | Booking
Functionality |
Hosting Included | Free Domain | |
| Ucraft | Basic Plan @ $0
Most Popular Plan @ $6 Unlimited Plan @ $60 |
Yes | Yes | Yes | No | No | Yes | No | Yes | Yes (Except Basic plan) |
| Wix | Basic @ $4.5
Most Popular @ $12.5 Unlimited Plan @ $ 24.5 |
Yes | Yes | Yes | Yes | Yes | Yes | Yes | Yes | Yes (Except Basic Plan) |
SEMRush vs. SE Ranking: Which SEO Tool is Best?
Today, ranking on top of Google and other search engines is no easy job. From optimizing your website to amassing a healthy amount of backlinks, there’s no end to what an SEO expert has to do to take a website to the #1 spot on Google. That’s why I wanted to compare two tools that I’ve heard a lot about amongst my fellow SEO enthusiasts: SEMRush vs. SE Ranking. Which reins supreme?
That being said, there’s no shortage of SEO tools which can help you achieve this task.
Today, we’re going to talk about – and compare – two extremely well known and excellent SEO tools on the market, SEMRush and SE Ranking. These aren’t just tools, but rather a collection of multiple tools bundled in one awesome piece of software.
Which of these is better suited for your needs? What features does one have which the other doesn’t? How much does each cost?
Let’s find out…
SEMRush and SE Ranking: An Introduction To Two Powerful SEO Tools
The advantage of both these tools is they house all the SEO specific SEO tools you might need. They both offer flexible pricing and both tools can be accessed via the internet on any phone or tablet thanks to the cloud.
We’ll dive into more detail as to what specific tools they both offer, but right now, let’s discuss what makes each of these tools unique.
SEMRush
In the case of SEMRush, they seem to be focused on providing their users with extremely detailed reports on their SEO efforts. Whether it’s a report on backlinks, a keyword or a domain analysis, SEMRush provides a wealth of data in both a visual and numerical format.

Another area where SEMRush shines is that they offer a wealth of information through their blog. In addition, they also have a knowledge academy where you can pass a SEO examination and get a certification.
And most importantly, SEMRush has every kind of SEO tool imaginable for your marketing needs. From finding competitor keywords to giving you a full SEO audit of your website, SEMRush does nearly everything.
SE Ranking
SE Ranking is more focused on providing their services to agencies (or so it seems). That’s because they strongly emphasize their custom reporting tools and even have a cool widget agencies can use for lead generation – but more on that later.

This isn’t to say SE Ranking isn’t fit for freelancers, startups and companies. On the contrary, their interface is one of the easiest to use among the two. You can see the information laid out on SEMRush much more clearly.
With that being said, the easy-to-use UI comes with its own sacrifices. The data provided by SE Ranking is nowhere as complete and comprehensive as SEMRush. But nevertheless, the data provided by SE Ranking is enough to give you a solid idea in what direction you have to go.
Feature Rundown: SEMRush Vs. SE Ranking
Both SEMRush and SE Ranking provide powerful and essential features that will help you implement your SEO strategy. But while 90% of the features are similar, there are one or two features that are unique to each specific tool.
In this section, let’s first have a run down of what features both SEMRush and SE Ranking provide.
SEMRush Feature List
We’ve divided the tools which SEMRush provides into 7 categories. In each section, we’ll break down what you can accomplish with the many features SEMRush provides. Let’s get started.
Organic Research & Organic Traffic Insights:
Today, the formulation of every SEO strategy starts with analyzing your competitors and your own website. For that, SEMRush provides two tools:
1. Organic Research
2. Organic Traffic Insights
The organic research tool lets you do three main things. a) You can use it to discover your competitors’ best performing keywords, b) find out your top organic competitors fighting for your spot in SERPs and c) analyze changes in ranking of your competitors’ and your own domains.

With these three features, you’ll be able to find out which keywords you should focus on, who you have to beat and where you stand on search engines.
The organic traffic insights tool does something even better.
It helps you find out ‘hidden’ keywords you are ranking for that Google Analytics doesn’t show you.
In addition, this tool provides data from both Google Analytics and Google Search Console. This means you get a deeper understanding about the value of a keyword.
And finally, organic traffic insights will also show you the potential of each keyword buy sorting them based on how much competition each keyword has. This way, you can focus on ranking for low competition keywords, hence, moving faster to thee top of search results.
Advertising Research & Display Advertising
These tools let you see the advertising strategy of your competitors. You can use this tool to find what keywords your competitors are bidding on, what kind of ads they’re creating and how much they’re spending on their campaigns.
Both these tools will help you immensely in discovering what you need to do to outperform your competitors in paid campaigns.
Backlinks & Backlink Audit Tool
Backlinks is the backbone of a well performing SEO strategy. Good quality backlinks can boost your ranking in SERPS while bad backlinks can take you down.
The Backlink and Backlink Audit tools help make sure your website is linked to good quality domains. It will help you identify both high authority and toxic backlinks. This will make it easier for you to associate your website with good domains while simultaneously break off with bad domains.
Keyword Research, Keyword Difficulty, Keyword Magic Tool & PPC Keyword Tool

Because of these four tools, you will be able to discover, collect and analyze the very best keywords possible for your website.
These tools will help you discover long tail, less competitive keywords and also give you suggestions for other keywords. You can then sort, analyze and group these keywords right within the tool and use in in your SEO and PPC campaigns.
Product Listing Ads
This is a unique tool on SEMRush. You can use this tool to analyze your competitors’ PLA ads and find out which keywords trigger their ads to show up and how much are they spending on each ad
Domain vs. Domain, Position Tracking, Charts & My Reports
These three tools let you accomplish three main tasks:
1. Compare various SEO stats for two domains. It can be either you vs your competitor or between two of your competitors.
2. See the position of your or any other domains for a specific keyword.
3. Analyze your competition and your performance visually through charts and create custom reports either for yourself or your clients.
Site Audit, On Page SEO Checker & Content Analyzer
With these three tools, you can scan your website for any SEO errors, discover opportunities to further optimize your website for SEO and create SEO optimized content such as articles, landing page copy and blog posts.
Social Media Tracker, Social Media Poster & Brand Monitoring
The most important among these three tools is the brand monitoring tool. This tool scrapes the web and finds mentions of your brand on the internet.
Why is this important?
Because when someone mentions you on the internet, it’s either to say something positive or negative. The brand monitoring tool allows you to see at once what kind of information is being said about you so you can capitalize on good press and damage control on negative press.
The social media tracking and management tools on the other hand allow you to control how you spread information about your company on the internet.
You can use these tools to find out which posts people engage with the most, which posts are getting the most likes and comments and which posts are bringing you the lowest amount of traffic.
In addition, you can use these tools to manage and automate your social media campaigns on both Facebook and Twitter.
SE Ranking
SE Ranking also provides tools similar to SEMRush but are less robust. But nevertheless, they get the job done and SE Ranking allows you to show all the results by customizing the reports to your branding. That being said, let’s take a deeper look at SE Ranking’s features:
Keyword Rank Tracking, Keyword Suggestion Tool & Keyword Grouper

These three extremely important tools SE Ranking provides are similar to the keyword research tools provided by SEMRush. You can use this tool to discover new keywords, both through suggestions and by analyzing your competitors. In addition, you can use this tool to group keywords based on different metrics, view how valuable each keyword is and how well you and your competitors are ranking for a specific keyword.
Website Audit & On-page SEO Audit
Again, similar to SEMRush, these features will scan your website and show you where you can make improvements to the technical SEO on your website. And similar to SEMRush, not only will SE Ranking check your website, domain and links, but it will also check the content within your website to find SEO errors.
Backlink checker & Backlinks Monitoring
These tools will help you check which backlinks are boosting your website ranks and which backlinks are hurting your website rank, allowing you to block and allow the appropriate backlinks to link back to your domain.
Page Changes Monitoring
Now, this is a feature that’s unique to SE Ranking. As we’ve said before, SE Ranking emphasises heavily towards agencies, and for them, this tool is a blessing.
What this feature will do is that it will alert you if there are any changes made to the content, metadata and links on your website. You’ll receive frequent reminders presented in a clean dashboard so you can quickly become aware of any changes on your website.
Marketing Plan
We’ve already mentioned how SE Ranking has an easy to use interface making it ideal to beginners. In addition, the Marketing Plan feature of SE Ranking will give you a solid checklist which you can use to understand how you have to get started with SEO.

This marketing plan checklist will benefit both newbies and experienced SEO players as both have to go through similar steps when optimizing websites for search engines.
The marketing plan will serve as a guideline you can follow to make sure you’re on the right track.
White Label & SEO Reporting Tools
These two features, similar to SEMRush, allow you to create custom reports of your SEO efforts. You can measure the results and put them into a custom-branded report to present it to your client or your team.
Lead Generator
Now, this is the unique tool we were talking about that’s exclusively available for SE Ranking users.
The lead generator is not a tool, but a widget you can place on your website. What this widget does is that when a visitor on your website enters their domain, it presents them with a free SEO audit report in exchange for their email.
This is a win-win situation both for you and your visitors. Your visitors get a ready-made SEO report which shows all the problems on their website. You, in return, get to collect leads and establish your authority. Because as far as your visitors are concerned, the report is from you, not SE Ranking.
Pricing: Which Offers The Best Value?
SE Ranking has more flexible pricing than SEMRush. You can decide which plan you want based on how many users will be using the app, how frequently you’ll check rankings, how long you’ll be subscribed to your plan and how many keywords you’ll track. This combination makes it easy for you to choose a plan that suits your needs.
SEMRush on the other hand, offers three simple plans: Pro, Guru and Business. The plans are also generally more expensive and the Pro plan, which is the most basic plan, has significantly less features when compared to SE Ranking’s basic plans.
Which One Should You Choose?
That’s why, if you’re just getting started with SEO, we recommend you use SE Ranking. Their clean UI, flexible plans and additional unique features like the lead gen tool and marketing plan will be great for those starting out, especially if you’re a freelancer or a one-man marketing team.
But, if you’re a big company who needs a wealth of information and more SEO-centric features, SEMRush is a better choice. Because as an expert, you’ll need more powerful tools, better data and more diverse results, and among the two, only SEMRush can give you that.
SEMRush Vs. SE Ranking Comparison Chart
|
Pricing/ Month |
Total SEO Tools | Marketing Plan Checklist | Historical Data | Lead Generation Tool | Custom Reports | Social Media Management |
Flexible Pricing |
|
| SEMRush | Starts @ $99.95 | 28 | No | Yes | No | Yes | Yes | No |
| SE Ranking | Starts @ $7.00 | 15 | Yes | No | Yes | Yes | Yes | Yes |
Once you start getting all the traffic (because of your newfound SEO skills of course), you are going to want to convert these people into paying customers.
While there are many tools that can help you generate leads, not all of them are the same. Here are some other articles you may be interested in:
The 5 Best Sales Funnel Software Programs to Get You Started Making Money Online
The Best SEMRush Alternatives You’ll Love
Clickfunnels vs.Website: Do I Need Both to Build Leads?
Let us know how your SEO game is going! Reach out if you need any tips. Around here, we love SEO (and the traffic that comes with it.)
Clickfunnels Review: Will This Tool Help Propel Your Business?
Clickfunnels is an all-in-one marketing software you can use to build your whole online business.
With Clickfunnels, you can:
- Easily create your whole sales funnel.
- Collect, manage and segment your leads and subscribers.
- Run an email marketing campaign.
- Automate your sales process
- Avoid creating a ton of pages for funnels on your primary website domain
Literally, if you subscribe to Clickfunnels, you’ll never need anything else to run your online business again.
That’s because Clickfunnels is built for entrepreneurs who:
- Don’t know how to code
- Aren’t marketing experts
- Don’t want to spend thousands to build their website
If you fall into this category, Clickfunnels is the perfect software for you. And it isn’t a dumbed down version of other marketing tools. Clickfunnels offers the same, or even better functionality and a LOT more features in one single piece of software.
With that being said, let’s start exploring the many features of Clickfunnels, and see how you can use them to build your own sales funnels and successfully run your own online business.
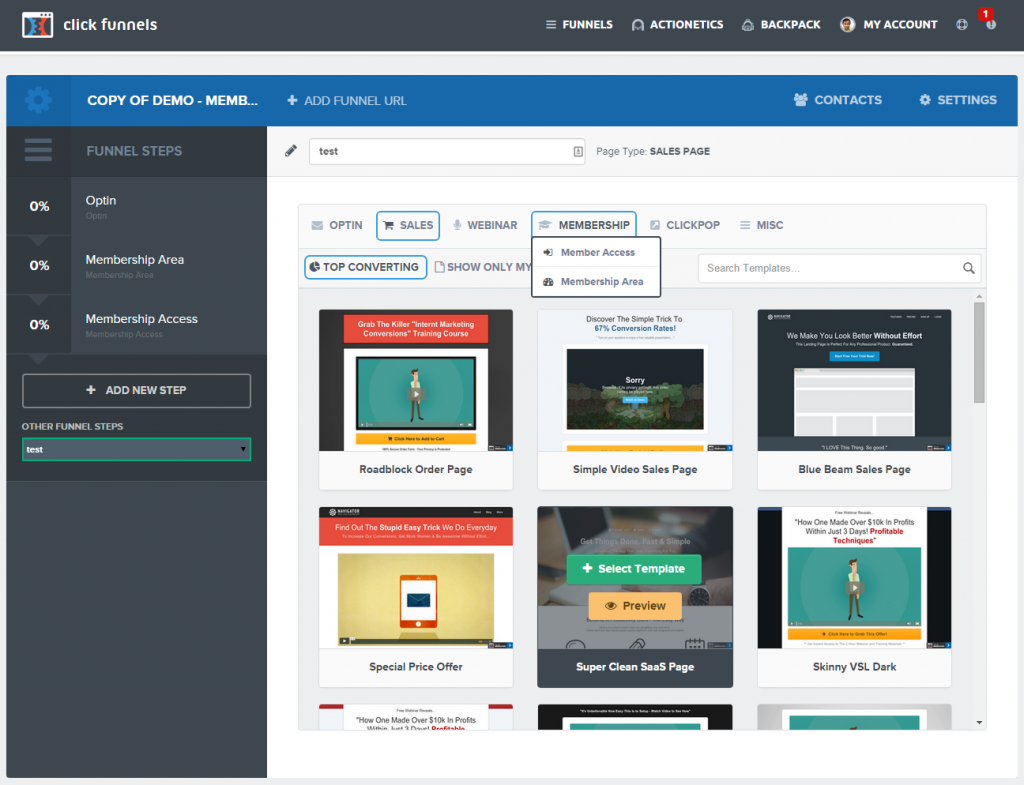
Clickfunnels Features
What separates Clickfunnels is that it offers a lot of diverse features at an attractive price point.
The majority of marketing tools either:
a) Focus on one area of your business: For example, tools like MailChimp and Unbounce are good for only email marketing and building landing pages respectively.
b) Are too expensive: For example, all-in-one marketing tools like Hubspot and Marketo cost $800+ a month for their CRM, automation and lead gen features.
Clickfunnels offers its features including the CRM and email autoresponder for less than $300/month.
Here’s what you can get in Clickfunnels:
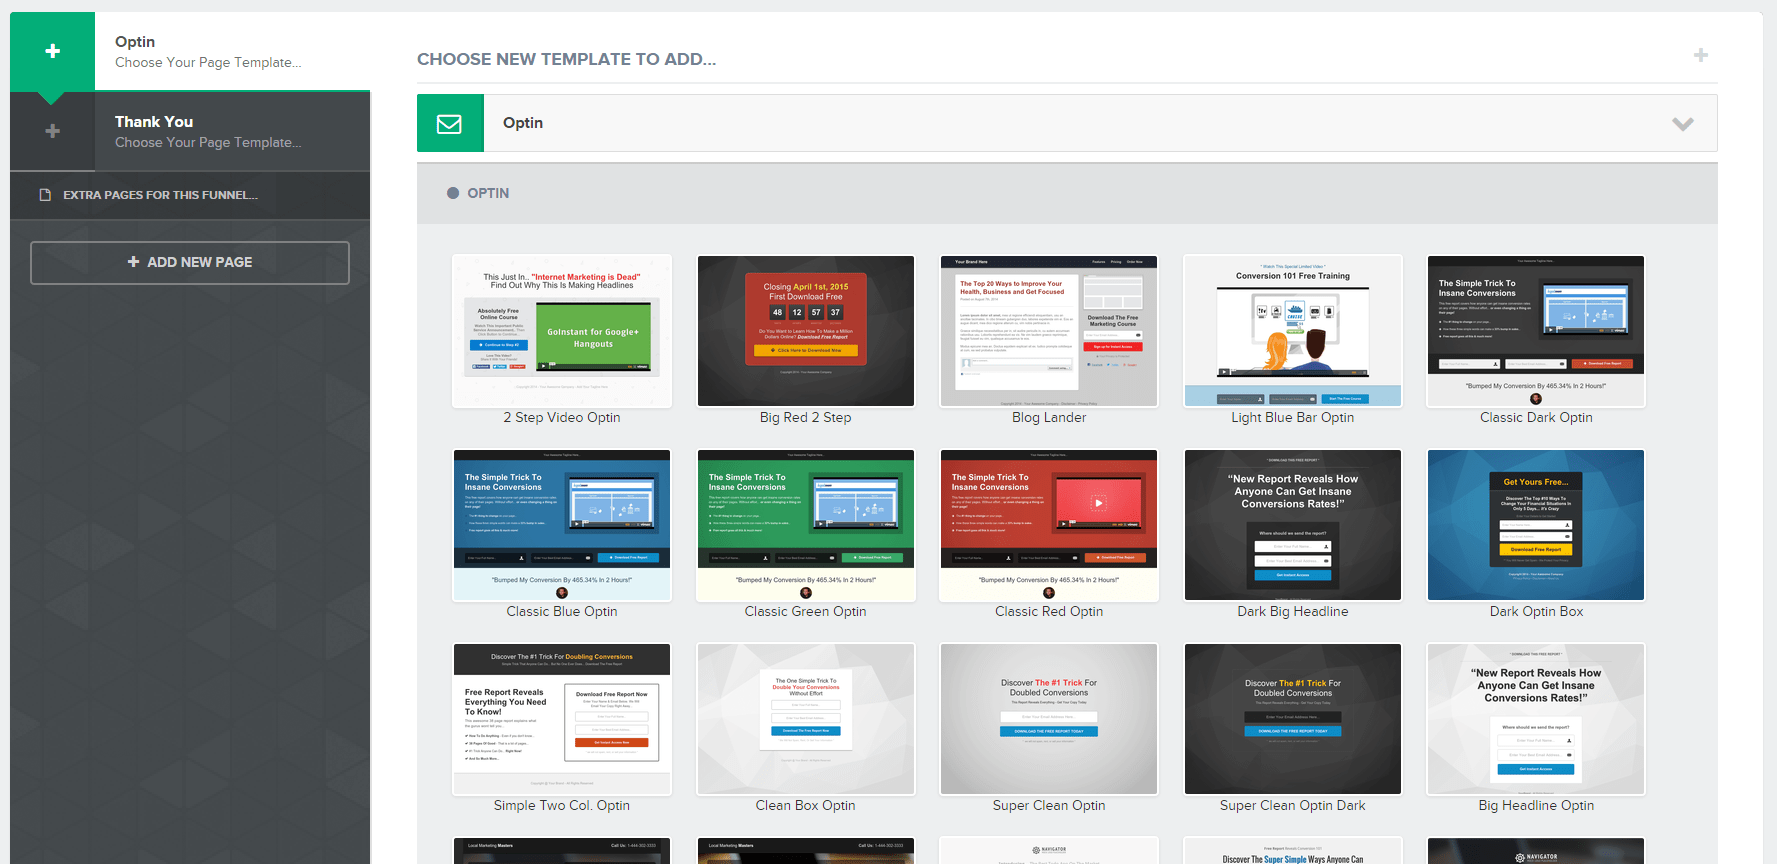
Awesome Feature # 1: Clickfunnels Funnel Builder
A sales funnel consists of many parts. There’s the main sales page, then the opt-in form, the checkout page, thank you page and so on…
In Clickfunnels, you get the whole sales funnel, with all of the pages, bundled in a complete package.
No other marketing tool gives you this.
Step 1 – Choose A Pre-Built Funnel
All you have to do is choose for what purpose you want to use your funnel for. It can be one of these three:
- To collect leads
- To sell a product
- To run a webinar
Then, you simply choose what kind of funnel you want. It can be a product launch funnel, a sales letter funnel, a two-page opt-in funnel etc.
These funnels are further divided into templates for what kind of products you want to sell i.e an ebook, a course, a webinar, a physical product etc. This means if you want to build your funnel from scratch, you can still get templates for individual pages like an opt-in page, thank you page, checkout page etc.
Step 2 – Create / Edit Your Funnel
If you have knowledge of funnels, you can go ahead and edit the order of your funnel pages – and add/remove them as well. For example, if you want to add a squeeze page in your funnel, you can do that. If you want to remove the upsell page, you can do that as well.
This flexibility to add/remove and move around pages of the funnel is going to be very handy. That’s because, with Clickfunnels, you can create checkout forms and membership sites in your funnel as well.
This means the people can directly pay and get access to your content without leaving your funnel and you can, therefore, change when these pages appear inside your funnel. (Hint: You don’t want your membership page appearing before the checkout page!)
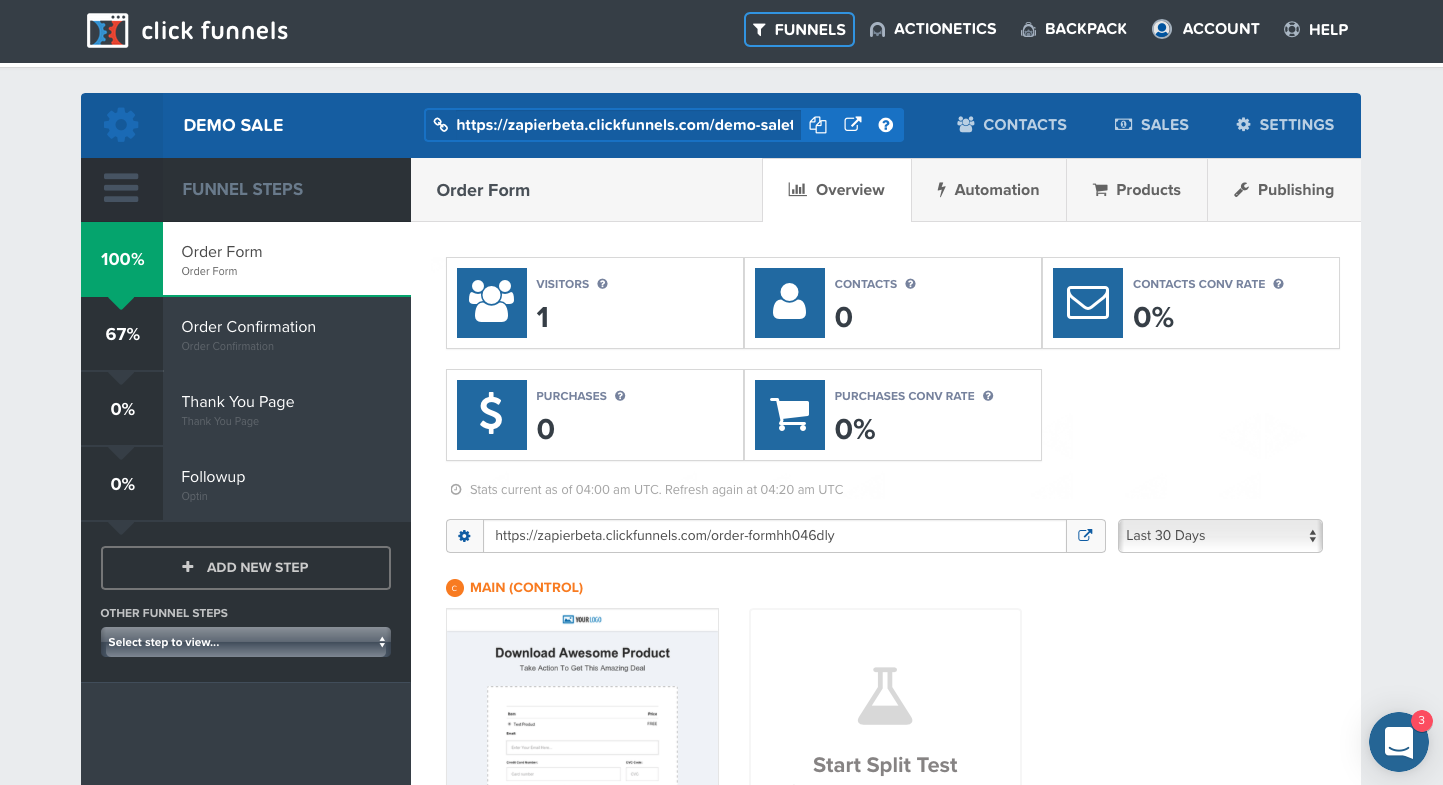
Awesome Feature # 2: Etison Web Builder
In the first feature, we learned how Clickfunnels gives you an awesome sales funnels and page templates that are ready to go.
But be that as it may, you still have to edit the pages inside your funnel and add your own text, images, and videos. That’s where the Etison Web Builder comes in.
With the web builder, you can customize every single aspect of your pages. Every single page is divided into sections. Each section has its own rows. And every row has elements.
The elements are the most important part of your funnel. Text, images, headline, forms, boxes and everything that’s on your page is an element.
Clickfunnels Editor
In the editor, there are 11 categories, each with its own kind of elements:
1. Text Elements: Text, Heading, Bullet Points etc.
2. Media Elements: Images, Audio, Video etc.
3. Form Elements: Buttons, Inputs, Text Box etc.
4. Advanced Form Elements: SMS Form, Billing Form, Survey Form
5. Countdown Elements: Countdown Timer etc.
6. Content Blocks: Icons, Dividers, Pricing Table etc.
7. Misc Elements: FB Share, FB comments, Custom Script etc.
8. Order Forms: 2-Step Order Form, Order Summary, Credit Card
9. Affiliate Links: User Login, Affiliate Links, Affiliate Stats etc.
10. Membership: User Login, Membership Content, Search etc.
11. Webinar: Webinar Form, Webinar Date, Add Event etc.
In addition to all these elements, you can also add your custom CSS code, change the background and colors with HEX codes and edit the mobile version of you funnel as well.
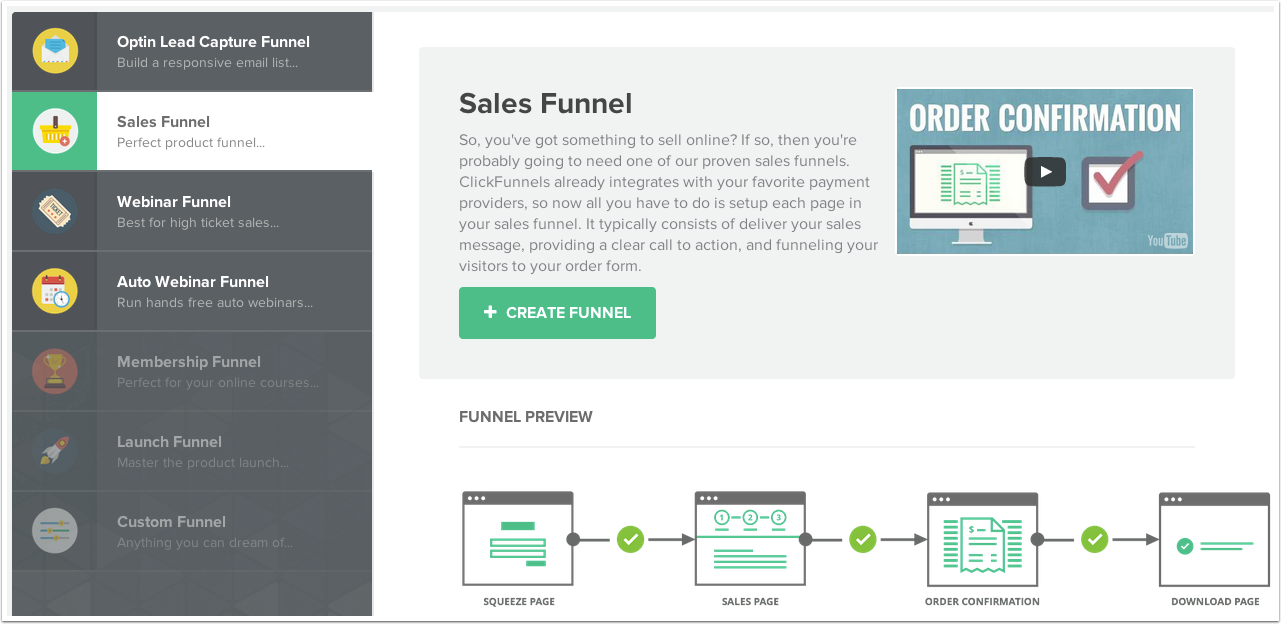
Awesome Feature # 3: Actionetics
So, now you’ve got your whole marketing funnel up and running. But that’s just the start. The next step is following up on the leads who’ve entered your funnel but haven’t become your customers.
Actionetics: Do you need this feature?
To do that, Clickfunnels offer an amazing feature called Actionetics.
But calling Actionetics a ‘feature’ can be a bit misleading. It’s not a single feature, but rather a set of multiple features. Here’s what you get in Actionetics:
1. Subscribers Info: You can see information and activity of your subscribers. Things like how many subscribers you have, how many unsubscribed etc. In addition, you can also see each subscriber’s individual activity like what funnel they’re in, what they’ve bought, how much they’ve spent, their social media profiles and more.
2. Email Lists: This is where you can create email lists. You can automate the whole process by adding subscribers to lists based on the funnels the join, the actions they take and the purchases they make. In addition, you can create ‘smart lists’ that allow you to create new lists based on data like where you subscribers live, how long they’ve been your customers, are they first-time visitors etc.
3. Email Broadcasts: Here, you can create new emails and email campaigns based on templates or completely from scratch and send them to your email lists. You can also automate the process so that when a customer takes an action like subscribing to your funnel, purchasing a product, opting in for a free ebook etc., they automatically get subscribed to certain email campaigns.
4. Follow up Funnels: This is a relatively new feature. It allows you to send your subscribers not just emails, but text messages, facebook messages, mobile and desktop notifications and more. It’s great for when you want to target your customers in places other than email.
5. Action Funnels: Action Funnels lets you combine your funnels and email campaigns. With this feature, you can automate the process so that any time a subscriber enters your specified funnel, the get a series of emails based on that funnel. And these emails can lead them to another funnel as well which can lead to another series of emails. It’s perfect for product launch campaigns or email courses which lead to upsells.
As you can see, within Actionetics, you get every single tool you need to manage the whole marketing of your online business. And this feature alone is why you should get Clickfunnels.
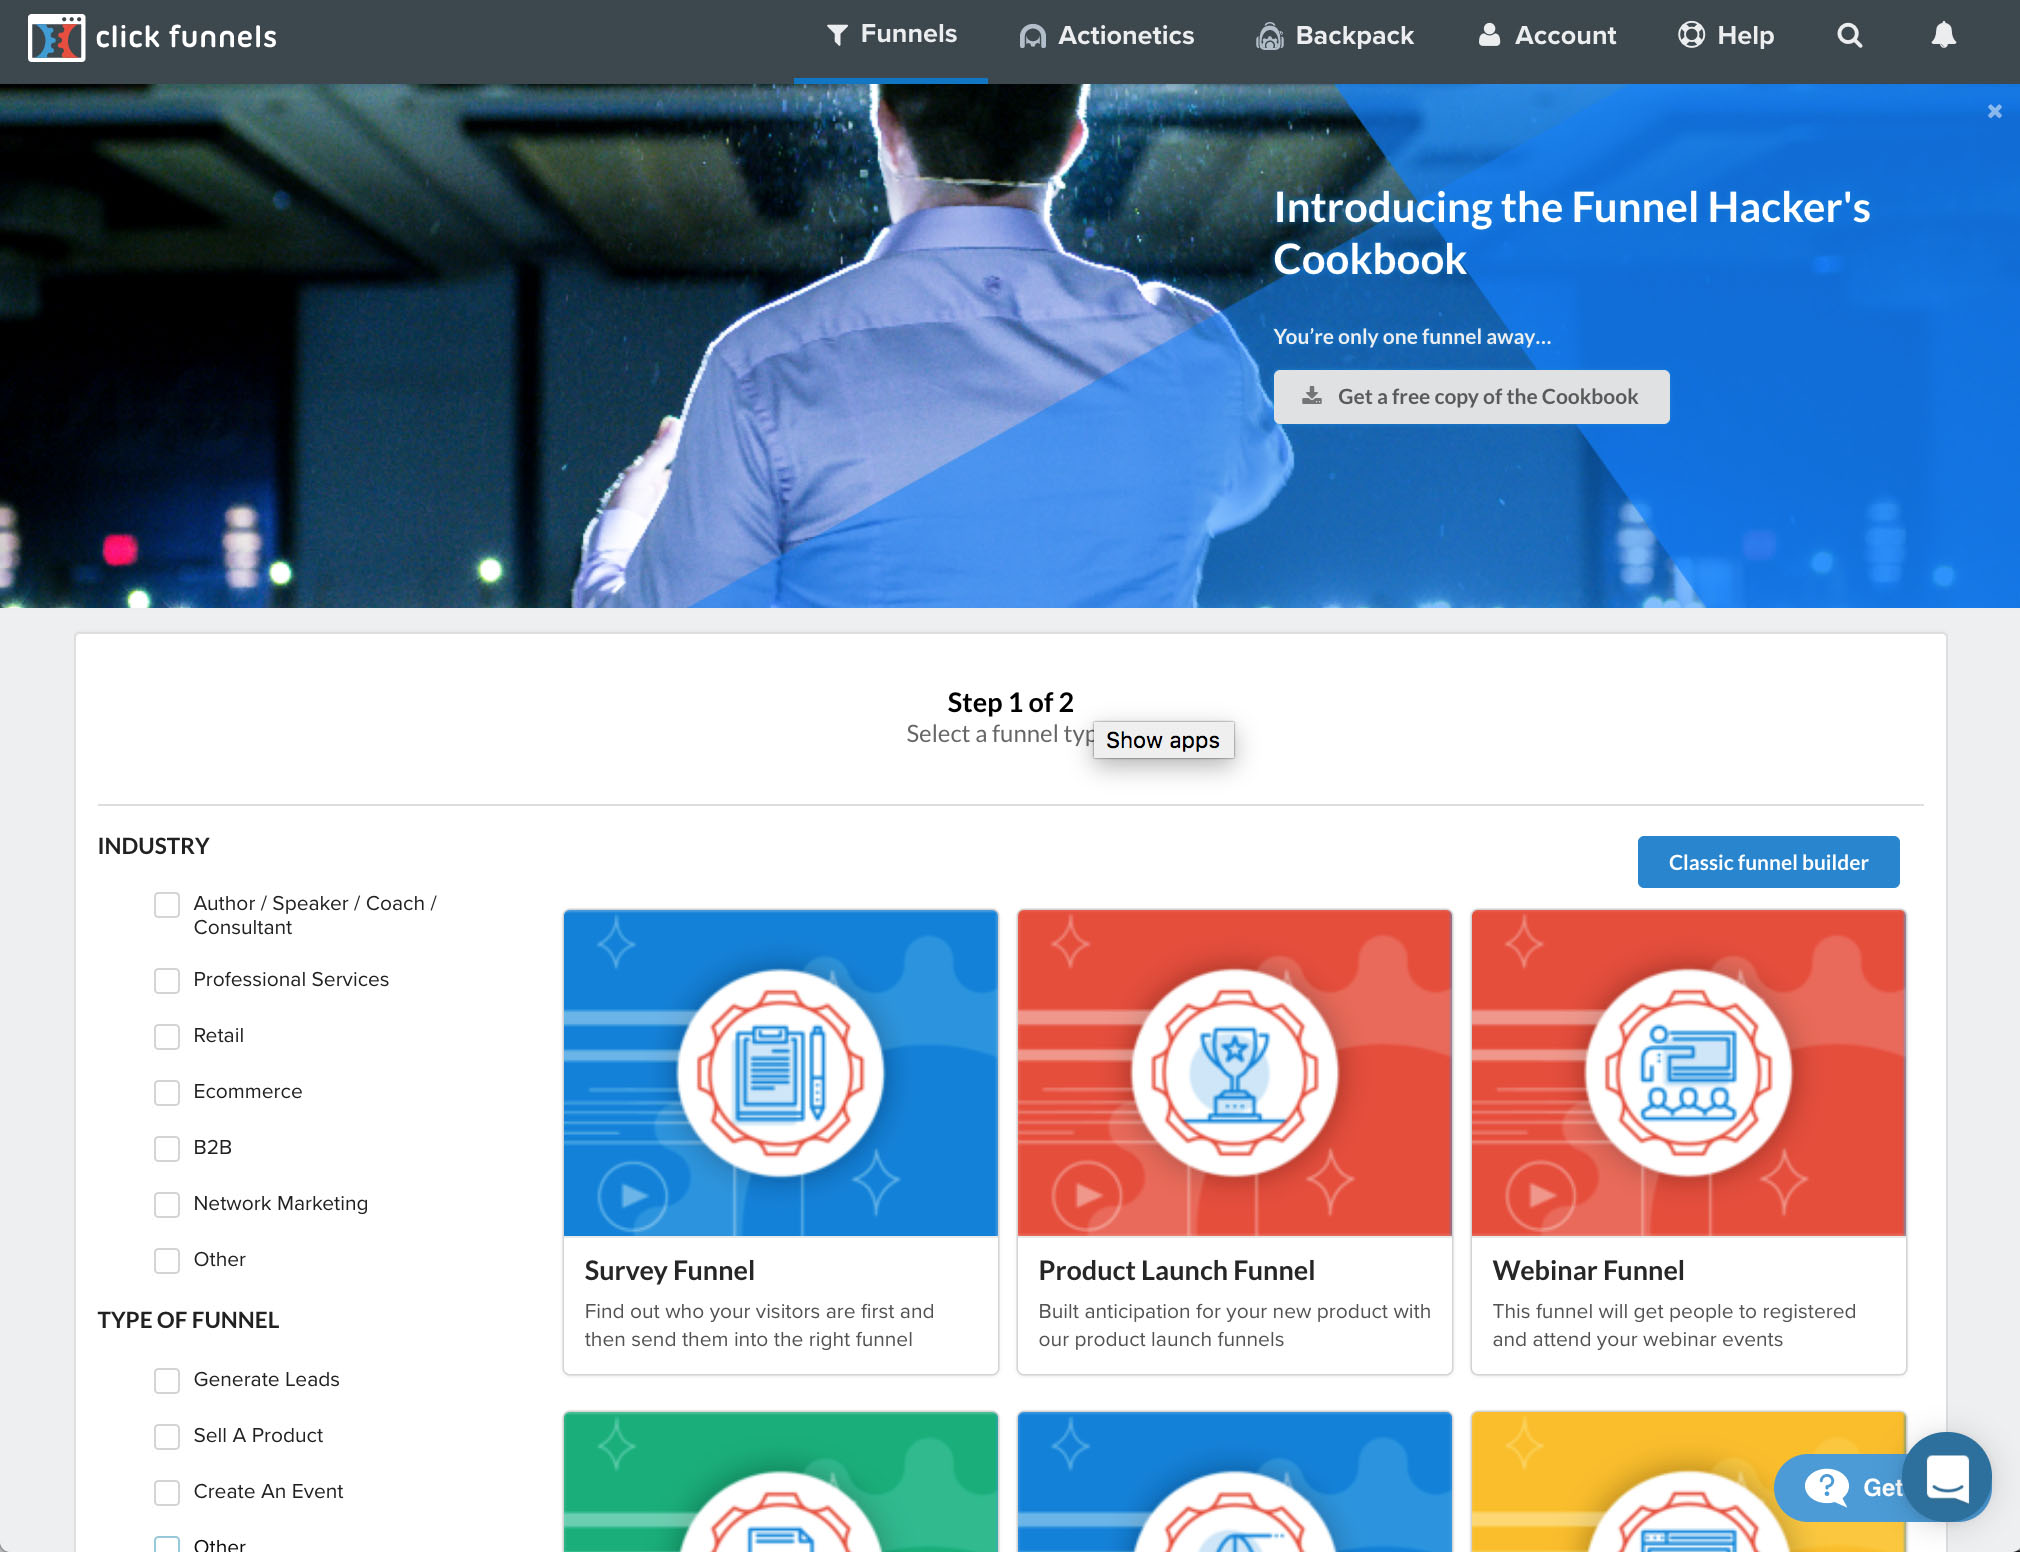
Awesome Feature # 4: Backpack
This is another feature most marketing tools don’t have – which is the ability to create your own affiliate center.
With a backpack, you can create affiliate links for the products you sell – so other people can sell your products for you in exchange for commissions. Clickfunnels puts it best when they say ‘it’s like having an army of your own salespeople’.
What makes the Backpack feature so amazing is this:
- The commission links are ‘sticky’: Previously, affiliate IDs of your affiliates were stored in browser cookies. This means if customers cleared their browser history or purchased your product from another device, your affiliates commission would be lost since the browser cookie got lost. Now, the affiliate IDs are tied with customer emails. That way no matter what device they use, your affiliate commissions will be tracked because the customer email will remain the same.
- The commission is for all products your customers buy: Suppose a customer came to the product page referred by one of your affiliates. But they also buy other products from you as well. Your affiliates will get the commission for every single product their referred customers buy from you.
- You can create 2nd tier commissions: If you want, you can give a commission to your affiliates for every customer their referred customers bring.
- You can run contests: You can create a competition among your affiliates so that the ones that sell the highest amount of your products, get a prize of your choosing (in the form of money).
With these features, you can be sure your army of salespeople will be motivated to sell your products, bringing you a higher amount of sales which in the end, will increase your revenue and profits.
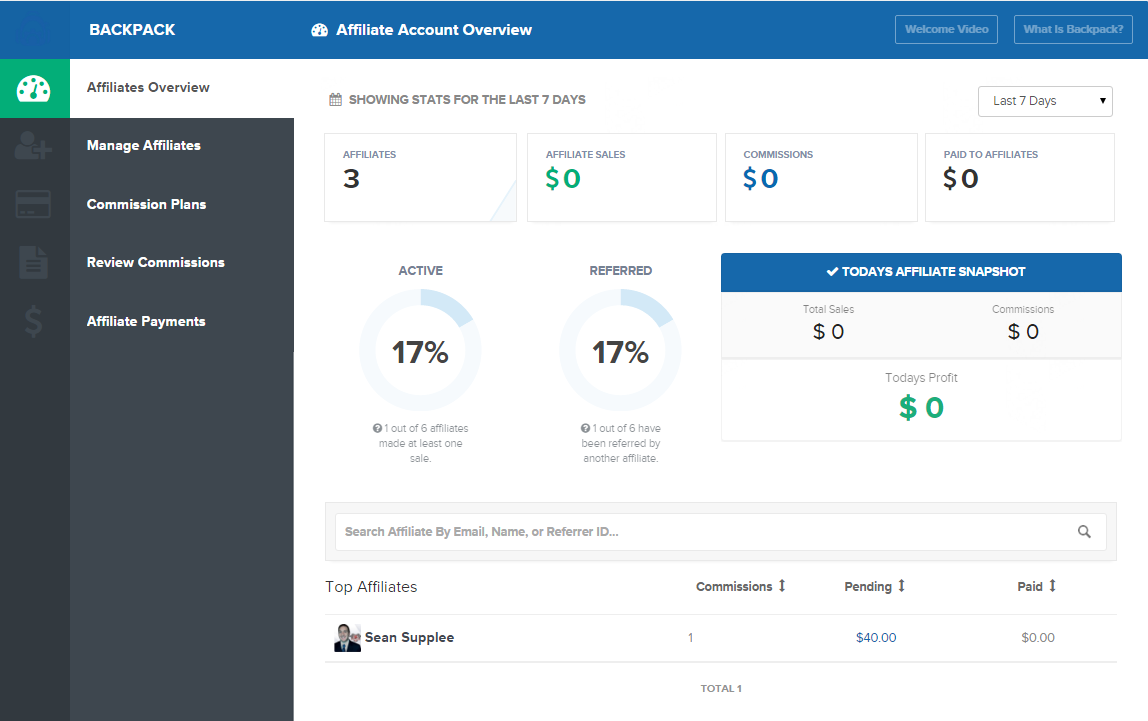
Clickfunnels: Pros and Cons
Based on the features we’ve listed, here’s what we think are the biggest pros and cons of a tool like Clickfunnels:
Pros:
You get prebuilt funnels: These are 100% tested and guaranteed to bring you the maximum conversions possible. This is a big deal since it means you don’t have to learn marketing (or at least, don’t need to be an expert at it).
You save money because of Actionetics: A CRM and Email Marketing service is nothing to scoff at. If you purchase these services for your running online business, they’ll easily set you back $300+ dollars.
You make more money because of Backpack: With affiliate marketing, you will get people who sell your products for you. And you don’t pay them a penny until their referred customer makes a purchase. It’s a safe way to make more money without spending time and money.
You save time: Integrating different services like CRMs, payment gateways, email autoresponders and landing page software is a big hassle. With Clickfunnels, everything is set up and ready to go.
Cons:
There’s a big learning curve: Learning Clickfunnels is going to take some time. That’s because there are so many features and so many things you can do to optimize your marketing funnel.
The basic plan has a lot of limits: The Clickfunnels basic plan (which costs $97) doesn’t have Actionetics and Backpack, only sales funnels. Plus, the number of funnels you can create and the subscribers and traffic you get is limited.
Its analytics aren’t very detailed: You don’t get a lot of info on how your funnels are performing except conversion rate, subscribers, and unsubscribers etc. To get more detailed data, you’ll have to integrate Google Analytics.
You can’t create content: While Clickfunnels does integrate with WordPress, there’s no feature in-the-box which lets you create blog posts and articles.
Final Verdict: Is Clickfunnels for You?
If you want an all-in-one software – just one – that can help you run your online business, Clickfunnels is meant for you. It’s a great sales funnel tools for beginners just starting their online business.
But even if you’re a power user or an expert marketer, with Clickfunnels, you can create a powerful funnel and integrate other services you might use.
Because while Clickfunnels is easy-to-use, it’s by no means a dumbed down or watered version of any software in the market. It has all the features you could possibly need to sell your new product or service.
It starts at $97 for the base subscription. But if you want to unlock Backpack and the Actionetics bundle, it’ll cost you $297 to get you started. If you are building your business online, I strongly recommend you unlock Backpack and Actionetics bundle. You just won’t get the analytics and metrics without it.
Leadpages vs. Unbounce vs. Clickfunnels: The Ultimate Battle
Most customers don’t whip out their credit card when they visit your website the first time. It takes a lot of convincing (and trust) to turn your visitors into customers.
And a sales funnel helps you do exactly that. It’s a marketing ‘process’ online businesses like yours can use to turn your visitors into buyers.
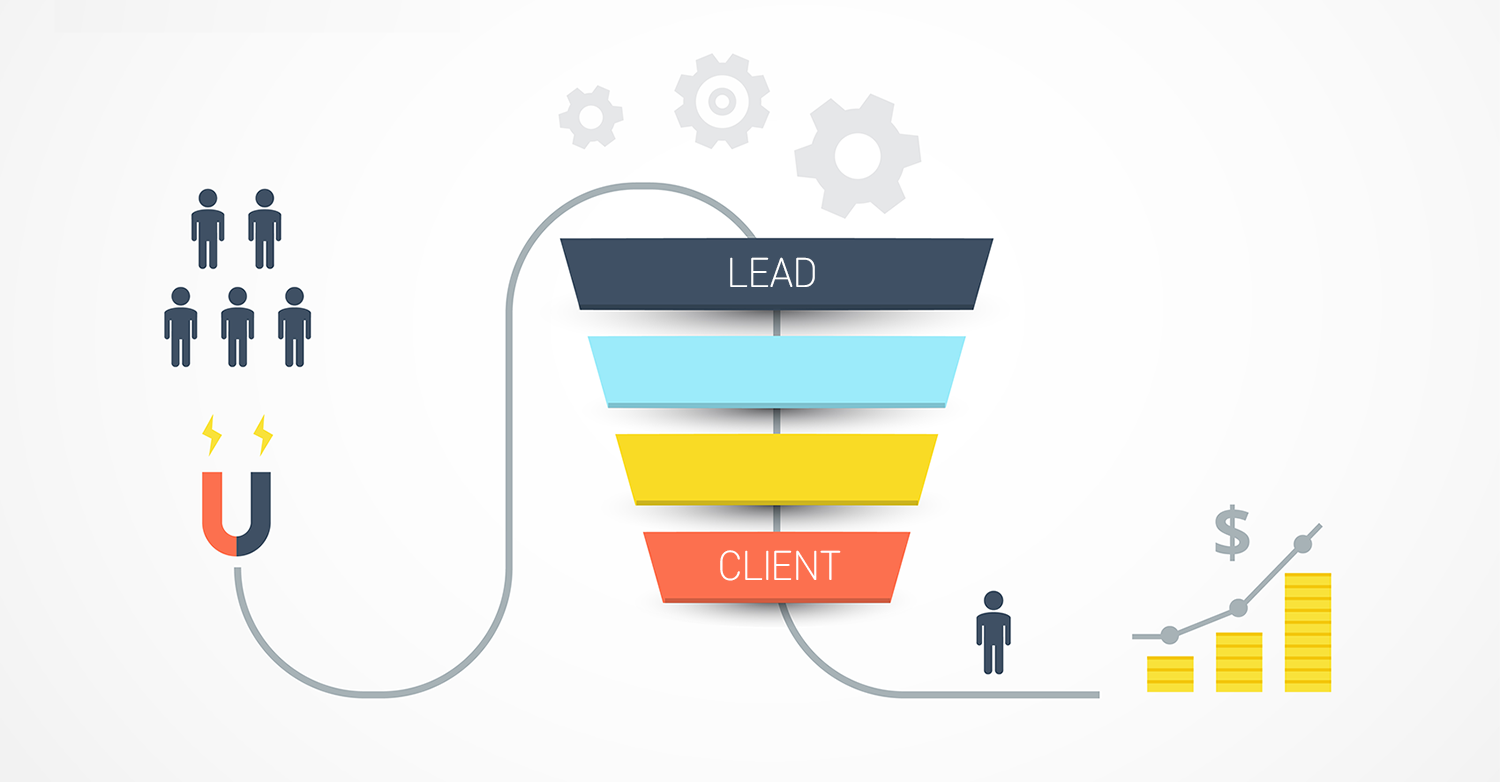
Here’s how it works:
A lot of visitors enter into your funnel through your sales page, blog or website. As they move further into the funnel, few and few visitors remain. But the ones that successfully reach the end of your funnel i.e. to your thank you / checkout page – become your customers.
Every online business, whether small or large, uses a sales funnel (whether knowingly or unknowingly) to get new customers.
But here’s the thing:
Creating a sales funnel wasn’t always an easy job. To create the necessary parts of the sales funnel i.e landing pages, sales pages, opt-in forms, checkout forms etc., companies had to hire web developers and designers.
But fortunately, new tools have emerged with which you can create complete sales funnels without any coding whatsoever.
There are hundreds of these tools out there, all of which let you build excellent sales funnels. But they can vary a lot in price, features, and functionality.
Which tools should you choose?
To make your job easier, we’re going to review three awesome tools that you can use to build your own sales funnel today. We’ll discuss the features, functionality, and prices of these three tools so you can find one that’s a winner for you.
Let’s get started.
Leadpages vs. Unbounce vs. Clickfunnels
These are the three tools we’ll be comparing in this article. First, let’s look at a brief overview of each of them:


Leadpages: Leadpages is the most basic, least expensive sales funnel tool on this list. You get page templates, a drag-and-drop web builder, analytics dashboard, A/B testing, pop-up builder, inbuilt payments, FB ad creator and the ability to integrate with other marketing tools. It’s enough to get you started if you’re going to build simple landing pages to collect emails.
Unbounce: You can call Unbounce the beefed-up version of Leadpages. Every feature you get in Leadpages i.e. the templates, A/B testing and the analytics dashboard – comes with Unbounce. And although you don’t get inbuilt payments or the FB ad creator, you get ‘Dynamic Text Replacement’ and the pop-up / sticky bar builder – which are more unique features Leadpages doesn’t have.
Clickfunnels: Of the three, Clickfunnels is in a class of its own. Because with Clickfunnels, you already get pre-built, 100% proven-to-convert sales funnels. All you have to do is add your own text and images. Plus, you also get a CRM, email marketing automation tool and an affiliate program creator, all which are complete marketing tools themselves. With Leadpages and Unbounce you’ll have to pay extra for different services to get all this functionality. But with Clickfunnels, all this comes right out of the box.
Now that you have a general idea about which tool stands where let’s compare these tools a little more in-depth. To do that, we’re going to compare how they stack up in these two areas:
- Features & Functionality
- Value for The Money
But before getting started, it’s important to make clear that none of these tools are ‘the perfect choice’. It all depends on what matters to you.
Is price a major deciding factor? Choose Leadpages. Don’t have experience choosing and integrating marketing tools yourself? Choose Clickfunnels. Want comprehensive data and prefer to pick your own marketing tools? Choose Unbounce.
Ultimately, it’s up to you to decide which tool is best for you based on your own unique situation.
With that being said, let the comparison begin!
Features and Functionality
In this section, we’ll compare the functionality of Leadpages, Unbounce, and Clickfunnel – and see which of the three offers the most comprehensive set of features.
Leadpages
Templates and Web Builder: Leadpages offers 130+ templates. You can use them to quickly build your sales funnel. There are landing pages for opt-in, ebooks, webinar, coming soon etc. Or you can build a landing page from scratch using the drag-and-drop builder. You can also integrate popup boxes and a payment system right within Leadpages so your customers can pay your right within your landing page.

Analytics and A/B Testing: Leadpages comes with a basic analytics tool which tracks four metrics: Total Views, Unique Views, Conversions, and Conversion Rate. If you want additional data, you’ll have to integrate it will Google Analytics or Facebook Pixel. Plus, you can A/B test different versions of landing pages and compare their performance.
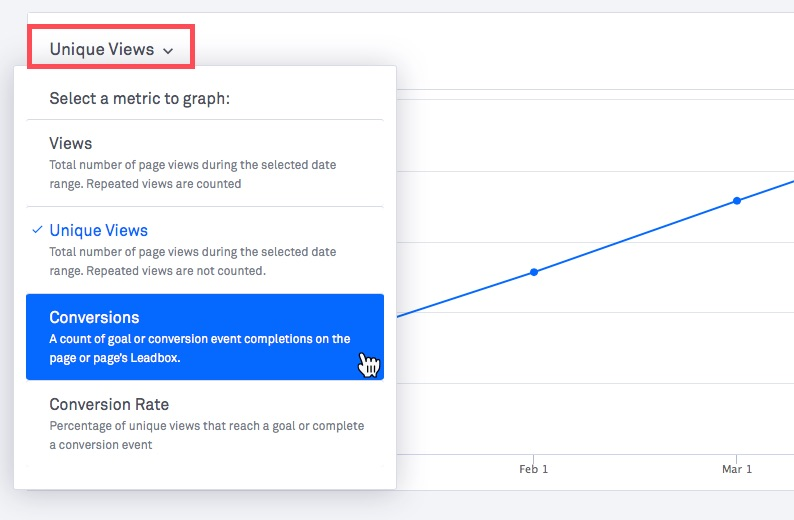
FB Ads Creator: After you’ve built your landing page, you can integrate with with Facebook ads right within Leadpages. Not only can you create an ad, you can also choose your target audience as well. Plus, you also can put a Facebook pixel in your landing pages which allow you to retarget customers who visit your landing and track and measure the specific actions they perform.

Unbounce:
Templates and Web Builder: Unbounce also offers 100+ templates and similar to Leadpages, you can choose a template based on your business or marketing campaign. But where Unbounce differs is that you also get templates for popup boxes and sticky bars, which is a functionality that Leadpages does not have. But the integrated payments functionality of Leadpages is missing.

Analytics and A/B Testing: Similar to Leadpages, Unbounce comes with its own analytics and A/B testing tool, which to be honest, feels more robust than Leadpages even though the functionality is nearly identical.

Pop-ups and Sticky Bars: Pop-ups are small windows that literally pop up on your landing page. You can add opt-in forms in them and set them to trigger after a visitor performs a certain action like clicking on a button, spending a certain amount of time, starting to close your landing page etc. Sticky bars, on the other hand, are small bars at the top or bottom of your landing page that moves with the visitor as they scroll.

Dynamic Text Replacement: In Unbounce, you can mark certain high-value keywords to change their text to what users have typed on Google Search to search for your landing page. It’s a great way to increase the relevancy of your copy which can lead to increased conversions as well.
Clickfunnels
Pre-Built Sales Funnels: This is the highlight feature of Clickfunnels. With Leadpages and Unbounce, you have to build and organize different pages of the funnel yourself – and A/B test the pages to get max conversions. But Clickfunnels puts all the pages of a funnel in one package. For example, the webinar funnel will contain the landing page, an opt-in form and thank you page. Plus every single page is already designed to get the maximum conversions possible.

A/B Testing: Suppose you don’t want to use the existing funnels and want to create your own. If you do that, you’ll need to split test with different variations of your pages in order to get maximum conversions. Clickfunnels, like the Unbounce and Leadpages, lets you A/B test and compare the performance of different variations of your funnel pages.

Backpack: With Backpack, you can create your own affiliate program. So everytime someone sells your product or service for you, they get a commission and you get more sales. Both Unbounce and Leadpages don’t have this feature.

Etison Suite: This feature of Clickfunnel has multiple tools in it you can use to automate your funnel. Here’s what you get:
- CRM: See the information of people in your funnel and their activity. View their email, location, social media profile, which funnel they’re in, what product they’ve bought and who much money they spent.

- Email Autoresponder: Create awesome email marketing campaigns and automate them. Then send them to different email lists you’ve segmented based on demographics and activity.

- Action Funnels: Automate your whole marketing process by automatically sending your customers emails and text messages based on the actions they take inside your funnel.
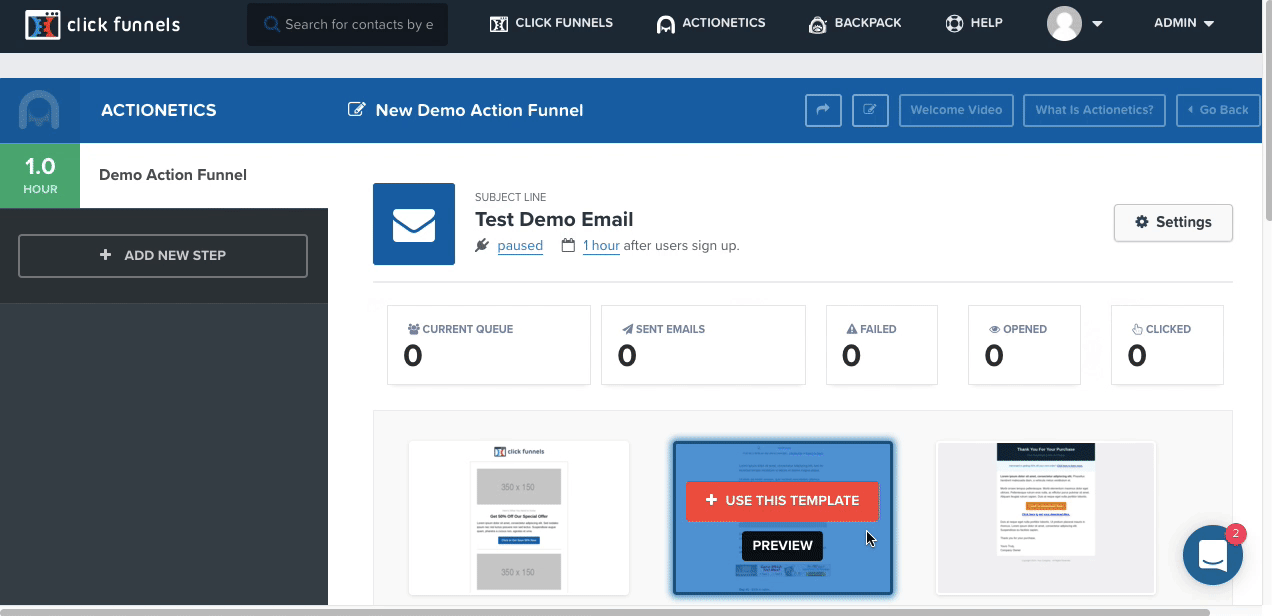
Verdict
In terms of functionality, Clickfunnels clearly wins because of the ‘Backpack’ and ‘Etison Suite’ features. That’s because you get a fully functioning CRM and Email Autoresponder service in addition to the sales funnel builder.
Value For The Money
Now that we know the features, which tool is the best choice? Which tool gives the best value for the money?
Of these three tools, our answer is Clickfunnels.
The main reason why is because, with Leadpages and Unbounce, you only get tools to build a funnel that captures leads. But even here, you have to build your sales funnel yourself. Clickfunnels gives you pre-built sales funnels to get you started.
If you want to learn more about Clickfunnels, check out our full Clickfunnels review.
But building a funnel is just the first step.
Where are you going to store those leads? How are you going to send them emails?
There’s no way to do these things in Leadpages and Unbounce. You have to subscribe to a 3rd party email marketing service and a CRM software. Both of this software start at an average of $30 per month and might be even free to get you started.
But as you get more subscribers, the price of these services will increase to up to $300+ per month and maybe, even more, depending on how many leads and visitors you have. This combined with your landing page tool i.e. Unbounce or Leadpages can add up to a cost of $500 per month.
Plus, you’ll have to set up each of these tools yourself, which takes time and effort.
But with Clickfunnels, you simply pay $297 per month and you get all features and everything is unlimited forever, which is why this is the best sales funnel tool if you’re just starting your online business.
Thrive Themes vs Clickfunnels: Which Sales Funnel Builder is Best?
Growing your business means doing online marketing right. Sales funnels (done right) can be an awesome way to generate more leads, more clients, and more revenue. In this review, we’ll compare two awesome sales funnel building software: Thrive Themes vs Clickfunnels.
First, let’s start with a brief intro of both these tools to get a general idea about them.
What is ClickFunnels?
Clickfunnels is a sales funnel builder. A sales funnel has a series of webpages (such as landing page, opt-in forms, checkout pages etc.) that guides your visitors and turns them into paying customers. Clickfunnels gives you pre-built funnels for selling anything you want and tools to measure the performance of your funnels. Plus, with the pro version of Clickfunnels, you also get a CRM system and an email autoresponder tool.

Thrive
Thrive Membership is a collection of tools and plugins designed to be used with WordPress. You can use these tools to build sales funnels (and other kinds of websites) and measure their performance. Also, it has pre-built landing page templates and a website builder you can use to create complete sales funnels. Plus it has plugins like quizzes, testimonials and countdown timers you can add to your sales funnel or website.
Then here’s a short summary of Clickfunnels and Thrive Themes based on the above description:
- Clickfunnels is an all-in-one solution for building sales funnels to sell your products and services.
- Thrive Themes is a website building tool you can use to create all kinds of websites, including sales funnels.
Now that we know a bit about these tools, let’s dive in and see exactly what features these tools have.
Thrive Themes: An Awesome Suite of WordPress Tools & Plugins
The highlight of Thrive Themes is its diverse suite of WordPress tools and plugins you can use to build sales funnels.
Here’s the full list of tools and plugins Thrive offers:
1. Thrive Themes: Thrives Themes are a collection of WordPress Themes you can use to get started building your website.
2. Thrive Leads: This is a robust tool for creating opt-in forms on your website. You can create pop-up forms, slider forms, in-line forms, sticky forms and more that you can add to your website. In addition, you can also set when you want these forms to show such as when a person is exiting your website or scrolls half-way through. Plus, you can also see which forms are converting best with the inbuilt analytics tools.
3. Thrive Architect: This is the Thrive website building tool. You can use it to build homepages, landing pages, sales pages, blog posts and more. Plus, you can use it to add buttons, pricing sections, videos and other elements to your web pages.

4. Landing Pages: Thrives gives you templates for building your sales funnel. There are pre-built pages for everything from landing pages, opt-in pages to webinar pages and sales pages. Whatever you need to build your sales funnel, you’ll find it in here.

5. Clever Widgets: If your website has a lot of content, you can show relevant posts in the widget sidebar based on what someone is reading instead of the same posts every time.
6. Headline Optimizer: Headlines make your posts a success or failure. The headline optimizer allows you to create multiple headlines for a post and then A/B test it. The optimizer then picks the most clicked headline and makes it the default for that post.
7. Thrive Ultimatum: Thrive Ultimatum lets you add a countdown timer to any offer you present on your website or sales page. When the timer runs out, the offer will automatically end.
8. Thrive Ovation: This excellent feature lets you collect testimonials from your customers and followers either through a submission form or social media networks. Then, using the many beautiful design templates, you can display these testimonials on your sales pages, increasing your conversion rates.
9. Thrive Quiz Builder: A quiz builder is an excellent tool you can use to build quizzes on your website. You can A/B test quizzes, tie them to your offers and use the answers to segment your users and uncover valuable data.

10. Thrive Comments: This plugin gives your website visitors the ability to comment on your posts and create more engagement.
11. Thrive Optimize: With this tool, you can A/B test the pages in your sales funnel or website with different variations – and the pick the one that gets the most clicks or sales as the default.
Clickfunnels: An All-in-One Sales Funnel Building System
The highlight of Clickfunnels is that it offers the quickest and simplest way for entrepreneurs and marketers to build effective sales funnels.
Let’s look at ClickFunnels features in a bit more detail…
1. Clickfunnels: A Fast Sales Funnel Builder
The main feature of Clickfunnels is, well… Clickfunnels.

What this means is you get ready-to-use funnels for selling products, collecting emails and even hosting webinars that you can create in one click.
As an example, suppose you want to get leads for your new digital course on training dogs.
For that, your funnel needs to have 3 pages: 1) The sales page with an opt-in form. 2) Checkout page. 3) The Thank You Page
In Thrive, you’d have to make these pages separately using the free templates. But in Clickfunnels, you’ll automatically get the sales funnel pages created in this order.
All you now have to do it edit the content and add your digital course – or whatever you’re selling.
2. Backpack: Run Your Own Affiliate Programs
With Clickfunnels, you don’t have to sell your products alone. You can get others to sell for you as well.
How?
With the backpack feature – which lets you run affiliate programs and offer people commission in exchange for selling your products

This is a great way to get your very own salespeople for free and get them to sell your products for you!
3. Actionetics: Run An Automated Marketing Campaign
Like we said, Clickfunnels is not just a tool, but a whole system for creating sales funnels.
So if you subscribe to the pro version of Clickfunnels, you unlock a whole new set of tools called Actionetics.
In this tool, you can manage your leads, divide them into segments, send them targeted emails and text messages (with their permission) and see your whole marketing campaign in a glance which you can then edit with additional funnels and emails.

This means that with the addition of just one more feature, you get your very own robust CRM system and email autoresponder tool as well!
Which Tool Is Better For Creating Sales Funnels?
To be fair, both these tools have their own advantages and disadvantages.
Let’s start this discussion with the price:
Clickfunnels Pricing:
It costs $97 per month to get Clickfunnels basic plan. And if you want all its features such as the email autoresponder, CRM, and affiliate system, you need to get the advanced plan called the Etison Suite. This costs $297 per month.
Thrive Membership Pricing:
It costs $30 per month (paid quarterly) to get a Thrive Membership. In this membership, you get all of the tools and plugins they have. The only limit is you can use them in up to 25 websites. If you’re an agency and need to work on 25+ websites, you’ll have to get the agency membership which costs $69 a month (paid quarterly).
On the surface, Thrive Themes is the significantly cheaper option.
If you compare Thrive Membership with the Clickfunnels basic plan, Clickfunnels is 5 times more expensive and compare it with the Clickfunnels premium plan (the Etison Suite), Clickfunnels is 10 times more expensive.
But there’s another side to the story.
With Clickfunnels, here’s what you’re getting:
1. Free Hosting: Clickfunnels hosts your website so you don’t have to pay for hosting. Thrive Themes does not. However, with Clickfunnels, you only own your web pages as long as you’re a subscriber. With Thrive Themes, you own them even if you are not.
2. Inbuilt Payment Integrations: You can set up payments for your customers inside ClickFunnels without going for a 3rd party solution. With Thrive Themes, you can add payment integration only with a 3rd part solution.
3. CRM System: Thrive Themes lets you collect leads via opt-in but has no option for you to store leads. But Clickfunnels also lets you store leads and segment them into lists based on the actions they take. Again, you have to integrate Thrive with a 3rd party CRM to get this functionality.
4. Email Autoresponder: In Clickfunnels, you can send automated emails to your leads after they opt-in to your funnel. In Thrive Themes, you cannot and need to connect to a 3rd party email autoresponder.
5. One-Click Upsell or Downsell: After customers buy (or don’t buy) your product, you can also promote other products after the checkout page in Clickfunnels. You can’t do this and need a 3rd party tool in Thrive Themes to do this.
As you can see, with Thrive Themes, you only get tools to build your sales funnel. For hosting, adding a payment system and managing and marketing your leads, you need 3rd party solutions.
While you can get many of the tools for free, tools like CRM systems, hosting and email autoresponders certainly aren’t free – and also requires you to pay additional dollars monthly to use them, adding up to a significant amount.
However, it is true the Thrive Themes offers many unique tools to create a business website focused on conversions.
Instead of just an opt-in form on your page, you can add a slider opt-in form, a ribbon opt-in form, a form that pops up when the visitor is about to close the website and more. In addition, you can add things like blog posts, comments, headline analyzer and more. For building a proper website, Thrive Themes is a good choice.
The Final Verdict
Thrive Themes is definitely the cheapest way to build your funnel – but that’s only what it can do. For more functionality in managing your sales funnel (which you’ll definitely need), you’ll have to integrate other services.

And while many marketers and entrepreneurs will like this freedom of choosing their own tools and services for managing their funnel, others will find that signing up and paying for additional 3rd party tools and extensions too much of a hassle.
If you’re one of the latter – and are looking for a complete all in one sales funnel solution for one fixed price, Clickfunnels is the way to go. Click here for a Free 14-day ClickFunnels Trial!
It has everything you need to create your funnel, manage your leads and tools automate your whole marketing process under one roof, that is what it was designed for after all.
You might also like:
Ontraport vs Clickfunnels: Which is Right for You?
How do you run your online business? How big is your sales team? How many marketing campaigns do you run?
These are important questions you need to answer so you can make the right choice between Ontraport and Clickfunnels.
First, let’s start by briefly seeing what each of these tools are made for.
Ontraport:
Ontraport is the swiss army knife for automating your online business. It has lots and lots of tools to manage all parts of your business such as campaigns, sales, finances and more.
Clickfunnels:
Clickfunnels and all its accompanying features revolve around doing one thing only: helping you create functional, attractive sales funnels that successfully get people to buy your products and services.

Which Tool Should I Get For My Online Business?
None of these tools is a one-size-fits-all solution. Both of them cater to different businesses with different needs.
That being said, your decision on what tool to get depends on exactly how complex the inner workings of your online business is.
If it’s just you – or a small team that’s going to be selling products, services or memberships, and you need a no-nonsense tool that’s powerful, yet simple and easy to use, Clickfunnels is the ideal choice.
But, if your online business is really big and complex, plus you have an army of marketers and salespeople on payroll who manage your customers and your many marketing campaigns, then Ontraport is a much better fit.
You now probably have an inkling of which tool you need to run your online business.
But hang on…
Let’s first look at the features each tool has to offer. Then, we’ll look at the pricing followed by our final verdict. And then you can decide which tool you should choose.
So let’s get started…
Ontraport: The Swiss Army Knife For Running An Online Business
If you had to choose one word to describe Ontraport, it would have to be ‘automation’.
Why?
Because even though it’s a platform where you can create sales pages, manage your leads and send them emails; going through the software, you can’t help but notice Ontraport’s strong emphasis on automating each and every part of running your business – not just your campaigns.
Don’t get me wrong. This isn’t a bad thing.
[earnist ref=”curious-about-ontraport” id=”33702″]
This can prove to be extremely useful for big businesses. But if you’re a small team or a solo entrepreneur, you might find these extensive automation features to be overwhelming.
But we’ll let you decide what you feel about this tool yourself.
Here’s a rundown of the major features Ontraport offers.

1. Business Automation
The highlight feature of Ontraport is business automation.
What this means is you can automate each and every little activity that happens within your business.
Here’s an example of what automation within Ontraport looks like:
Suppose you are running three sales funnels at the same time. One that collects emails of people interested in seeing your software demo. One that gets people to buy your ebook. And one that gets people to subscribe to your newsletter.
Now each of these are different audiences.
With Ontraport, you can automatically assign tags to different audiences, assign salespeople to follow up on the people interested in your demo, send an email campaign to people who subscribe to your newsletter.
And that’s just one example.
With Ontraport, you can automate tasks associated with your CRM, your marketing campaign, your sales processes, your billings, your email marketing and more.
And that’s barely scratching the surface.
Remember when the app store was booming, we used to say ‘there’s an app for that’? Now with Ontraport, you can say ‘there’s an automation for that’.
2. Campaign Builder
This is where the automation part of Ontraport really shines.
In the campaign builder, you can visually map out the whole process of your company’s marketing campaigns.

Here’s what the process of building a marketing campaign with the Ontraport campaign builder looks like:
1. Select a trigger or activity: This can be any activity or event that happens within your business. For example, a person opts-in to receive a demo. A customer purchases a product. Your salespeople initiate a follow-up call. You sell 10 products…
2. Select an action after said activity happens: What do you want to do after your desired activity happens? For example, your action after a customer opts-in to receive a demo could be to a) assign them the tag ‘high-priority’, b) add them to an email list c) assign them to a salesperson for a follow-up call.
3. Rinse and Repeat: After this happens, you can add another trigger and another action based on the outcome of the previous action… and on and on it goes, until you’ve built out your fully automated marketing campaign.

3. CRM:
Ontraport CRM is feature-packed, powerful and extremely sophisticated.
To start, you can add custom fields, view the behavior of your customers and see the communication history of your contacts.
Then, based on the above metrics, you can divide your contacts into different groups and segment them into different lists.

And finally, you can use these lists in your automation processes within the campaign builder, email marketing tool or for any purpose within your online business.
Other Notable Features
All these fancy automation features, marketing campaign builders, and CRM tools are well and good – but none of this matters if you can’t build a solid sales funnel to get started.
So, for that, Ontraport provides:
1. Landing Pages: There are templates you can use to quickly build landing pages, test them and modify according to your preferences. Plus, you can add opt-in forms too to collect emails.
2. Email Marketing: With the powerful CRM behind you, you can create emails and send them to your segmented lists based on their identities or behaviors to create highly personalized marketing campaigns.
3. Send SMS, Letters, and Postcards: You can integrate Ontraport to services that let you send personalized greeting cards, letters and SMS to your audiences.
4. Create an E-commerce or Membership Site: With Ontraport, you can also create an e-commerce site or connect with WordPress to create a membership site.
5. Dashboard: You can create custom metrics and display them in a single dashboard. For example, you can see metrics for products sold, the conversion rate for a form, number of users in your email list etc.

ClickFunnels: The Sales Funnel Builder That Does One Job… But Does It Well
Reading our intro and the review of Ontraport, you might get an impression that Clickfunnels is the ‘weaker’ of the two.
Nothing can be further from the truth.
Clickfunnels offers the same features as Ontraport does, but it isn’t focused on automating every single tiny thing that goes on in your business.
No, it’s focused on doing one job: Helping you successfully sell your products and services to your customers – and it makes this process quick, easy and painless for you.
To do that, Clickfunnels offers ready-made sales funnels for:
1. Collecting Emails
2. Selling products and services
3. Hosting webinars
All you really have to do is edit the funnels a bit, move them around to create a personalized sales funnel and automate the process so that everything runs by itself.
Let’s see in detail how this works.
Ready-To-Use Sales Funnels
The biggest selling point of Clickfunnels is that it gives you ready-to-use funnels for selling ebooks, services, products, webinars, memberships and more. And what’s more? All these funnels are scientifically tested to convert.

This is a huge factor you need to keep in mind.
With other tools, you need to be an expert in building funnels and campaigns in order to take full advantage. But Clickfunnels does the whole job for you.
Its funnels are designed to get the highest number of sales possible and you can see exactly what pages your funnel has. For example, a funnel for selling an ebook might have the following pages:
1. The sales page with an opt-in form.
2. The checkout page.
3. The thank you page.
All these pages can be easily modified with Clickfunnel page editor which, to be honest, is much better than Ontraport’s website editor.
That’s because everything feels more flexible and less confined. You aren’t just working with boxes and templates. You can change and move individual elements more easily.
Actionetics: Contact Profiles, Email Lists & Broadcasts
Clickfunnel’s CRM shows you in a glance the information about your leads and subscribers.

A cool thing to note is that once you click on the lead to get more detailed information, Clickfunnels pulls that lead’s social media profiles as well, which you can visit with a single click to get more in-depth information.

In addition, you can see all other relevant information like what was their last purchases, which email list they’re in, what campaigns are they currently a part of etc.
Plus, based on their activity, demographics or other info, you can quickly segment your leads into different groups so you can send them personalized emails or put them in your automations.
For that, Clickfunnels has a whole email marketing tool where you can create emails and whole email campaigns and send them to your desired audiences based on different identity and behavior related metrics.

Actionetics: Action Funnels
Actionetics is where all the automation inside Clickfunnels happens.

Here, like Ontraport, you can create funnels – and if someone interacts with it, you can assign different actions based on their previous action.
The biggest difference between the two is this:
Clickfunnel’s automation tool is focused on getting users through funnels and getting you sales. Ontraport’s automation tools are focused on managing all aspects of your business, not just funnels.
What’s The Cost?
Clickfunnels Offers Two Plans:
1. Basic Plan
This costs $97 per month which includes everything you need to build your sales funnels. But the number of funnels, traffic, and emails you can create is limited.
2. Etison Suite
This costs $297 per month in which you unlock the actionetics bundle, which has the CRM, email marketing, and automation tools as. Plus the number of emails, traffic, and funnels you can create is unlimited.
Ontraport Offers Four Plans:
1. Basic
This costs $79 in which you get to store 1000 contacts and unlimited emails.
2. Plus
This costs $147 in which you get to store 2500 contacts and unlimited emails.
3. Pro
This cost $297 in which you get to store 10,000 contacts and unlimited emails.
4. Enterprise
This costs $497 in which you get to store 20,000 contacts and 200,000 emails.
Note: The basic plan severely limits the capabilities of both Clickfunnels and Ontraport. That’s why it’s recommended that no matter what tool you choose, you subscribe to the Etison Suite for Clickfunnels and the Pro Plan for Ontraport, which unlocks all the features of both tools respectively.
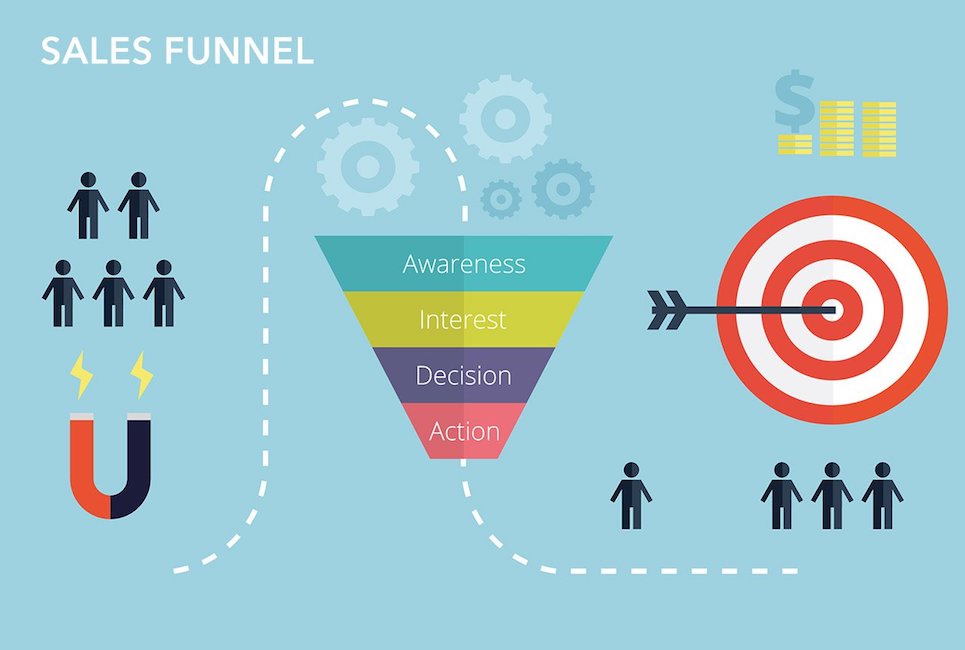
Our Final Pick
The importance of automation for big companies cannot be understated.
That’s why if you have expert marketers and salespeople at your service, and want a solution that can provide data and tools for both your sales team and marketing team, plus help you automate the tedious, repetitive tasks in every area of your business, Ontraport is the way to go.
If you don’t need (or want) to automate each and every process of your business, and want to focus on selling your products and services, Clickfunnels is a great choice.
It offers sales funnels so that even a newbie can start selling online like a pro. Plus, it offers powerful, yet easy to use CRM, email marketing, and automation tools to run your funnel and your online business, all the while remaining easy to use.
9 Best Wix Websites For Business Inspiration
With over 110+ million users worldwide, it seems that everyone on the internet is using Wix to build their website.
And why wouldn’t they? Wix is free and it’s awesome.
If you want to build a website and don’t have the budget for a web developer, nor do you want to be stuck with messy WordPress installs, Wix is a great choice for building your professional, business website.
There are hundreds of beautiful templates for you to choose from – and their robust customization tools allow you to create exactly the kind of website you want.
Not just that, Wix also has a booming marketplace full of apps (Wix’s version of plugins) which you can integrate with your website to add more functionality.
Try Wix! It’s FREE!
To show you what Wix is capable of, and to inspire you to build your own business website, we’ve compiled a list of, what we think, at the top Wix websites.
And these websites aren’t being used for hobbies and personal blogs. No, people are running fully-fledged businesses on them.
The reason we’ve created this list is to show you that business websites don’t have to be generic and ugly. Instead, they can be beautiful, wacky, colorful and unique.
9. Two One Studio
Two One Studio is a graphic design/product creation company in Lisbon where they collaborate with artists and creatives to create high-quality designs and products.
Their website focuses on showing off their latest designs and clothing items. They do this by featuring high-quality images and applying the use of rich gallery templates to show off their portfolio. In addition to that, they also have an online store and complete checkout and payment functionality so customers can order items directly from their website.
The design of their website is fairly simple with a menu bar at the top all with links to their dedicated landing pages.
Try Wix! It’s FREE!
8. Brown Owl Creative
This website belongs to another creative agency – called Brown Owl Creative. They are a web design agency in Essex who build beautiful websites and web experiences for their clients.
That’s why, naturally, their own website has to be beautiful as well – which it is! It’s based on a template which allows the agency to show off delightful, rich images of their work. What brings the website more alive is that the image thumbnails aren’t static, but are animated.
Navigation is easy thanks to the ever-present hovering menu bar that moves with you as you scroll. Plus the beautiful typography makes reading the website an absolute pleasure!
7. Chris Covert
Among business websites, you might be wondering why we’ve included a portfolio website on our list.
The answer is because not all people who run businesses have big teams and huge setups. Instead, for many people, their business is selling their skills. And Chris’ website does a marvelous job of doing that for him.
Another reason why this website deserves to be highlighted is that Chris used the power of Wix Code to add custom animations and effects to his website – utilizing the full power of his web development skills on Wix.
Visit his website and you’ll see exactly the limitless possibilities Wix is capable of.
Try Wix! It’s FREE!
6. Cuts & Bruises Barbershop
So here it is – the first e-commerce website on our list. This website is special because it shows how different each website can be on Wix.
Here, Cuts and Bruises have created their website to reflect the personality of their barbershop, which is inspired by the music of hip-hop, metal, and grime.
Their website is chock-full of awesome functionality. Not only can visitors see awesome pictures of the barbers in action, they are also treated with delightful animations as they scroll.
On their main landing page, they have a ‘contact us’ form and an interactive map. Plus, the website offers the ability to buy their cosmetic products and book haircut appointments, which no doubt give them access to additional customers for their business.
5. Le Tigre Tents
Le Tigre Tents is an awesome circus and entertainment show full of talented performers.
Their website is a classic example of how you don’t have to conform to the design standards and rules of 99.99% websites out there.
The moment you land on their website, you’ll be transported to the 1950s. The vintage colors, beautifully written signboards, the moving gallery showcasing their show and performances – all make you wish you could experience their performance in person.
Their website features a simple landing page, a menu bar, share buttons and a contact form which let you get in touch with the people in charge.
Try Wix! It’s FREE!
4. Chiles Mexican Grill
The first restaurant website on our list, Chiles Mexican Grill’s website also, like Le Tigre Tents, customized their website to give visitors a feel for their unique branding and style.
The whole website is themed in a beautiful yellow color, has a beautiful image slider which shows their many delicious and mouth-watering dishes and deals.
The website mostly consists of images – but at the bottom of the homepage, you’ll see a form where you can subscribe to their newsletter and an interactive map which you can use to get directions from your place to their restaurant.
3. Seven Grams Caffe
Another incredible website, Seven Grams Caffe doesn’t waste much time to show their tantalizing and incredibly tasty pastries and baked items.
Their website makes use of a restaurant template where images take place front and center.
At the bottom of the website, you’ll find a slider gallery showing their deserts in full glory, a testimonial section which shows different reviews from people and a locations section where you can click to get to a page with an interactive map.
Try Wix! It’s FREE!
2. Bruno Barba
The most underrated feature of Wix is the ability to create beautiful stores. And Bruno Barba, a beard oil products website, shows just how amazing and functional e-commerce websites can be when created on Wix.
The website features beautiful typography and tons of pictures of handsome bearded men. The menu on the upper right-hand includes links to different pages of the website, including the shop, where customers can directly buy online. In addition, the website also has a shopping cart icon on the upper right corner where you can see the number of items you’ve added to your cart.
Overall, the website is fast, beautiful and a pleasure to use for any bearded/ non-bearded person alike!
1. Valeria Monis
Straight out of Russia, Valeria Monis makes beautiful, hand-painted ceramic plates and vases. Their website is extremely beautiful, minimalistic and a pleasure to browse.
Their website is fairly simple, with a hovering menu bar at the top that moves with you as you scroll. There are plenty of eye-catching pictures of their ceramics, which are subtly animated to move as you scroll. The website features rich typography that makes reading a pleasure.
In addition, the website features an online shop where you can purchase ceramics and make payments directly from within the website.
Try Wix! It’s FREE!
Tips You Can Use To Make A Great Business Website As Well
The best Wix websites, as you can see from the above, have one thing in common. All are beautifully designed and easy to use.
This is important for you too if you wish to create a Wix website that gets you more customers and sales.
So, to make sure you also create an awesome website, here are a few tips to keep in mind:
Make Navigation Easy:
Your website will have a lot of pages that lead to many areas. Your job is to make sure visitors find it easy to get to the page they want. For that, categorize different pages of your website into sections and add these sections to your menu bar. This is particularly important if you plan to create an e-commerce website with different products as it will allow visitors to easily explore and discover the various parts of your website.
Add Lots of Whitespace:
Don’t make your website crammed with text, images, and links. Make sure different elements of your website are evenly spaced and the room between elements. This makes sure people don’t get overwhelmed by your website and that they find everything easily.
Focus on Creating A Beautiful Layout:
Every website needs a different layout depending on the business you want to run. An e-commerce website is different from an education-focused blog, a portfolio, and services website is different from a restaurant blog etc. Luckily, Wix will provide you with a template that’s fully optimized for your business. Choosing a template means you won’t have to spend too much time on designing your website – and you have the freedom to customize the template any way you want.
Try Wix! It’s FREE!
Keep The Design Consistent:
Sure, there are a lot of beautiful color combinations and fonts you can use on different pages of your Wix website. But be careful to stick to just two-three fonts and a single color palette for your website. If different pages of your website have different fonts and coloring, users will get confused and you won’t be able to create a memorable design that’ll represent your business website.
Add Additional Functionality For Your Customers:
What makes Wix so amazing is that you don’t have to write a single line of code – yet add functionality that was previously reserved for big-budget websites. For example, if you offer services, you can add the Wix bookings plugin that lets your customers book an appointment with you online. Or if you’re a local store, you can add the interactive map widget to your website which visitors can use to instantly get directions to your shop. These features are mostly free and can be added to your website in minutes.
So there you go.
These tips, along with the 9 websites we listed above, are sure to give you a solid idea of how to get started building your website. So, sign up, choose a template and get started building your awesome website on Wix today!
Try Wix! It’s FREE!
How To Build A Landing Page for 5 Popular Ecommerce Tools
Most people are confused as to what a landing page is. That’s why, before we can learn how to build a landing page, let’s briefly define what a landing page is – and why it is used.
Here’s how Unbounce.com defines a landing page:
“… a landing page is a standalone web page, created specifically for the purposes of a marketing or advertising campaign. It’s where a visitor “lands” when they have clicked on a Google AdWords ad or similar.”
The purpose of a landing page, according to Unbounce.com, is to convince your visitors to take a single specific action of your choice, which is done by adding a CTA (call to action) button.
The Anatomy of A Well-Built Landing Page
No matter how many fancy software you use to build your landing page, you need to first learn how to create it. Ask any seasoned marketer and they’ll tell you that good writing is crucial to the success of any landing page.
Keeping this in mind, here’s are the top things your landing page should include to increase your chances for its success.
A Relevant, Persuasive Headline and Subheadline
Your headline should match your advertisement copy – and it should in one sentence, explain why your visitors should be interested in what you have to offer.

Benefit Driven Copy That Showcases Why People Should Buy What You’re Selling
Ensure that you write the benefits of what you’re selling, as that is more important than the features. For example, the feature of your product might be that it is 2 times faster. But the benefit of your product is that your users save 10 minutes of their time as a result of your product being faster. For more impact and greater visibility, list these benefits in bullet points nearer to the top of your landing page.

Testimonials To Increase Your Credibility
People don’t like be the first to try something new or untested. Similarly, they also don’t like to be left out of a good deal as well. If you could add testimonials from your previous customers, or positive reviews, it will go a long way to convince readers to act on your CTA.

GrooveHQ’s testimonial section includes one-sentence reviews of their product from acclaimed news sites.

GrooveHQ showing how many customers have bought their product is a great way to persuade new buyers.
A Pricing Section If You’re Selling A Product
If you’re selling a product or service, it’s important to justify the price. At the end of your landing page, create a table summarizing everything your potential customers will get when purchasing your product/service. In addition, also add a money-back guarantee or a free trial if possible to build more trust.

Pricing Table for Thrive Themes Paid Membership
Your Call To Action
70% of people will only read the top and bottom of your landing page copy. That’s why add your CTA button at the top and bottom of your landing page. But if your landing page is longer, you can add your CTA button on three to five areas.

A Call-To-Action Button on the KopywritingKourse sales page.
How To Build A Landing Page Using 5 Easy-To-Use Website Building Tools
Now that you know the basics of how to write a landing page, it’s time to learn how to build it using many of the incredible tools available online.
For this article, we’ve selected 4 of, which we think, are the best landing page building tools out there. They are:
1. Clickfunnels
2. Wix
3. Shopify
4. Instapage
5. Squarespace
All these tools are extremely powerful and have their own strengths and weaknesses, which we’ll discuss below.
How to Build a Landing Page: Instapage
If you need a simple, easy to use and fast solution to build your landing page, there’s no better choice to do that than in Instapage.
Here’s how to build a landing page on Instapage:
1. Choose A Template: Instapage offers hundreds of templates for any purpose imaginable. Landing page to collect emails? Check. Landing page to sell ebooks? Check. Landing page for a product launch? Webinar? Thank-You page? Check, check and check!
2. Edit The Landing Page: The Instapage Landing Page Builder is the place where you can edit the template you’ve chosen. Here, you can write your headlines and copy, add testimonials and images, and change the theme of your landing page template.
3. Publish Your Landing Page to A Domain: Instapage offers free hosting for your landing page, but for your visitors to be able to access it, you need to connect it to a domain (web address). To do that, simply click the publish button on the Instapage landing page builder tool. There, you can choose the way to connect your landing page to your domain. Options include connecting to your custom domain, your Facebook ad link, WordPress, Drupal and more.
Try Instapage free today!
How to Build a Landing Page: Shopify
If you are selling a huge collection of products, like clothes or mobile phone accessories, building landing pages for each product in your inventory is going to take a lot of time.
A better solution is Shopify. We love Shopify so much around here, we’ve created an entire post to help you do that, but here are some quick pointers to get you started.
Shopify lets you build a fully-fledged online store where every single item can have its own unique page.
To start, select one of the many themes available on Shopify. After you’ve chosen your theme, simply add the product(s) of your choice to your Shopify store and edit the product pages to include your own text and images.
A Shopify store with the product’s landing page showing images, features, color options and an ‘add to cart’ button.
However, if you want to go one step further and create a dedicated landing page for your Shopify store products, consider installing the Shogun Drag and Drop Page Builder Plugin to your store.
This will allow you to create landing pages separate from your Shopify website (yet integrated with it).
You can use the Shogun web builder to create a landing page complete with your product’s image, description and a checkout solution, which is perfect if you plan to run FB or Google Adwords ads for a specific product.
Try Shopify free for 14 days!
How to Build a Landing Page: Wix
Wix is another great tool you can use to build a landing page.
What makes Wix extra special is that not only can you build landing pages, you can build fully-fledged websites as well.
The process of making a landing page on Wix is fairly simple – and in many ways, just like Instapage.
To start, you choose a landing page template of your choice.
Once done, Wix will take you to their website editor tool where you can make any kind of changes you want.
And here’s where you’ll see why Wix is much more powerful than other landing page builders out there.
In the editor, you can not only add forms and a complete checkout solution, but you can also add interactive maps to show directions (if you’re advertising a physical location on your landing page), add bookings and appointments functionality and even add options for your customers to ‘pre-order’ your products.
Get Wix! It’s FREE!
How to Build a Landing Page: Clickfunnels
No article which shows how to build landing pages can do so without mentioning Clickfunnels.
Because even though all the above tools are awesome, none of them really are a complete solution like Clickfunnels is.
That’s because Clickfunnels already has pre-built sales funnels you can use to create your landing pages.
It’s simple. Here’s how you can create a beautiful landing page on ClickFunnels:
1. Choose Your Desired Template: Clickfunnels, like other landing page builders, has templates for selling anything imaginable, whether its ebooks or physical products or webinar tickets or just for collecting emails.
2. Do Some Branding: After you’ve chosen your template, just add your own copy and images. In fact, Clickfunnels lets you add any element such as picture, text, video etc to your landing page instantly.
3. Publish To A Domain: Clickfunnels includes hosting in their package. Simply just integrate your landing page with your domain (that you own) and that’s it. Your landing page is ready to go. Click here if you want step-by-step instructions on how to connect your Clickfunnels landing page to your domain.
Get Clickfunnels for free for 14 days!
How to Build a Landing Page: Squarespace
Creating a Squarespace landing page should not be as complicated as it initially seems.
So you want to create a custom landing page using Squarespace and are wondering how to go about it, step-by-step?
Not only can you build a beautiful website with Squarespace, you can also build your email list or boost sales with your own landing page on the platform. You can use a few Squarespace hacks to turn ordinary pages to stunning landing pages in the form of welcome mats, product-focused pages and thank you splash pages.
Creating great landing pages using Squarespace will save you time and money that you would have to spend on a third-party, dedicated landing page builder services like Instapage and Leadpages.
The cost of creating a landing page on Squarespace is factored into the monthly $18 subscription you shell out to use the platform’s website builder tools.
There are several ways to build custom Squarespace landing pages.
3 Ways to Create A Landing Page On Squarespace
Some of them are super simple and will not require you to show off your programming expertise—if you have any, which is great for the coding-averse.
Others will require a bit of coding. But it is only a few lines of code. The code will actually be already done for you, and all you have to do is copy-paste it to your forming landing page to make things happen your way.
Without further ado, here are ways to build a custom landing page using Squarespace.
-
Using a cover page
Squarespace allows you to create a simple and elegant landing page using the Cover Pages feature. Squarespace Cover Pages present one call to action in a bold and simple way.
No navigation links. No unnecessary content. No distractions. There’s only one button to encourage a visitor to complete one call to action. The ABCs of landing pages at their best.
Once you are logged in to your Squarespace account, you can find the feature tucked neatly in the admin area. Clicking on it will reveal several Squarespace landing page templates you can choose from.
So depending on your product, service, branding or messaging, you have options to choose what you think will work best. The Cover Page also allows you to add video in the background if you are wondering.
Of course, you can A/B test what works best for your primary goal, whether you want to capture email addresses or boost conversion for a sales drive you just kickstarted or plan to launch.
After creating your custom cover page, the next step is to add your email automation service link to that page.
If you are using ConvertKit and Zapier:
That’s pretty much it. You have a Squarespace landing page using Cover Pages.
- Create A Custom Squarespace Landing Page Using A Normal Page
Cover Pages are good for creating simple landing pages but are quite limiting. You only get to display a single image with a single call to action button. Custom CSS does not apply in Cover Pages, either.
In fact, Squarespace throws up a disclaimer warning that adding custom CSS to a page might break its design. So you might want to be careful before using this hack.
But, what if you need to use more images and buttons on your landing page to bring that conversion to pass?
Then you’ll want to crank out a custom landing page in Squarespace.
Here’s a step-by-step walkthrough for you by Roxy of City Girl Searching:
You can add a new page on your Squarespace website from the backend of your site by clicking on:
Pages > Not Linked > + > Cover Page
Now, as you’ll notice, a normal Squarespace page comes with a navigation bar. You’ll want to remove that to make it easier for your visitors to focus only on your primary call to action.
There is more to creating a landing page on Squarespace, but this will get you started.
What To Do After Your Landing Page is Up And Running
After building your landing page, you’ll need to look at your analytics to see how your page is performing.
If you can’t see a dashboard with analytics, most landing page software will allow you to integrate with Google Analytics. Look at the data in the analytics software and see how many sales and subscribers you’ve got.
Then, create different versions of your landing page with different heading, call-to-actions, and images and see if conversions (sales and subscribers) have improved.
If they do, make that variant of your landing page your new default landing page.
In addition, here are some other things to keep in mind about landing pages:
1. Have One Goal:
Your landing page should guide users to take only one action. It shouldn’t serve two purposes such as selling your ebook and subscribing to your blog. It’s a research-proven fact that landing pages with more than one CTAs confuse readers and result in low conversions.
2. Don’t Make it Your Homepage:
A landing page is different from your homepage, so don’t turn it into one. Sure, you can borrow parts of the copy but don’t add links to your website to your landing page.
Get yourself a decent landing page builder, like Shogun, which will not only allow you to create a solid landing page but also allows you to expand the landing pages that you love to new markets, to new stores, plus you’ll get the analytics you’ll need to grow.
3. Consider Hiring A Copywriter:
The words on your landing page are what get you sales. If your landing page is poorly worded or doesn’t make sense, you’ll get low conversions. To make sure that doesn’t happen, hire a copywriter who knows how to write persuasive copy and ask them to build your landing page. You’ll definitely get lots more sales and subscribers.
And that brings us to the end of this article.
We hope you get awesome conversions and tons of sales and subscribers when you build your own landing page software.
What are the landing page builders you going to use next? Let us know in the comments below!
You might also enjoy:


